

Furnishing a living room
You have a room with its walls and want to put real furniture in it, at real distances. In this tutorial you empty the example flat’s living room and furnish it again from the catalogue, typing the distances instead of guessing them.
At the end the living room has a TV cabinet against its north wall with the TV hung over it, a sofa facing them, a coffee table 40 cm from the sofa, the three lined up on one middle, and a cube shelving unit with two drawers and two doors against the east wall; the sofa and the table are a set you can drop in another room. It takes about 15 minutes.
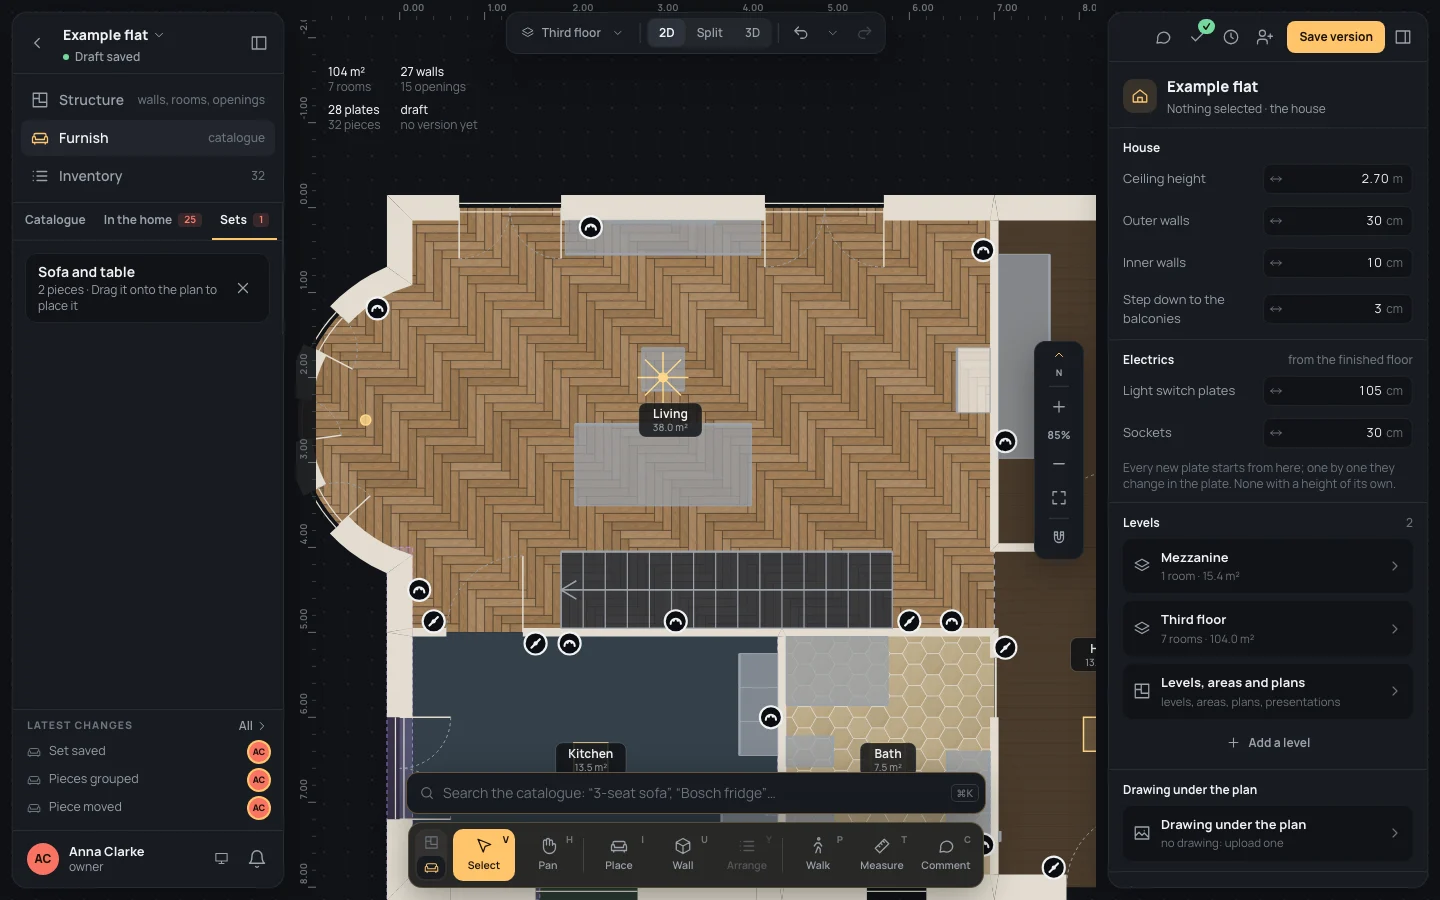
You need finished.home.json from the box above: the finished flat, whose living room you empty first. Everything
happens in Furnish, on the plan: the 3D shows the same pieces, but the plan is where the distances are.
1. The finished flat, its living room emptied
Section titled “1. The finished flat, its living room emptied”- Start a new project (A new home): in the wizard, click Ready in the column
of steps, then Open the editor. Then choose Import a home… in the project’s menu (its name, top left) and
pick
finished.home.json. - Click Inventory at the top of the left panel. The list has every piece of the flat, 34 of them.
- Set Room to Living: seven pieces are left, from the Low oak TV cabinet to the Velvet rocking chair.
- Tick the box at the top of the list, beside Piece: all seven are picked, and the bar above them says 7 selected.
- Click Delete in that bar. The living room is empty.
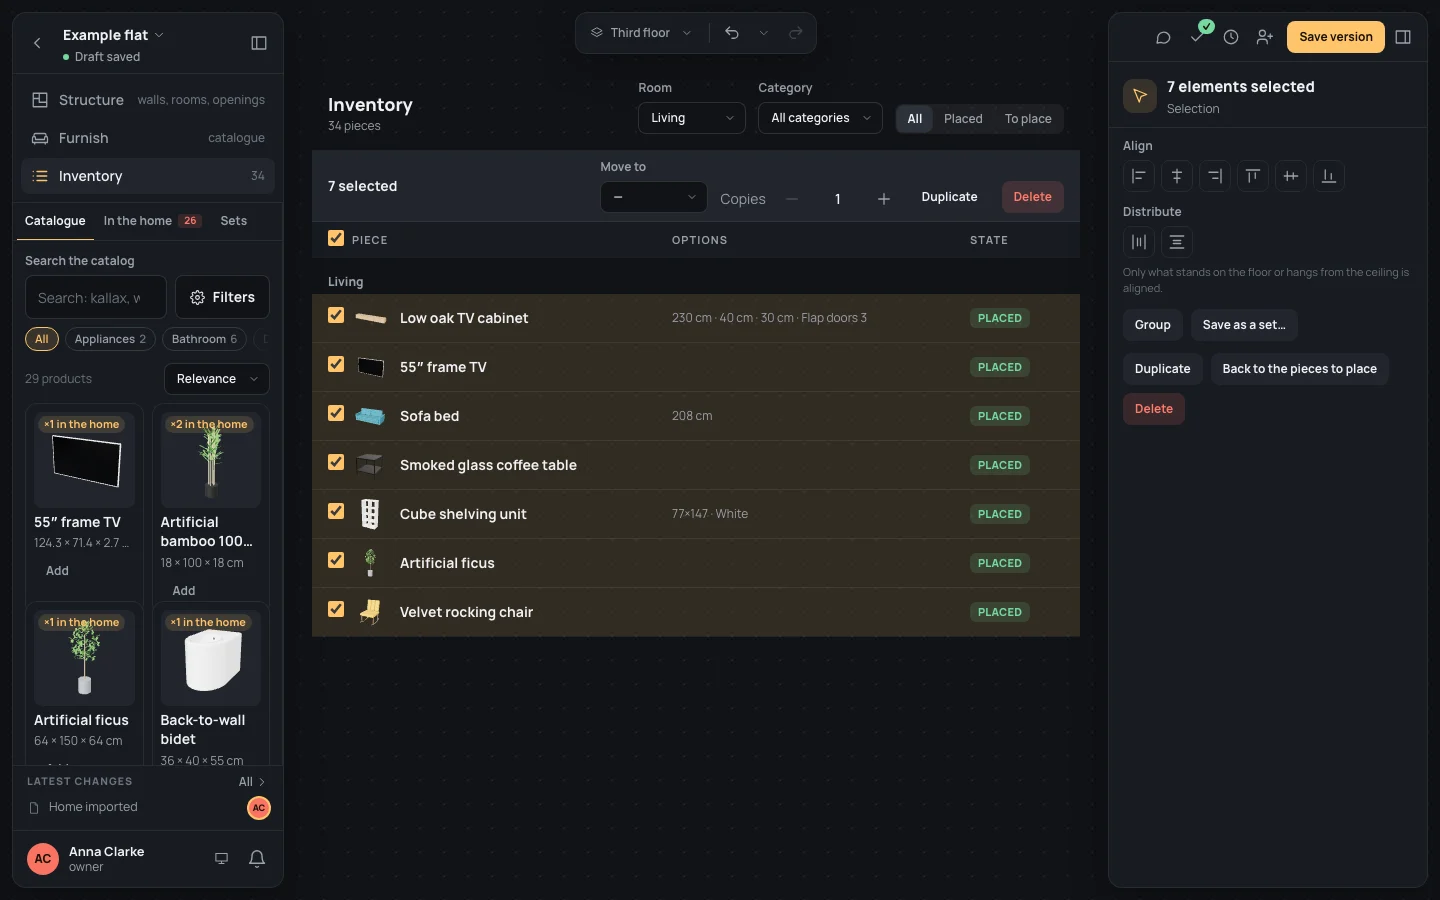
Delete takes the pieces out of the home, not only off the plan; ⌘ZCtrl+Z brings them back. More on the list: The inventory.
2. In Furnish, the living room in front of you
Section titled “2. In Furnish, the living room in front of you”- Click Furnish at the top of the left panel. The catalogue opens in it, on its Catalog tab.
- Zoom in on the living room (++or==, or ⌘Ctrl and the wheel), so the room fills the plan. The pictures here are at 85%.
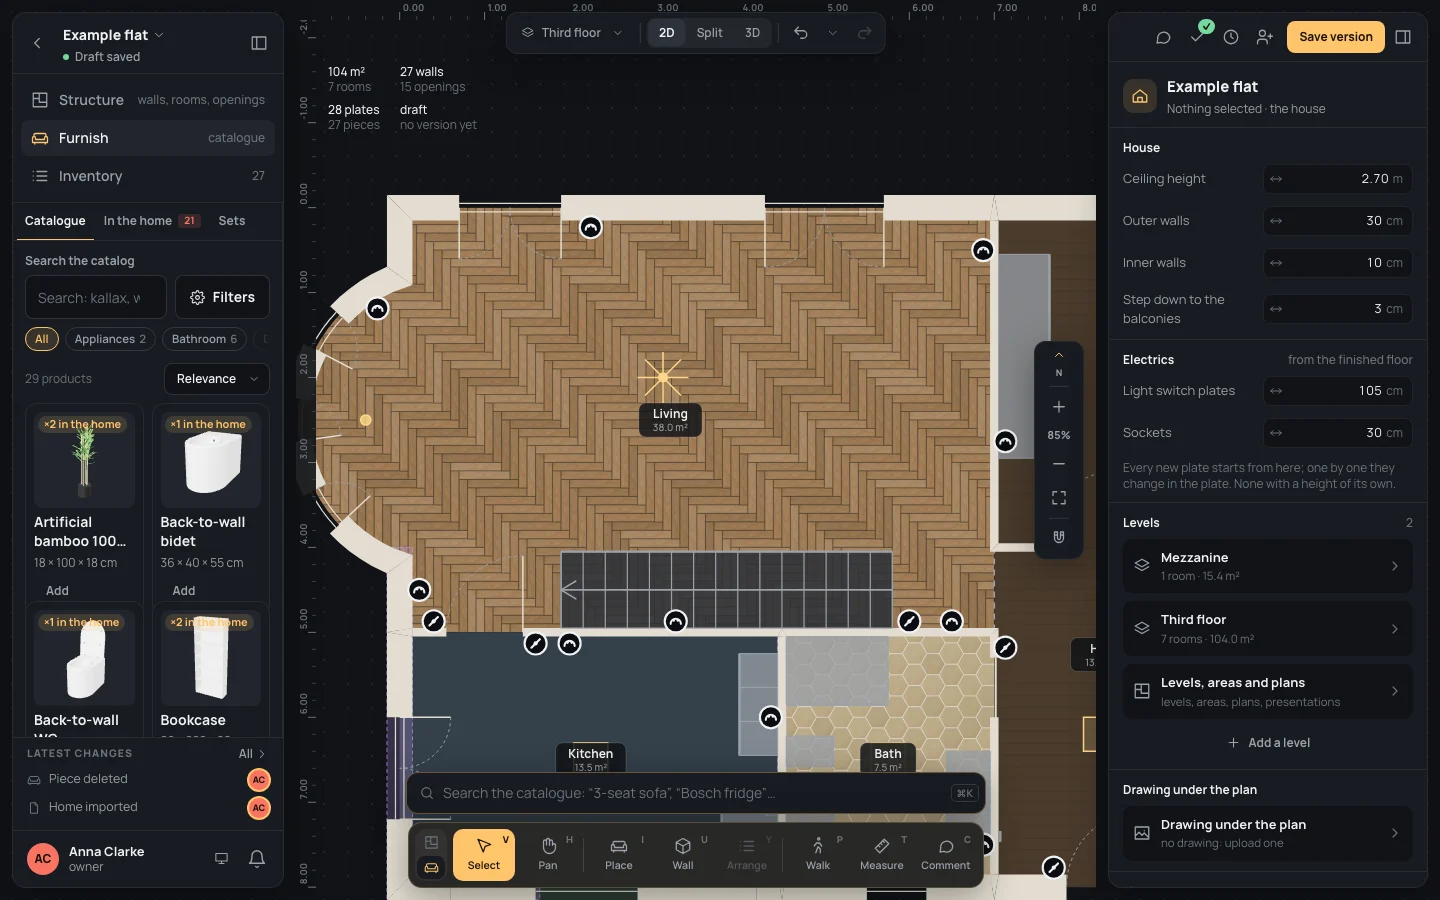
Look at the room before you start. Its north wall has two windows with 2.40 m of wall between them: that is where the TV goes. The stair takes the south wall, so the sofa faces the TV from the middle of the room, its back to the stair. The east wall, towards the bedroom, is free.
3. The TV cabinet, against the north wall
Section titled “3. The TV cabinet, against the north wall”- In Search the catalog, type Search the catalog
tv. The Low oak TV cabinet is among the cards. - Drag its card onto the plan and release it against the north wall, between the two windows. Released within 30 cm of a wall, a piece that stands on the floor turns its back to it and stands against it. It is placed and selected: its distances to the walls around it show on the plan, and its inspector on the right.
- Click the distance to its left, towards the bay: a box opens, Distance. Type
Distance
1.80and press ↵↵. The cabinet slides along the wall until its left side is 1.80 m from the west wall.
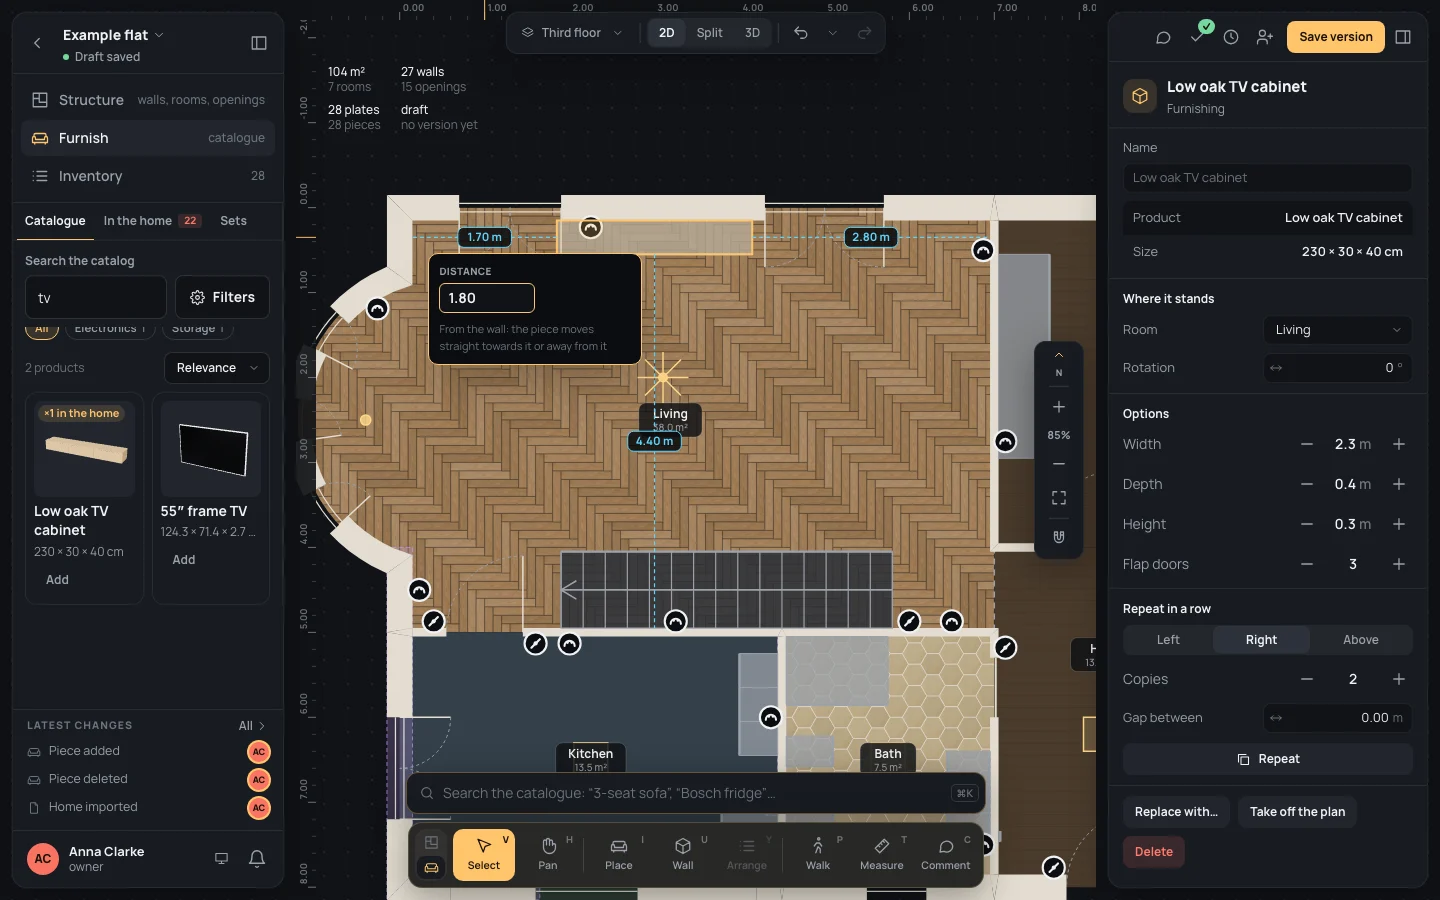
The cabinet is 230 cm wide: 1.80 m from the wall puts its middle 3.10 m from the flat’s north-west corner, the middle of the wall between the windows. Its width, depth, height and doors are options in its inspector. How a dropped piece stands, and the distances: Placing furniture.
4. The TV, over the cabinet
Section titled “4. The TV, over the cabinet”- Type Search the catalog
frame tvin the search, and drag the 55″ frame TV onto the north wall, over the cabinet. A TV hangs on a wall: it slides along the face under the pointer, its middle at 1.50 m from the floor. - In its inspector, type From the wall’s start
3.10in From the wall’s start and press ↵↵. Its middle is now over the cabinet’s.
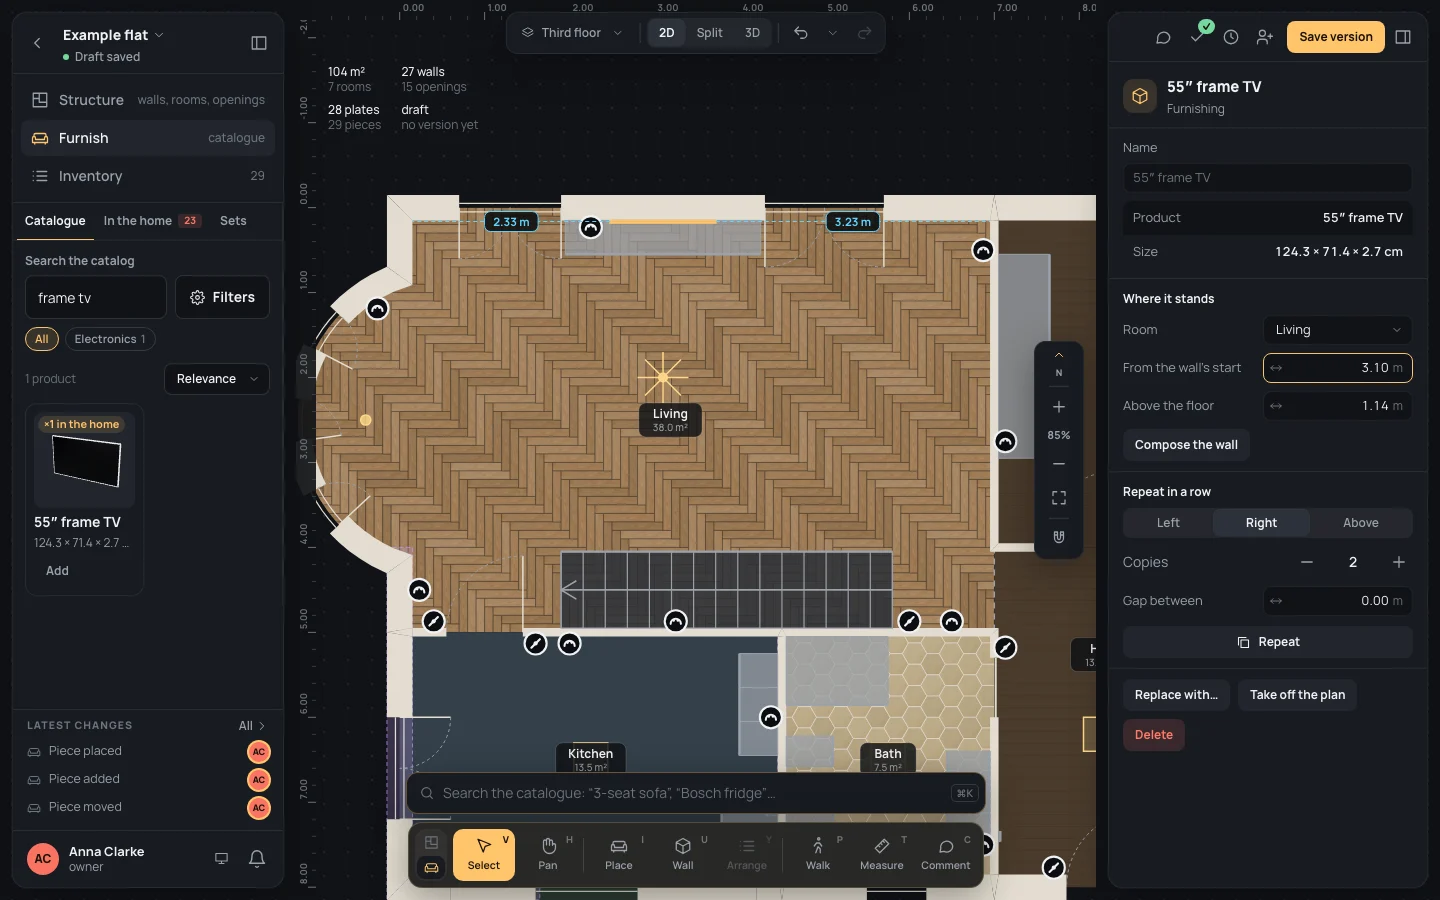
From the wall’s start is measured along the wall to the TV’s middle; the north wall starts at the flat’s north-west corner. Above the floor (1.14 m) is the TV’s bottom edge: change it if you want it lower. To line up several things hanging on one wall, use Compose the wall (Compose a wall).
5. The sofa, facing the TV
Section titled “5. The sofa, facing the TV”- Type Search the catalog
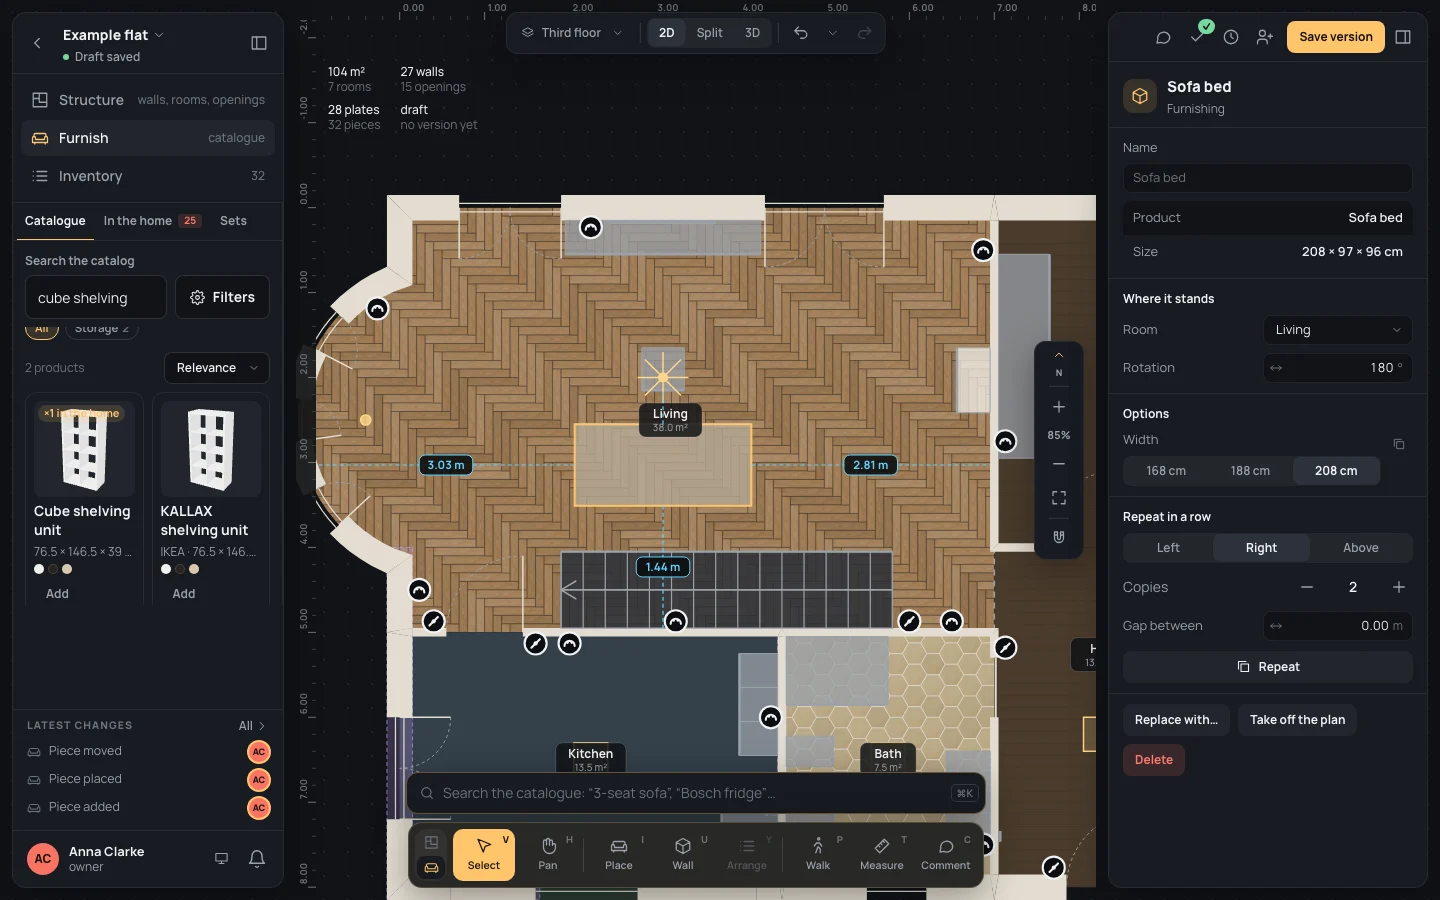
sofa bedand drag the Sofa bed into the middle of the room, about 3 m south of the north wall. Away from the walls, it stands where you release it, facing south. - Press RR twice: it turns 90° each time and now faces the TV. Rotation says 180°.
- Click the distance in front of it, towards the cabinet, type Distance
2.00and press ↵↵.
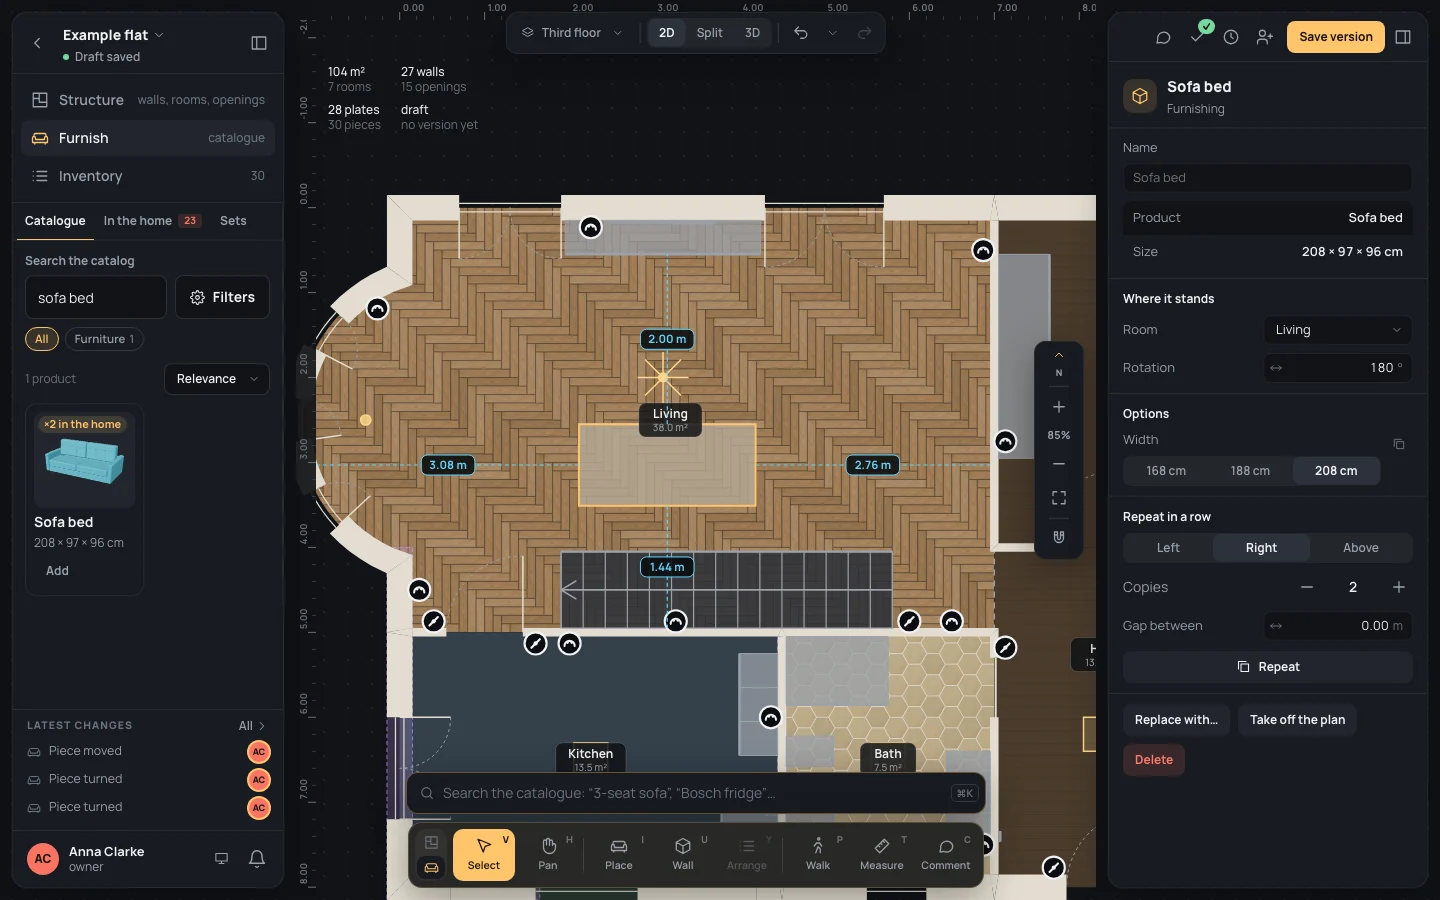
The sofa’s back is now 1.44 m from the south wall, but that is to the wall: the distances on the plan don’t see the stair, which takes 90 cm of it.
6. The coffee table, 40 cm from the sofa
Section titled “6. The coffee table, 40 cm from the sofa”- Type Search the catalog
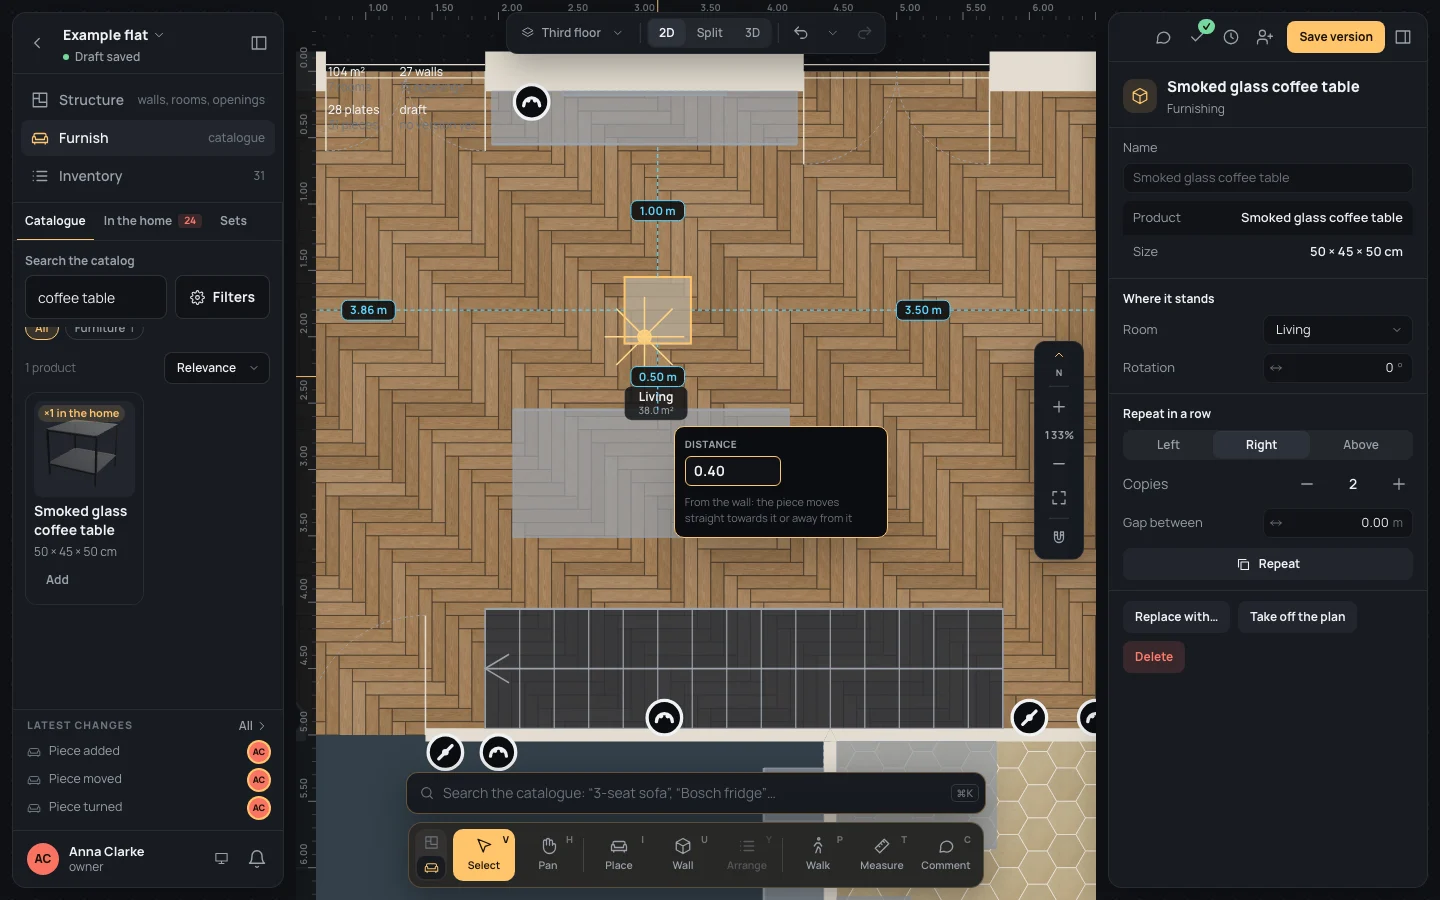
coffee tableand drag the Smoked glass coffee table between the sofa and the cabinet, nearer the sofa. - The gap between the table and the sofa is a dashed line with no figure: at this zoom it is shorter than its figure. Press ++or== twice: it shows, 0.50 m or so.
- Click it, type Distance
0.40and press ↵↵. Then −− twice.
7. The three, lined up
Section titled “7. The three, lined up”The cabinet sits where you typed it; the sofa and the table are only where you dropped them, a few centimetres off its middle. Align puts them on one middle.
- Click the cabinet, then ⇧Shift + click the sofa and the table. The inspector says 3 elements selected.
- Under Align, click Centre, across (the second button). The three move across to the middle of the box round them all, in one step (Pieces aligned).
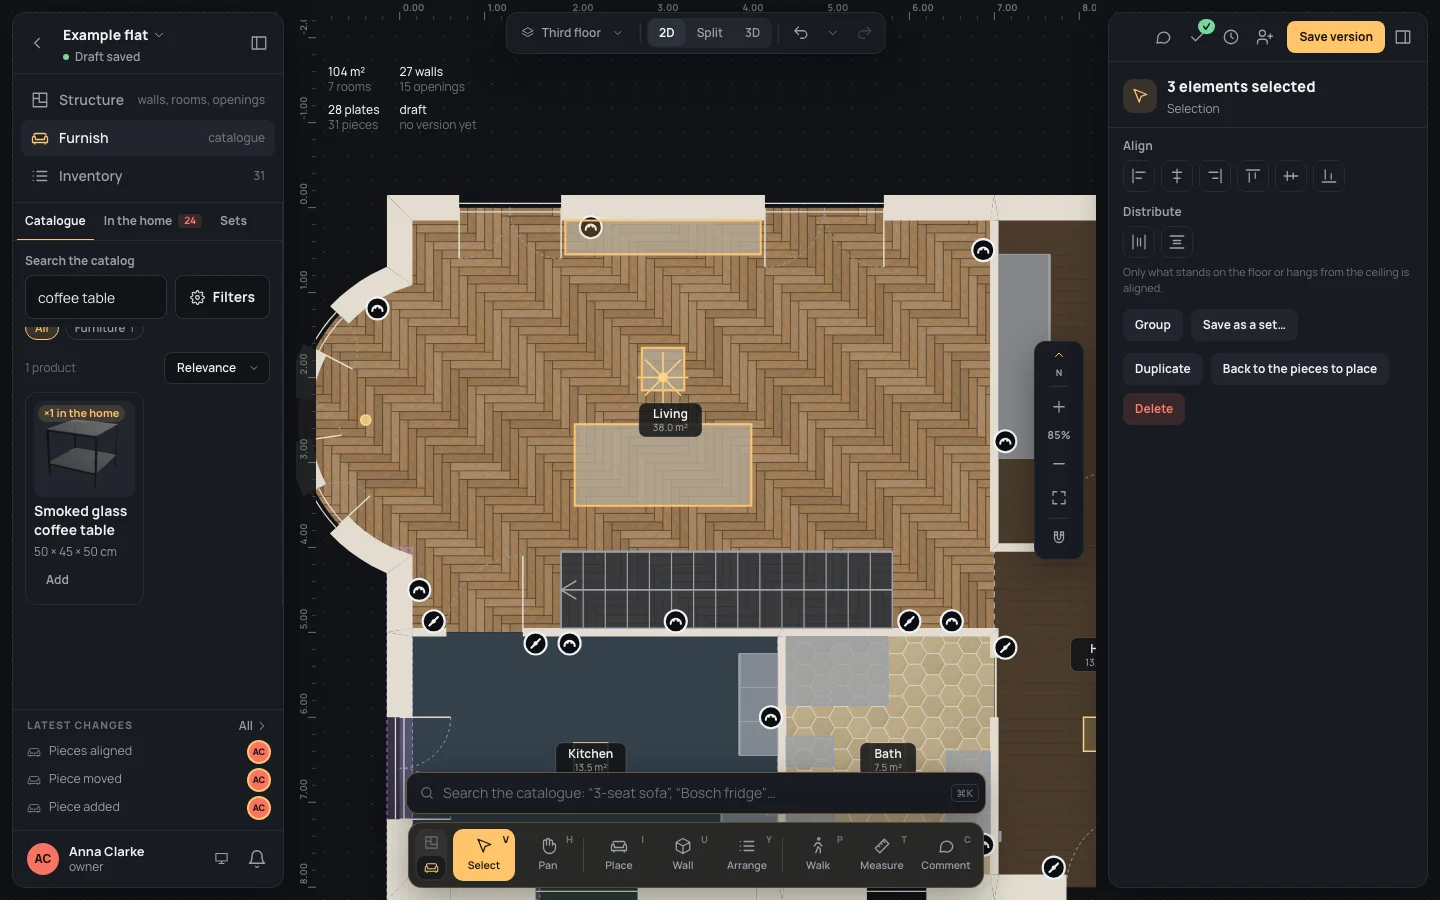
The box round the three is the cabinet’s, the widest: so the cabinet stays and the other two come to its middle. The TV isn’t in it: what hangs on a wall isn’t aligned here. More: Arrange and Arranging furniture.
8. A cube shelving unit with drawers and doors
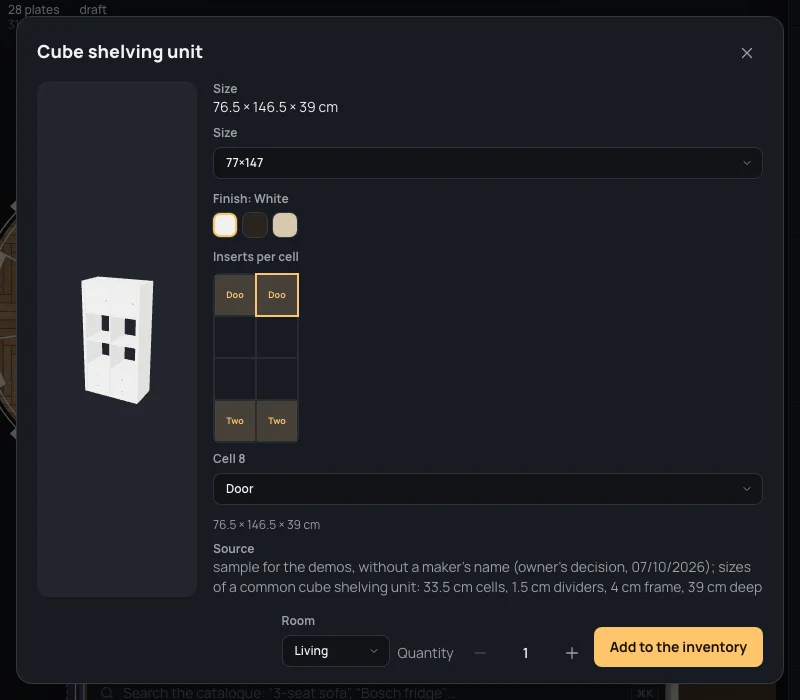
Section titled “8. A cube shelving unit with drawers and doors”A cube shelving unit comes in sizes, finishes and an insert per cell: you choose them on its sheet before it goes in the home.
- Press EscEsc, then type Search the catalog
cube shelvingand click the Cube shelving unit’s card (not its Add): its sheet opens. - Leave Size on 77×147 and Finish on white. Under Inserts per cell, the cells are drawn as the unit stands, cell 1 at the bottom left. Click the bottom-left cell and choose Two drawers in Cell 1; the same for the bottom-right cell (Cell 2). Choose Door for the two top cells, Cell 7 and Cell 8.
- Set Room to Living and click Add to the inventory. The shelving unit is in the home, not yet on the plan: the strip To place, at the bottom of the plan, holds it.
- Drag it from To place onto the east wall of the living room, about 2 m south of the north wall, and release it against the wall.
- Click its distance to the north wall, type Distance
1.50and press ↵↵.
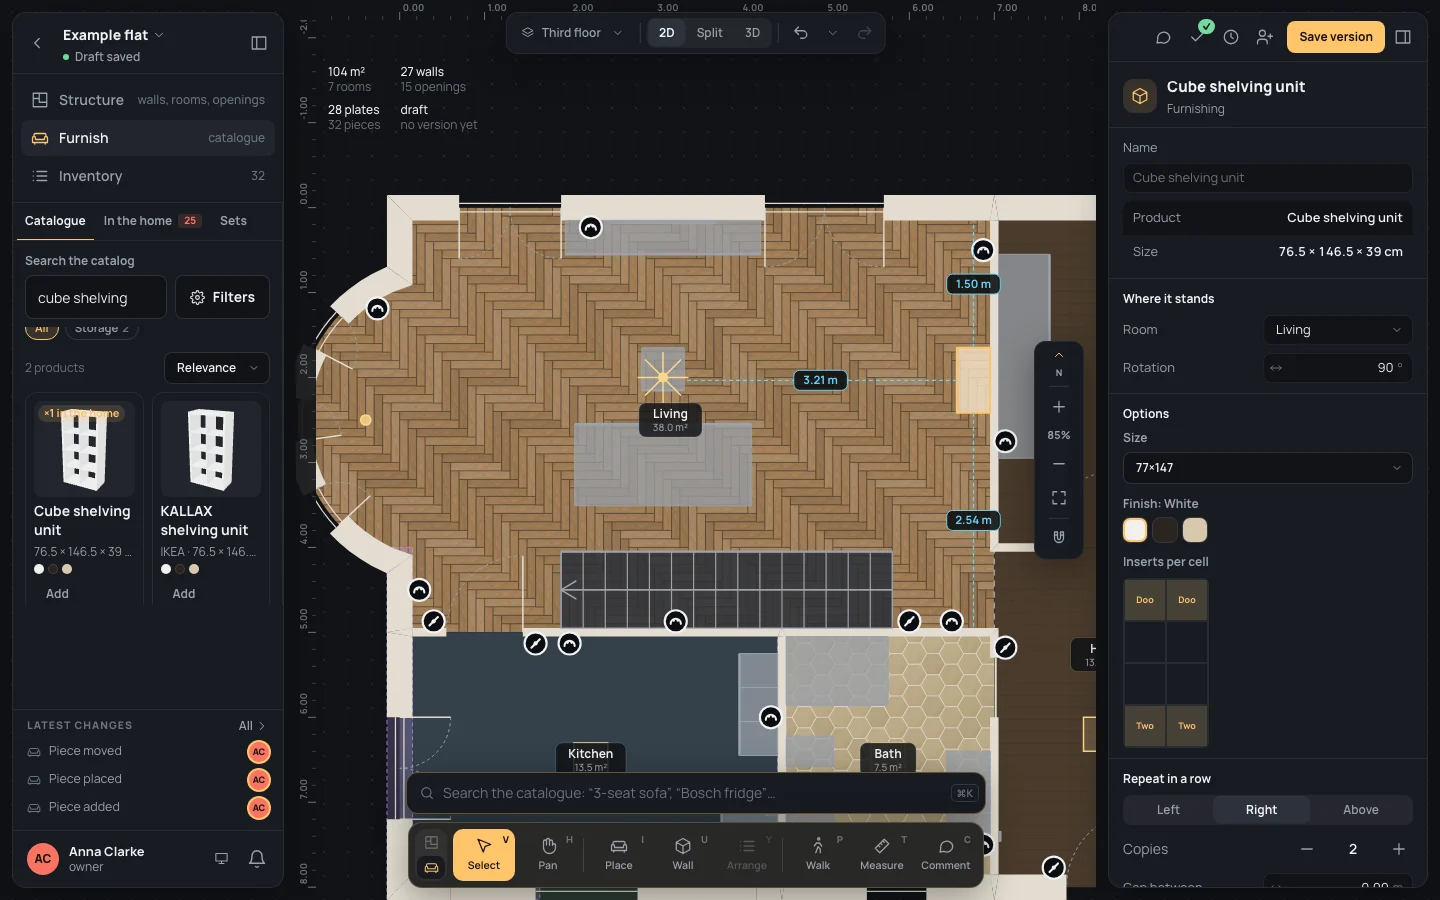
The options stay in its inspector, to change once it is placed. Every option of the catalogue’s products, and their sheets: The catalogue.
9. Checking the clearances
Section titled “9. Checking the clearances”- Click the sofa. Its four distances show: 2.00 m to the cabinet, 3.03 m and 2.81 m to the side walls, 1.44 m behind. Any of them can be typed, as before.
- Press EscEsc and open Checks, the tick at the top of the right panel, on its Review tab. It lists A 40 cm passage between Sofa bed and Smoked glass coffee table: walking through comfortably takes at least 80 cm, as advice. Show takes you to it on the plan.
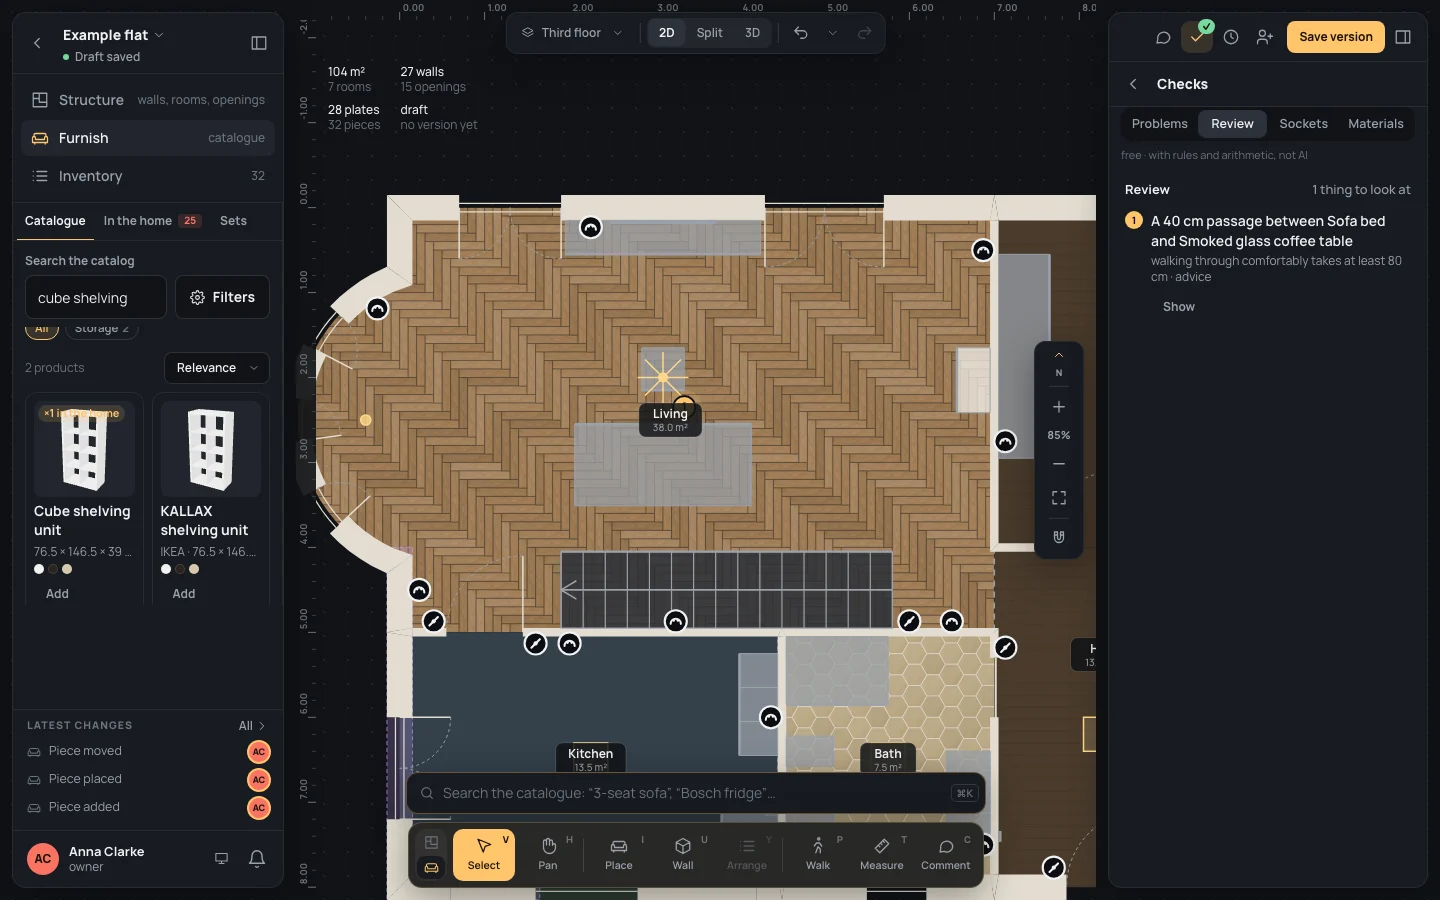
The review looks for the passages under 80 cm where someone would walk, between two pieces of a room or a piece and a wall. Between a sofa and its coffee table, 40 cm is what you want: you reach the table from the sofa, you don’t walk between them. Leave it as it is, or type 0.80 in the gap if you do want a passage there. Pieces that need room to be used (a chest of drawers’ drawers, a desk’s chair) show that space hatched when selected, and in red when something is in it; none of this room’s pieces has one. The checks: Checking the home.
10. The sofa and the table, a set
Section titled “10. The sofa and the table, a set”- Close Checks. Click the sofa, then ⇧Shift + click the coffee table.
- Press ⌘GCtrl+G: they are a group, selected together from now on.
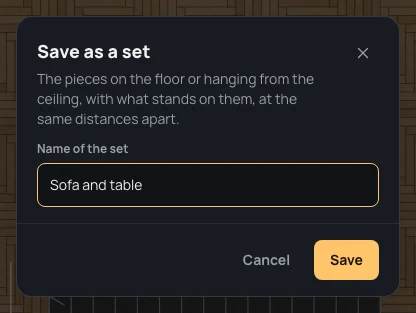
- Click Save as a set… in the inspector, type Name of the set
Sofa and tablein Name of the set and click Save. - Click Sets in the catalogue: Sofa and table, 2 pieces. Drag it onto the plan to place the two again, at the same distance apart.
The set is this home’s. Groups and sets: Groups and sets.
If something goes wrong
Section titled “If something goes wrong”- The piece stood away from the wall. It was released more than 30 cm from it. Drag it nearer, or type its distance to the wall.
- A distance has no figure to click. It is shorter on the screen than its figure: zoom in (++or==).
- The wrong distance moved. Each one moves the piece straight along its own line, towards that wall or piece: ⌘ZCtrl+Z and click the one on the side you meant.
- The sofa faces the wall. Press RR again, or type 180 in Rotation.
- Align moved the cabinet too. The sofa was wider than the cabinet, or off its sides: the middle is the box round all three. ⌘ZCtrl+Z, then type the cabinet’s distance again.
- The TV didn’t move with Align. It hangs on the wall: type From the wall’s start, or compose the wall.
- Any step: ⌘ZCtrl+Z takes it back, one at a time.
See also
Section titled “See also”- Place: the catalogue from the keyboard (II).
- Placing furniture: how pieces stand, the tray, the piece’s inspector.
- What fits: only the products that fit a space you trace.
- Groups and sets.