

Placing furniture
Placing puts a piece of furniture on the plan: you drag it from the catalogue or from the tray, and it stands where it goes, against a wall, on the floor, on another piece or from the ceiling, as the product is made to.
Furnish
Section titled “Furnish”Placing happens in Furnish, the second workspace in the left panel. There the walls are locked: a click on a wall selects nothing, and only furniture is picked and moved. Its dock has the tools for furniture:

- Select (VV) and Pan (HH), as everywhere;
- Place (II), the search on the catalogue (Place);
- Wall (UU), to compose the pieces on a wall (Compose a wall);
- Arrange (YY), greyed until two pieces are selected (Arranging);
- Walk (PP), where the first-person view starts (The walk);
- Measure (TT) and Comment (CC).
Who can only look at the project has Select, Pan, Measure and Comment.
Dragging a product onto the plan
Section titled “Dragging a product onto the plan”- Find the product in the catalogue (The catalogue).
- Press on its card and drag. Over the plan, the piece is drawn where it would stand, and follows the pointer; elsewhere a small tag with its name follows it.
- Release over the plan. The piece is added to the home, placed, and selected: RR turns it, ⌘DCtrl+D copies it.
A click on the card still opens its sheet: the drag starts only once the pointer moves. With a finger, hold the card still a moment before dragging; a quick swipe scrolls the list. Released anywhere but the plan, nothing happens.
A product dragged straight from its card comes as it usually does (its standard size and finish): change its options in its inspector afterwards, or configure it in its sheet first and drag it from the tray.
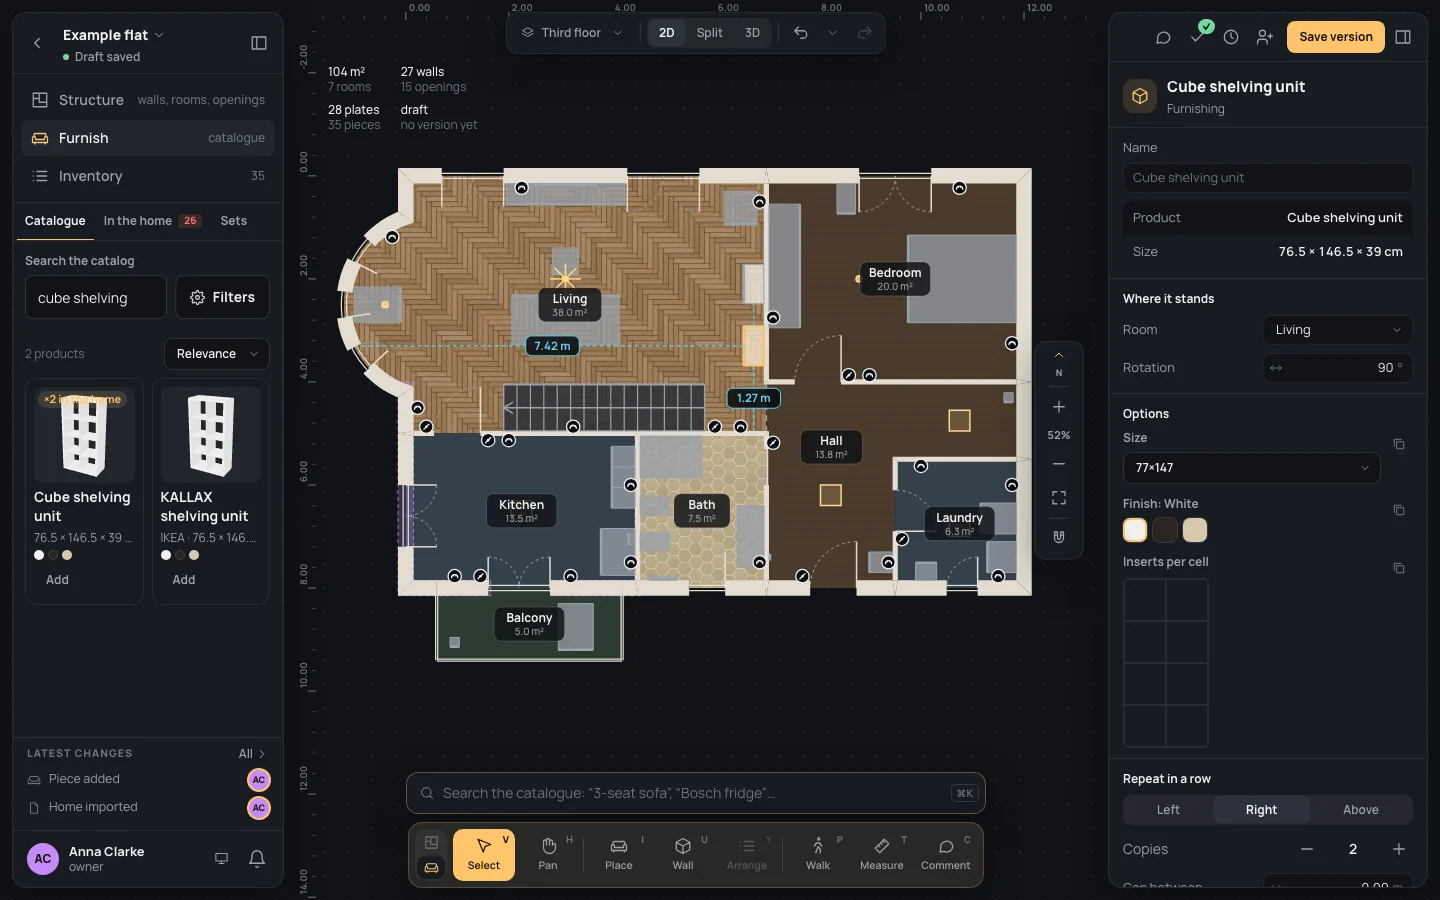
Example: a second cube shelving unit in the living room
Section titled “Example: a second cube shelving unit in the living room”On the finished example flat, in Furnish:
- Search Search the catalog
cube shelving. - Drag the card onto the living room, by its east wall (the one shared with the bedroom), a little below the shelving unit already there, and release within 30 cm of the wall.
- The new shelving unit turns its back to the wall, stands against it, and is selected. Its inspector says Room: Living, Rotation 90°.
How a piece stands
Section titled “How a piece stands”Where you release it decides how it stands, by how the product is mounted:
- On the floor, released within 30 cm of a wall’s face: it turns its back to the wall and stands against the face, its front towards the room. Released further away, it stands where you released it, square to the sheet.
- On a wall, released within 60 cm of a wall’s face: it hangs on that face, at the point along the wall under the pointer, its middle 1.50 m above the floor (its bottom on the floor when it is too tall for that). Further away, it stands on the floor where released.
- On the ceiling: it hangs where released, right under the ceiling. Today’s catalogue has no product hung from the ceiling.
- On a surface (a monitor, a speaker, a basin): released over another piece, it stands on it and goes with it from then on; released elsewhere it stands like a floor product.
- Built in (a built-in bathtub): it stands where released.
Only a wall or a parapet holds a piece; a railing or a separator doesn’t.
The room it belongs to
Section titled “The room it belongs to”A piece dropped on the plan belongs to the room under it: a shelving unit dropped in the living room is the living room’s. A piece that already had a room (chosen in the sheet, or in the inventory) keeps it. The Room of its inspector changes it. When a room is deleted, its pieces stay in the home, where they stood, with no room.
Moving a placed piece
Section titled “Moving a placed piece”With Select, drag a piece: it goes with the pointer and, alone, lands as it was dropped the first time, by how it is mounted: a floor piece brought near a wall turns its back to it, a wall piece slides along its wall, a piece on another moves on it. Several pieces dragged together move as they are.
The arrows move what is selected 1 cm (→→), with ⇧Shift 10 cm (⇧→Shift+→). Each move is one step (Piece moved). More in Selecting.
The distances
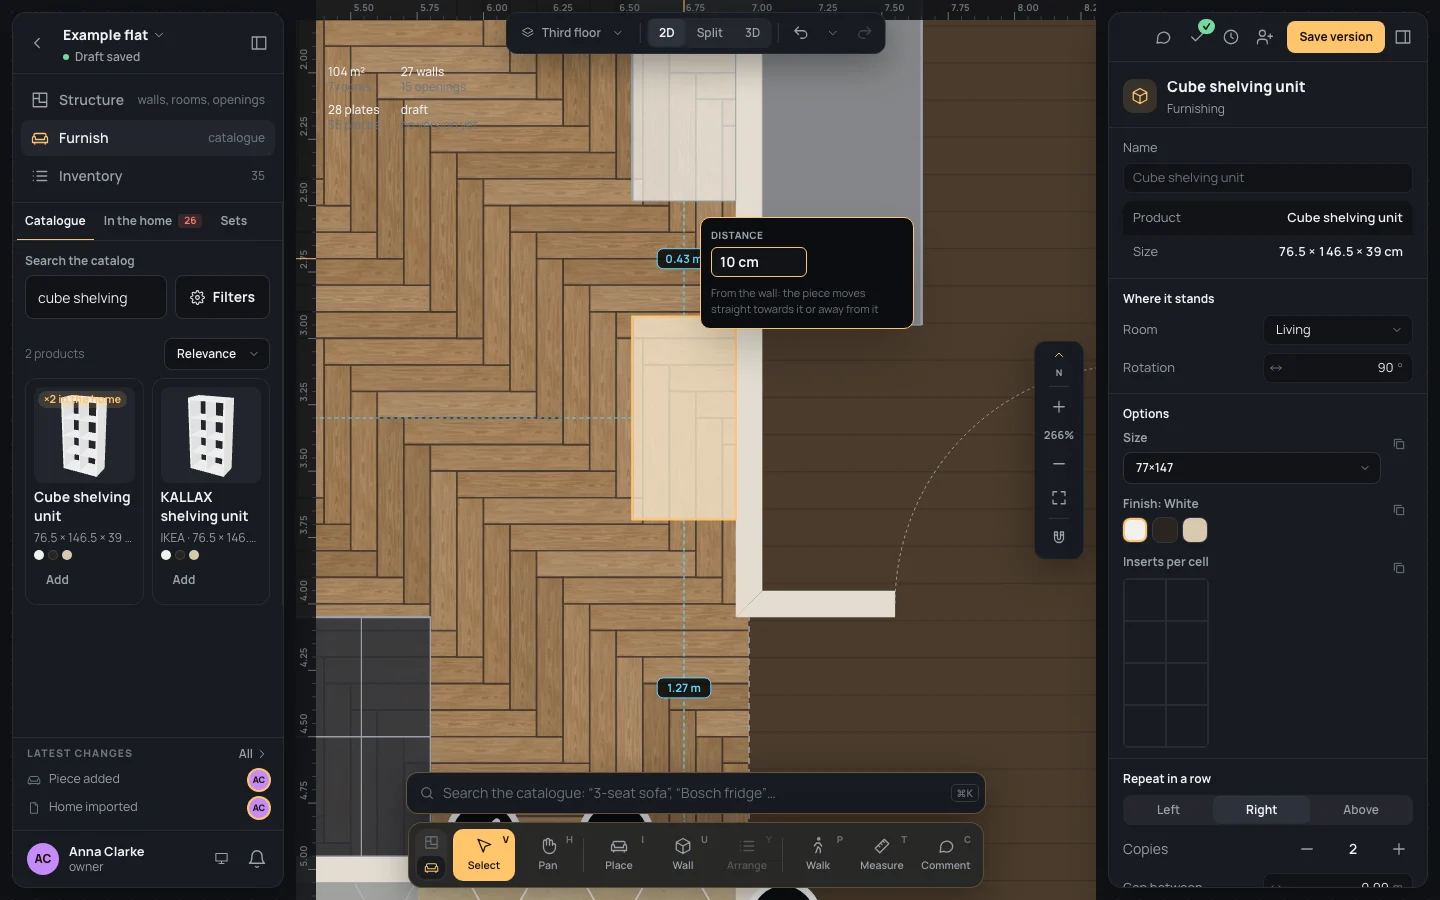
Section titled “The distances”A selected piece shows its distances on the plan: from the middle of each side, straight out, to the face of the first wall, or to the first piece beside it at its height (a monitor on a desk is above its neighbours, so they don’t count). A piece on a wall shows only the two along the wall. A distance too short to write on the plan at this zoom isn’t written: zoom in (⇧2Shift+2 frames the piece).
Click a distance and type another: the box says Distance, From the wall: the piece moves straight towards it or away from it. ↵↵ moves it, EscEsc leaves it where it was.
Example: 10 cm from the other shelving unit
Section titled “Example: 10 cm from the other shelving unit”With the new shelving unit selected, press ⇧2Shift+2: its distances show, 0.43 m to the one above
it. Click 0.43 m, type Distance10 cm and press ↵↵: the new shelving
unit moves up, 10 cm from the other.
The space a piece needs
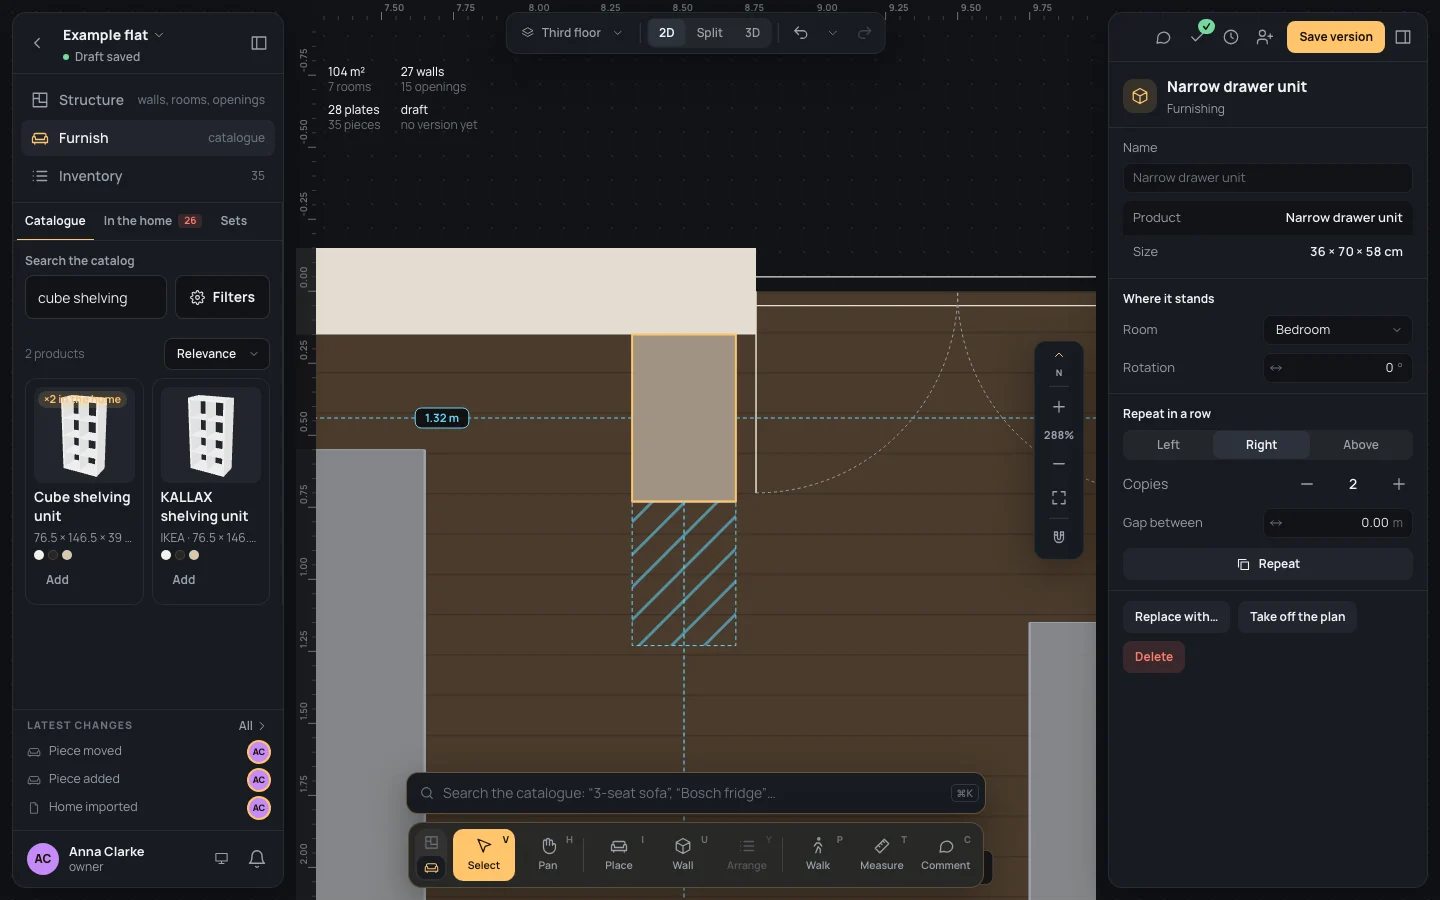
Section titled “The space a piece needs”Some products need room in front of them, or beside them, to be used: drawers pulled out, doors opened, a chair pushed back from a desk, a way round a bed, an appliance’s door. The narrow drawer unit’s drawers need 50 cm in front, the height-adjustable desk 80 cm for the chair, the double bed 60 cm on each side.
The selected piece shows that space hatched on the plan. Wherever something is in the way (another piece at its height, or a wall) the space shows red, selected or not, and the Checks list it as a warning, for instance “Narrow drawer unit”: no room to open the drawers, “Cube shelving unit” is in the way. Nothing is refused: move one of them, or leave it (Checks).
The tray
Section titled “The tray”The pieces of the home not on the plan wait in To place, the strip under the plan: those added with Add or from a sheet, and those taken off the plan. Pieces of the same product and options are one button with their number (×2), and they are grouped by room, the room of what is selected first, those of no room under No room.
- Drag one onto the plan to place it: one piece goes, the next of its kind stays in the tray.
- Click one to select it and edit it in the inspector.
The strip is gone once there is nothing left to place.

The piece’s inspector
Section titled “The piece’s inspector”Select a piece. The inspector is headed by its name, Furnishing, and holds:
- Name: the name you give it (Reading corner), or the product’s name, shown faint, when it has none.
- Product (brand and name), Size (width × height × depth, with its options) and, when the maker gives one, the Article.
- Under Where it stands:
-
Room: the room it belongs to, or none (—); the rooms of the plan open.
-
How it stands:
- against a wall: Compose the wall (Compose a wall), From the wall’s start (how far its middle is along the wall, from the wall’s first end) and Above the floor (its bottom);
- on the floor, on another piece or from the ceiling: Rotation, in degrees, clockwise (any number: 450 is 90);
- from the ceiling: Below the ceiling, how far it hangs.
Each number can be typed, or dragged by its ↔.
-
- Under Options, its options (The options). When the home has other pieces of the same product, a small menu beside each option offers To all in the room and To all in the house: that value given to all of them, in this piece’s room or in the whole home, in one step. A piece that can’t take it is left as it is.
- Repeat in a row and Replace with… (below and in Arranging).
- Take off the plan: back to the tray, with what stands on it; and Delete.
Replace with another product
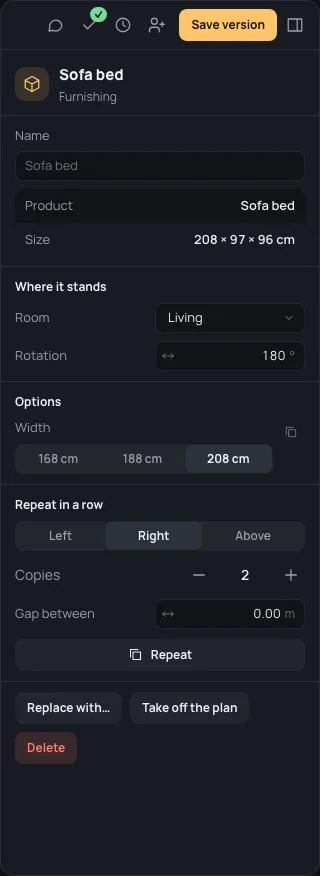
Section titled “Replace with another product”Replace with… opens the whole catalogue in a window (Replace with another product); click a product and the piece becomes that product where it stands, with its name and its room, and with the options both products have where the new one takes the same value. The rest start as the new product’s. One step (Piece replaced).
Taking off and deleting
Section titled “Taking off and deleting”- Take off the plan (in the inspector), or Back to the pieces to place (right-click a piece, or the inspector of several): back to the tray, still in the home. What stands on it goes with it.
- Delete (⌫⌫or⌦⌦, or Delete in the inspector or the menu): gone from the home. What stood on it goes back to the tray.
Neither asks first: ⌘ZCtrl+Z brings back what was there.
What can go wrong
Section titled “What can go wrong”- It stood against the wrong wall, or not against one: drag it again, nearer the wall you want (within 30 cm of its face, 60 cm for a wall product); or type its Rotation.
- It landed in no room, or the wrong one: choose its Room in the inspector.
- A click on a wall does nothing: walls are locked in Furnish; change them in Structure.
- No distance shows on one side: it is too short to write at this zoom; ⇧2Shift+2 frames the piece.
- A red hatch: something stands in the space a piece needs; it is only a warning.
See also
Section titled “See also”- Arranging: lining pieces up, repeating them, duplicating beside.
- Place, Compose a wall, Select.
- The inventory: the same pieces, as a list.