

Window
The Window tool puts a window in a wall: move over the wall, see where it falls and its distances, click. It works like the Door tool; here is what is its own.
Picking it
Section titled “Picking it”- Openings in the dock, then Window, or NN.
- The right click on a wall: Add a window here picks the tool; then click where it goes.
- The search (⌘KCtrl+K): type Window.
The bar
Section titled “The bar”
- Type: No type or one of the house’s windows (in the example flat One-leaf window, Two-leaf window, Tilt-and-turn window). Choosing one sets the width to its own.
- Width, in centimetres: 60, 80, 100, 120, 140, 160 or 180. It starts at 120 and keeps the last one chosen.
With No type, a window stands 0.90 m above the floor (Sill) up to 2.20 m (Head); with a type, at the type’s. The tool starts on the house’s type for windows (The tools’ starting type, in the house’s To start with), with the width at 120 until you choose one: pick the width you want before the first click.
With many types the bar can be wider than the space over the canvas: it is cut on the right. Closing a side panel (⌘\Ctrl+\) gives it room.
Using it
Section titled “Using it”- Pick the tool; choose the type, then the width.
- Move over a wall: the window’s stretch lights up with its width and the distance from each edge to the wall’s end or the next opening.
- Click: the window is placed and selected, the tool stays on.
Keys inside it
Section titled “Keys inside it”- EscEsc or Done (✓): back to Select.
- ␣␣ held: move the view; ⌘Ctrl with the wheel: zoom.
- DD and FF: the other openings.
What it snaps to
Section titled “What it snaps to”As the door’s: its middle on the wall’s middle, its edges on the wall’s ends and on the edges of the openings already there, within 10 pixels on screen. On a curved wall it follows the curve; its frame is flat, on the chord.
What it refuses
Section titled “What it refuses”The same as the door’s, its stretch red: It overlaps another opening: move along the wall. and The wall is shorter than this opening: choose a smaller width above. Railings and separators take none.
The window is selected, its inspector open: type, width, sill, head, leaves, the distance from the wall’s start (Openings). One step in the history (Opening added).
Example: the bedroom’s window
Section titled “Example: the bedroom’s window”The bedroom’s window is a two-leaf window, 1.40 m wide, in the middle of its north wall (from x 7.00 to 12.00 at y 0.00).
- Press NN. In the bar, click Two-leaf window, then width 140.
- Move over the bedroom’s north wall, towards its middle: the stretch catches it, with 1.80 m on each side.
- Click.

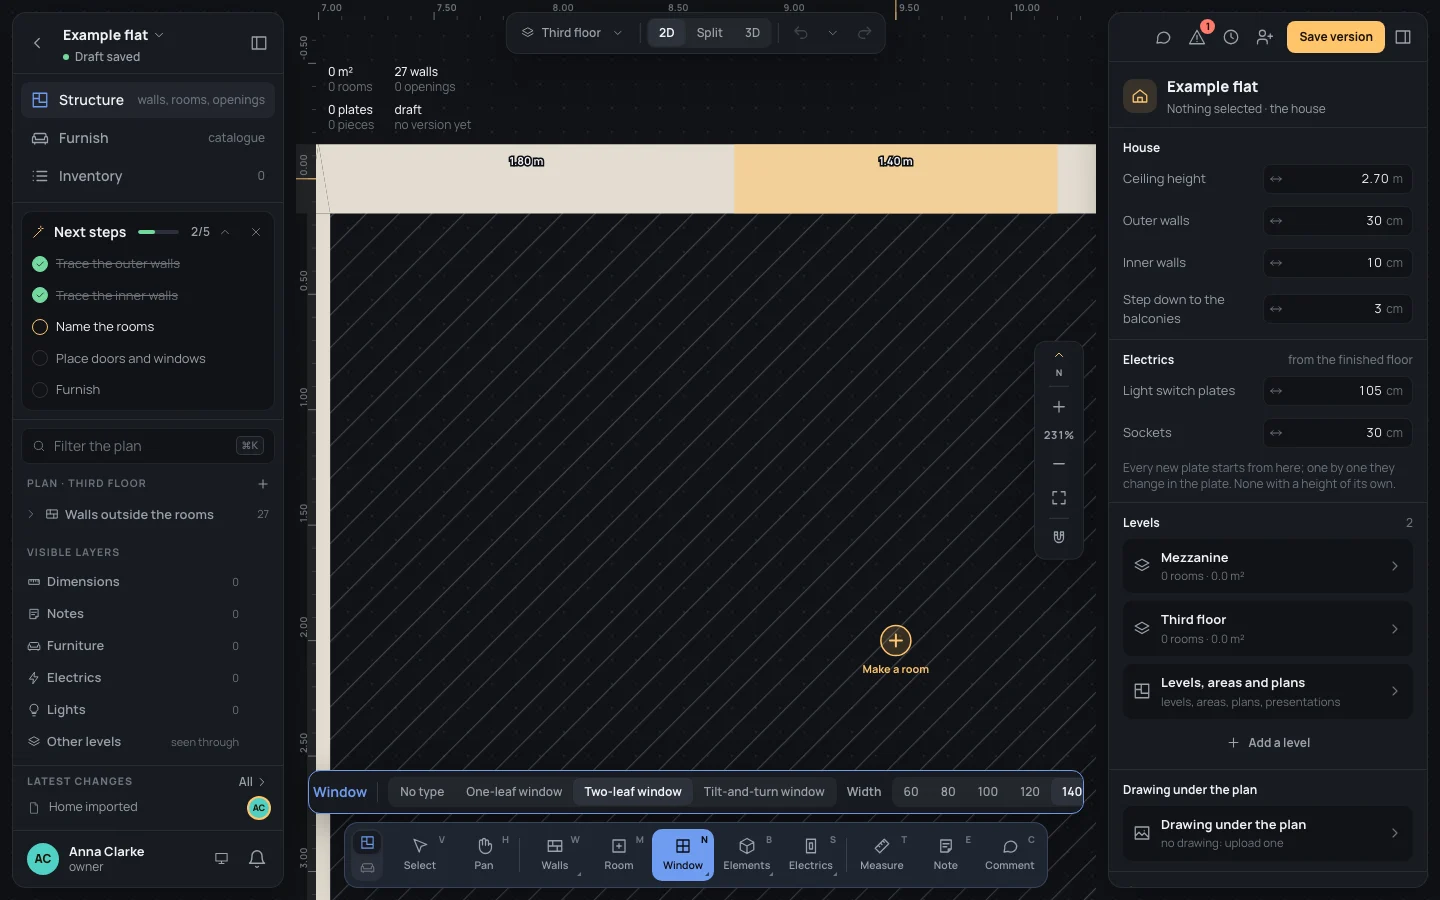
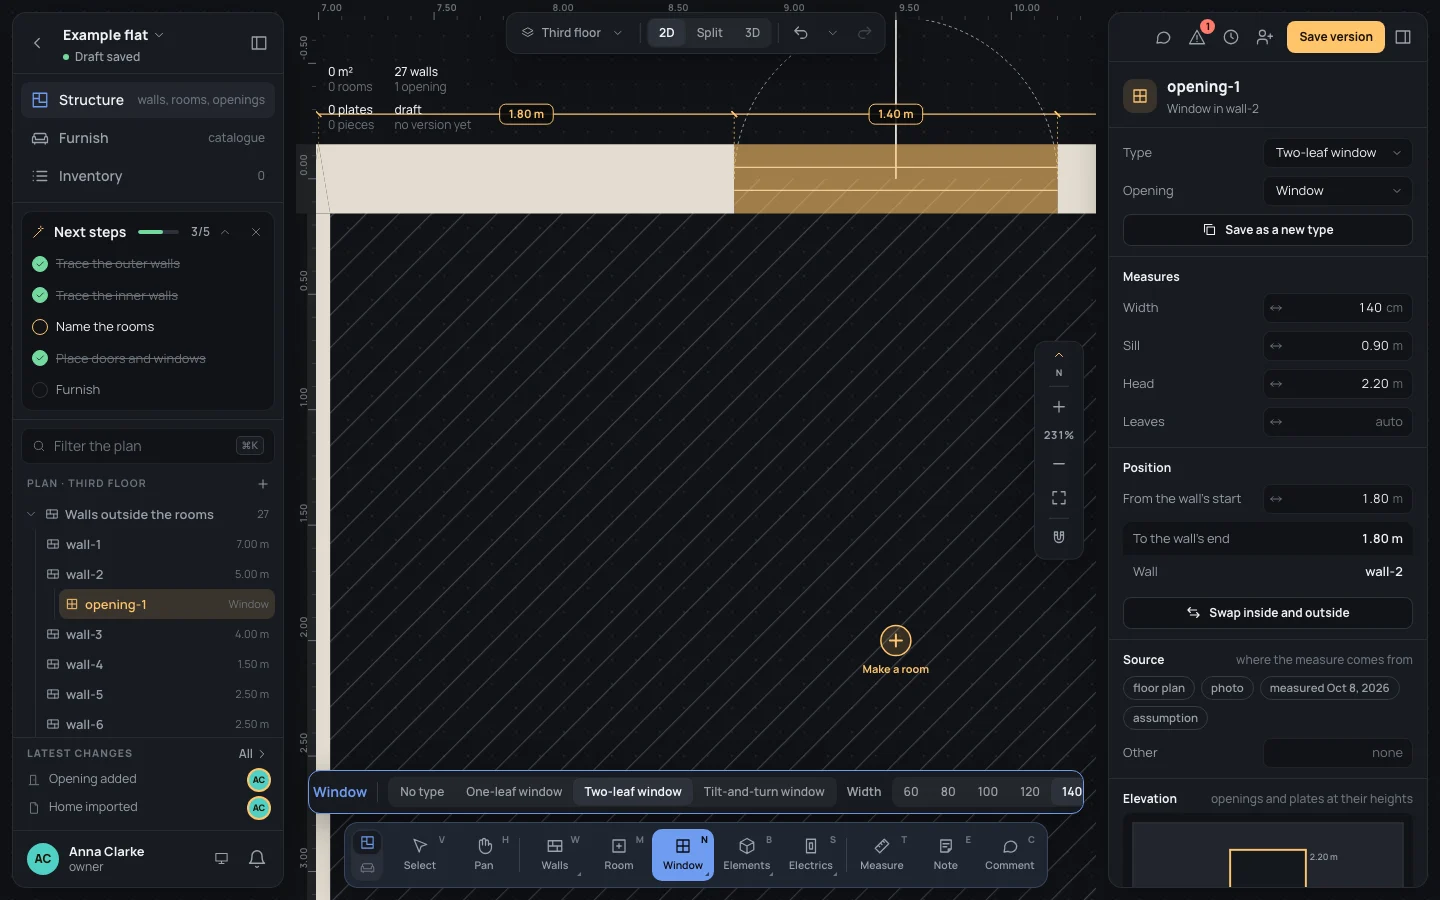
The inspector reads From the wall’s start 1.80 m and To the wall’s end 1.80 m. If it didn’t catch the
middle, type From the wall’s start1.80 there.
If something goes wrong
Section titled “If something goes wrong”- It didn’t catch the middle: move slowly over it, or zoom in; or type the distance in the inspector.
- The wrong width: change Width in the inspector, or ⌘ZCtrl+Z and place it again.
See also
Section titled “See also”- Door: the bar and the gesture explained in full.
- Openings · Opening types.