

Rectangle
The Rectangle tool draws a rectangle of four walls and makes the room they close, in one step. It is the quickest start for a home, a room or a box room.
Picking it
Section titled “Picking it”- Walls in the dock: a click opens the group, then Rectangle (four walls).
- RR picks it at once, in Structure.
- The search (⌘KCtrl+K): type Rectangle.
The bar
Section titled “The bar”The bar shows the new walls’ options, the same as the Wall tool’s but for Follow and Arc:

- Thickness: in centimetres, from 2 cm to 1 m; it starts at the house’s Inner walls.
- Height: empty (ceiling) up to the ceiling, or from 0.10 m to 10 m. Empty the field and the next walls go back up to the ceiling.
- Kind: Wall, Parapet, Railing (always 4 cm) or Separator (no body).
The bar keeps them for the next walls, of this tool and of the Wall tool alike, until you close the project.
Using it
Section titled “Using it”- Pick the tool. The hint says Drag a rectangle, or click two corners: four walls and a room.
- Press on one corner and drag to the opposite one. Under the rectangle a label gives its width and depth (12.00 m × 8.00 m).
- Release. Or click one corner, let go, and click the other: the hint then says Release, or click the second corner, to close the four walls.
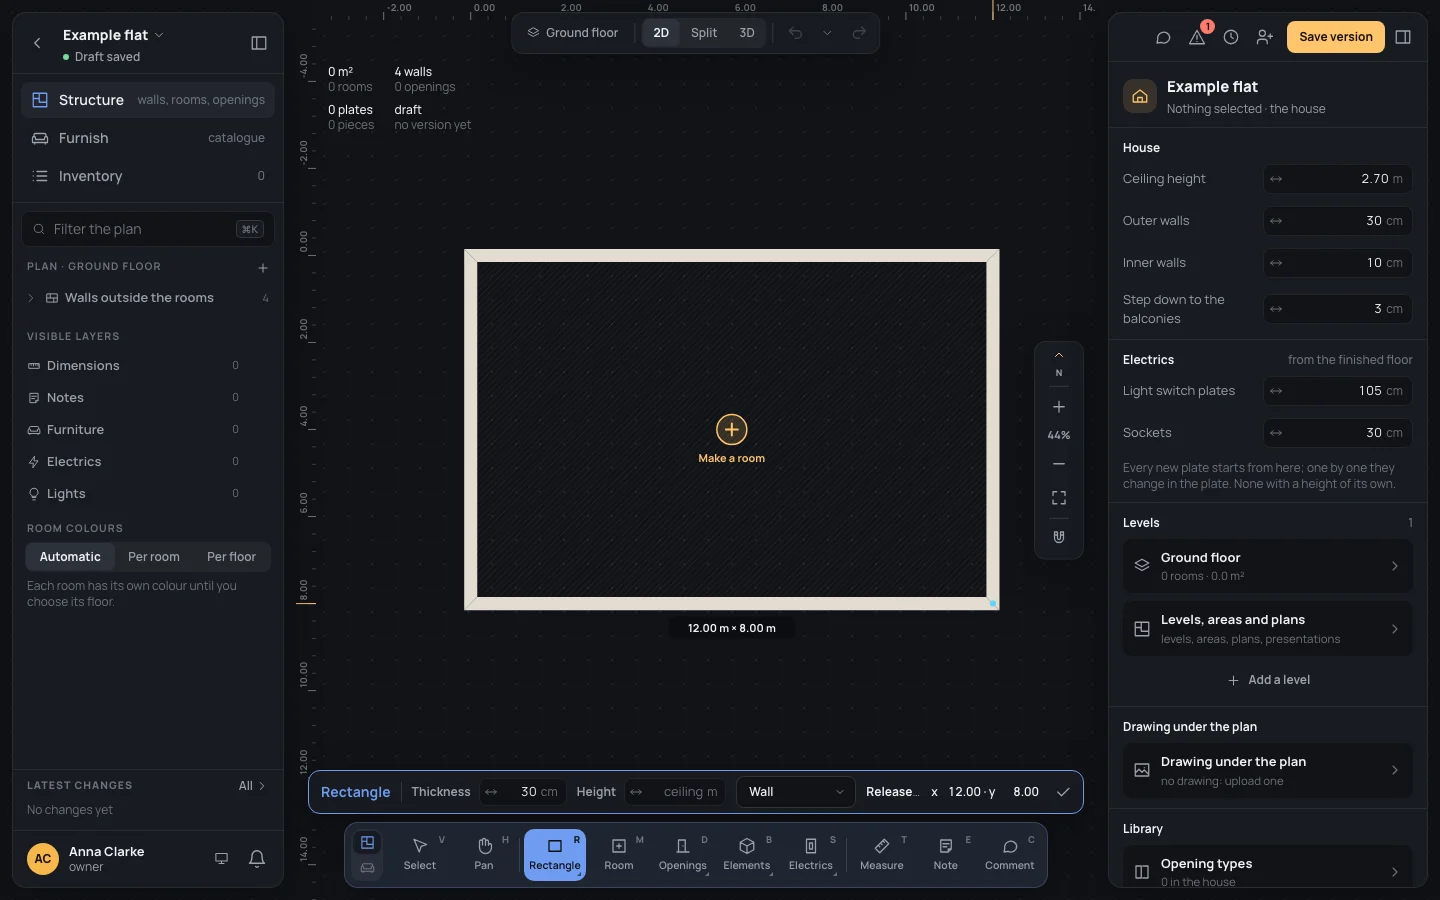
The corners are the walls’ centre lines: a rectangle of 12.00 × 8.00 m with 30 cm walls is 11.70 × 7.70 m inside.
Keys inside it
Section titled “Keys inside it”- EscEsc: drops the first corner; with none, back to Select.
- Held: ⌘Ctrl no snapping, ␣␣ to move the view.
What it snaps to
Section titled “What it snaps to”Both corners snap as the Wall tool’s clicks do: walls’ ends and middles, points on walls, the alignment with ends already there, the grid when it is on. ⌘Ctrl held turns snapping off. See Snapping.
What it refuses
Section titled “What it refuses”A rectangle whose width or depth is not longer than the snapping reach (10 pixels at the current zoom) makes nothing: a click there leaves the first corner waiting for a second one. Out-of-range thicknesses and heights are refused by the bar’s fields, as for the Wall tool (Between 0.02 m and 1.00 m.).
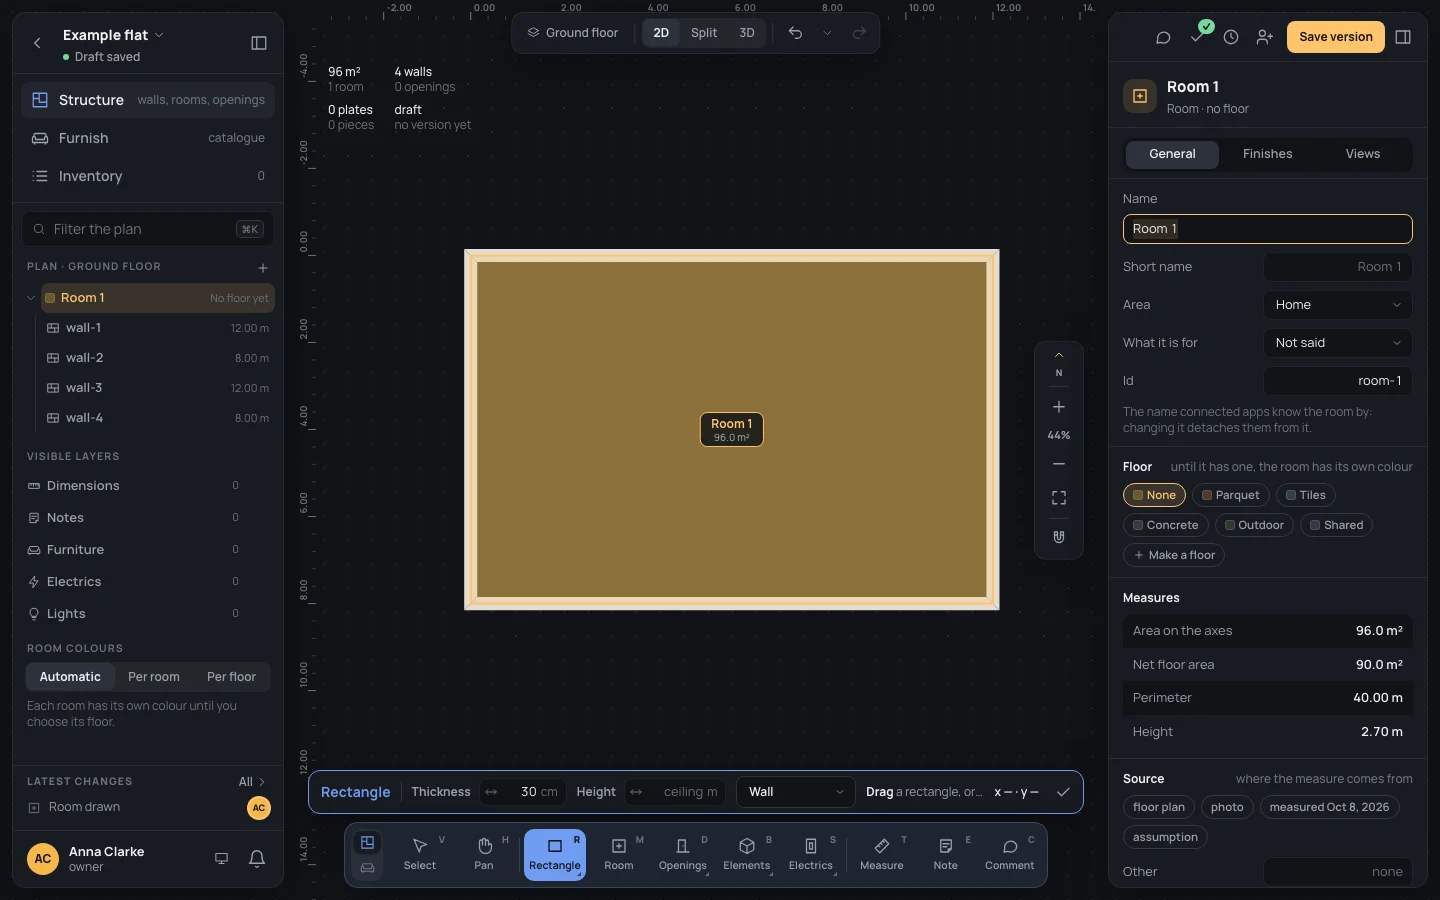
One step in the history, Room drawn: the four walls and the room inside them, named Room 1 (or the next number), in the plan’s area, on the house’s floor for new rooms when it has one. The room is selected and the inspector asks for its Name first: type it and press ↵↵. The tool stays on for the next rectangle.
Example: the example flat’s outline
Section titled “Example: the example flat’s outline”In a new, empty project, draw the outline of the example flat: 12.00 × 8.00 m between the centre lines of 30 cm walls.
- Press RR. In the bar’s Thickness type Thickness
30and press ↵↵. - To land on whole centimetres, turn on the grid: Snapping, the magnet at the bottom of the zoom column, then Grid 10 cm.
- Press on the sheet and drag down and to the right until the label reads 12.00 m × 8.00 m. Release.
- The inspector asks the room’s name: type Name
Flatand press ↵↵.
The flat then has 96.0 m² on the axes and 90.0 m² net.
If something goes wrong
Section titled “If something goes wrong”- The wrong size: ⌘ZCtrl+Z takes back the walls and the room together, one step. Or type the right length in each wall with Select (Editing walls).
- Nothing appears when you release: the rectangle is too thin; drag further, or zoom out.
- Its walls lie on walls already there: a rectangle is always four walls of its own and doesn’t join the walls it runs along, as the Wall tool does. Undo it and draw those walls with the Wall tool.