

Arranging furniture
Arranging puts pieces already on the plan in order: lined up on an edge, spaced evenly, repeated in a row, copied right beside themselves, turned. Everything here happens in Furnish, on placed pieces, and each action is one step you can undo.
Several pieces: align and distribute
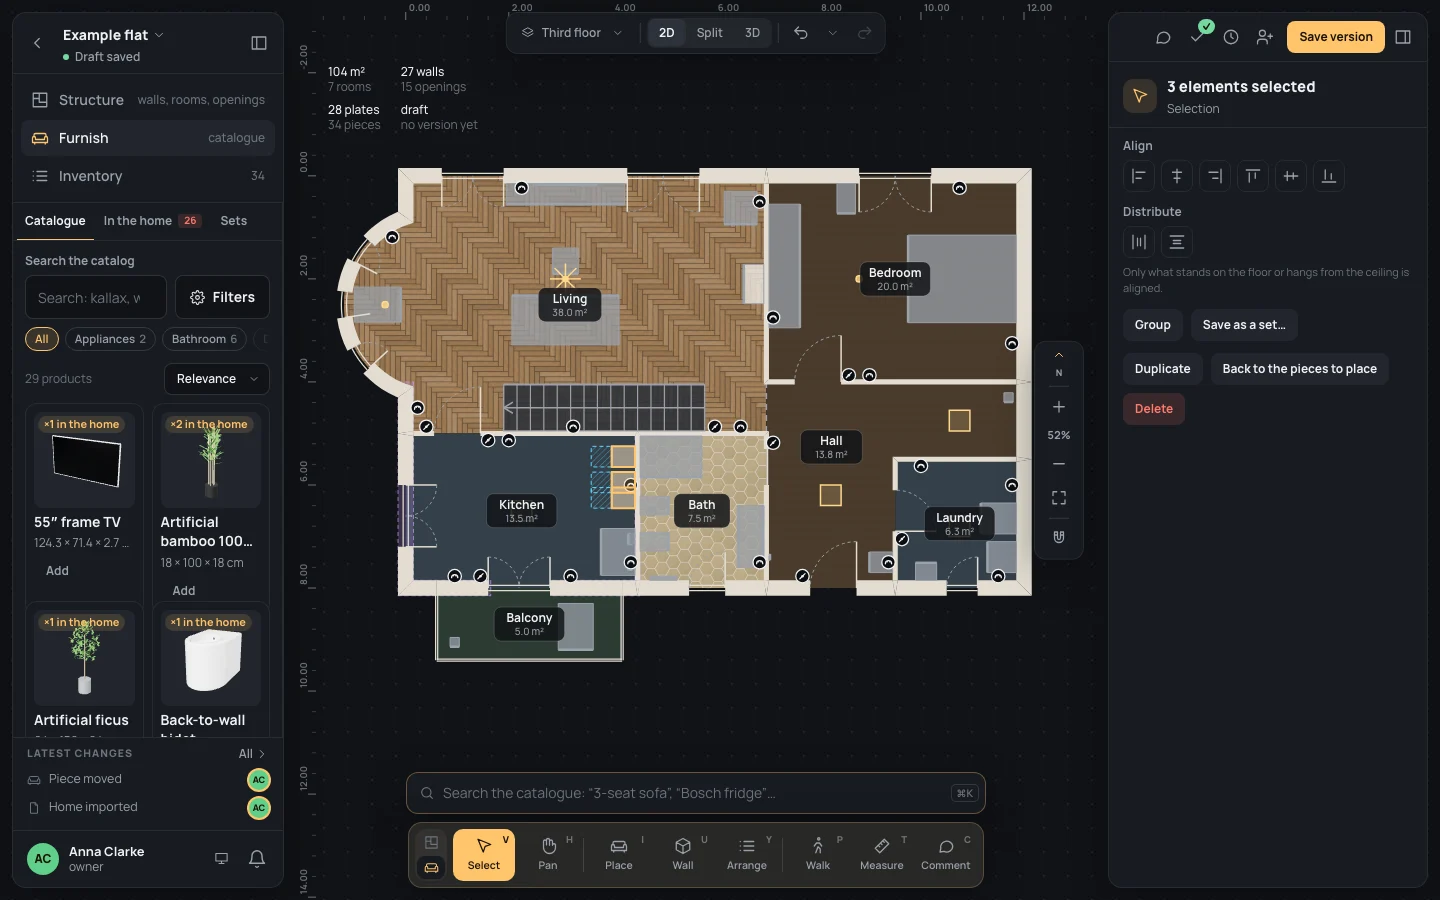
Section titled “Several pieces: align and distribute”Select two pieces or more with Select (a click on the first, ⇧Shift + click on the others, or a box dragged on an empty part of the plan). The inspector says how many are selected and offers:
- Align: Left, Centre, across, Right move them across only; Top, Centre, down, Bottom move them up or down only. They line up on that side, or the middle, of the box round them all.
- Distribute, with three pieces or more: Equal gaps across, Equal gaps down. The two at the ends stay where they are; the others move so the gaps between them are equal. With two pieces both are greyed out.
Only what stands on the floor or hangs from the ceiling is aligned. A piece hanging on a wall, or standing on another, stays where it is: line up what hangs on a wall in its composition (below).
The same buttons come with Arrange in the dock (YY), which brings the inspector back when the right panel shows something else: see Arrange.
Below them: Group and Save as a set… (Groups and sets), Duplicate, Back to the pieces to place (to the tray) and Delete.
Example: three kitchen cabinets evenly spaced
Section titled “Example: three kitchen cabinets evenly spaced”On the finished example flat, the kitchen has three tall rustic oak cabinets in a row against its east wall.
- In Furnish, click the middle cabinet and press ⇧↓Shift+↓: it moves 10 cm down, out of step.
- ⇧Shift + click the cabinet above it, then the one below it. The inspector says 3 elements selected.
- In Distribute, click Equal gaps down. The two at the ends stay; the middle one goes back halfway between them (Pieces distributed).
One piece: repeat in a row
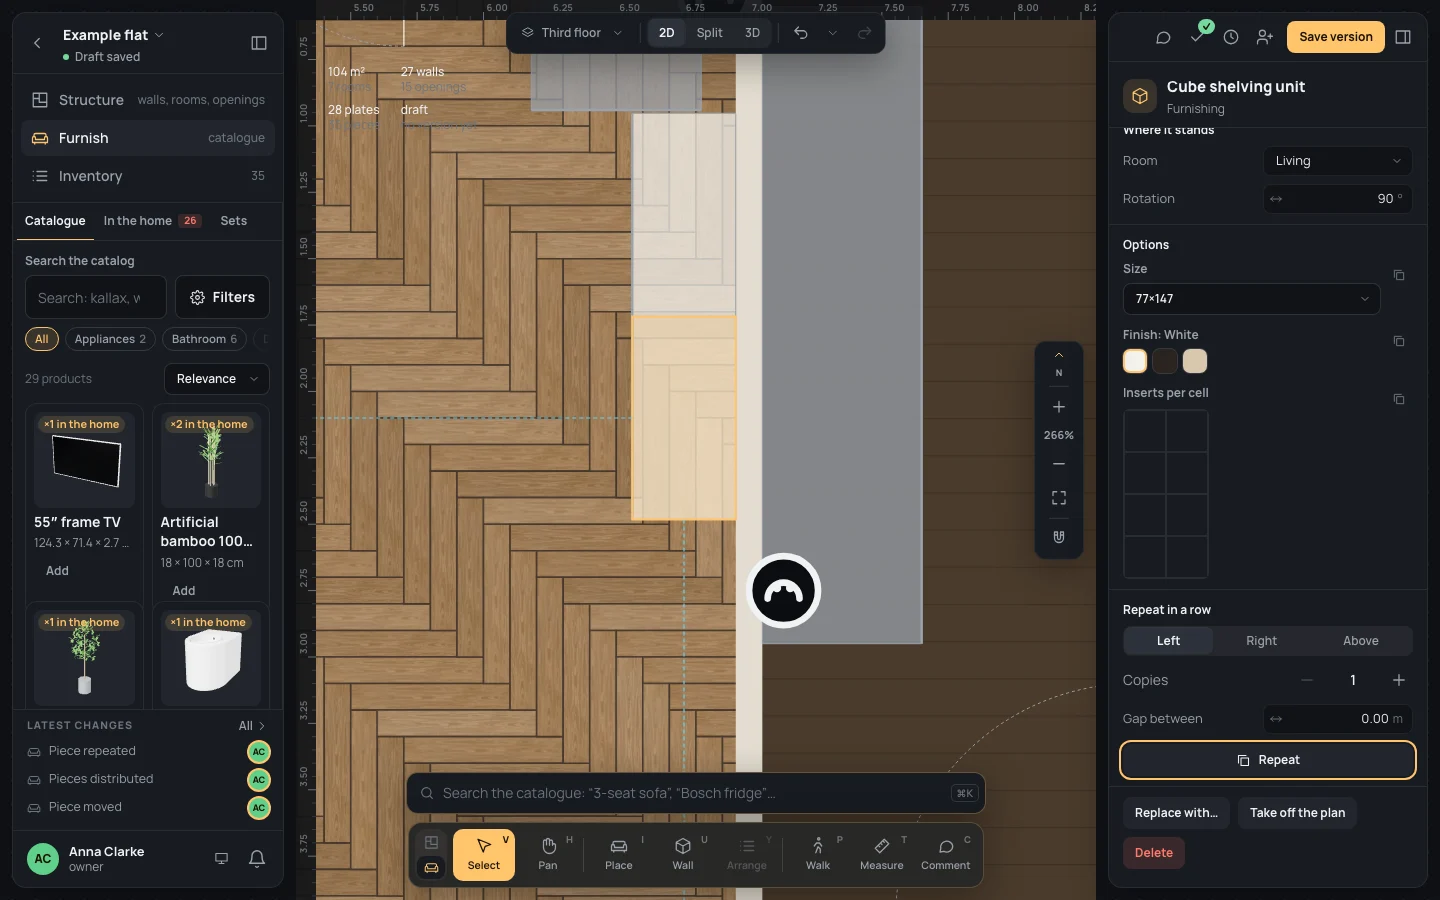
Section titled “One piece: repeat in a row”A placed piece’s inspector has Repeat in a row:
- where the copies go: Left or Right (along the piece’s width, as you see it standing in front of it), or Above (stacked on it);
- Copies: 1 to 20 (2 to start with);
- Gap between: the space between one and the next, in your unit of length (0 to start with: touching);
- Repeat: makes them, in one step (Piece repeated).
On the floor and from the ceiling the row follows the piece’s turn; against a wall the copies go along the wall; on another piece, across it. Above stands each copy on the one under it; a wall piece goes higher up its wall; nothing is stacked under a piece hanging from the ceiling. The copies have the piece’s product, options, name and room.
Example: one more cube shelving unit beside the living room’s
Section titled “Example: one more cube shelving unit beside the living room’s”- In Furnish, click the cube shelving unit against the living room’s east wall.
- In Repeat in a row, choose Left, take Copies down to 1 with −, leave Gap between at
Gap between
0. - Click Repeat. A second shelving unit stands against the wall, touching the first, on your left as you face it.
Duplicate beside
Section titled “Duplicate beside”One placed piece selected, these copy it right beside itself, touching, and select the copy, so that pressing again goes on making the row or the stack:
- ⇧⌘←Ctrl+Shift+←: Duplicate to the left;
- ⇧⌘→Ctrl+Shift+→: Duplicate to the right;
- ⇧⌘↑Ctrl+Shift+↑: Duplicate above.
They are also in a piece’s right-click menu. They do what Repeat in a row does with one copy and no gap. With several pieces, or a piece in the tray, they do nothing.
Try it on the same shelving unit: ⇧⌘→Ctrl+Shift+→ twice makes a row of three, and ⇧⌘↑Ctrl+Shift+↑ stands a fourth on the last one.
Duplicate
Section titled “Duplicate”⌘DCtrl+D (or Duplicate in the inspector of several pieces, or in the menu) copies everything selected, in one step: the copies land 50 cm to the right and 50 cm down, and are selected, ready to be dragged where they go.
- RR: Turn the pieces 90°;
- ⇧RShift+R: Turn the pieces 15°.
They work with pieces selected, each piece turning clockwise on itself. A piece against a wall stays square to it: turn it by dragging it to another wall. An exact angle goes in the inspector’s Rotation.
Composing a wall
Section titled “Composing a wall”What hangs on one wall (pictures, shelves, a TV) is arranged on the wall’s elevation: Compose the wall in a wall piece’s inspector, or Wall in the dock (UU) and a click on the wall’s face. There the pieces are dragged with snapping, lined up, given equal gaps or laid out in a grid: see Compose a wall.
What can go wrong
Section titled “What can go wrong”- Align moved nothing: the pieces hang on a wall or stand on another; compose the wall instead.
- Distribute is greyed out: it needs three pieces or more.
- Repeat isn’t there: the piece is in the tray; place it first.
- The copies went the other way: Left and Right are as you see the piece from its front; choose the other, or undo.
- A copy stands on a neighbour: repeating and duplicating don’t make room; drag or undo it.
Every one of these is one step: ⌘ZCtrl+Z takes it back.
See also
Section titled “See also”- Arrange and Compose a wall, the tools.
- Placing: distances, moving a piece, its inspector.
- Groups and sets: pieces kept together.