

Stair
The Stair tool draws a stair from the plan you are on to the level above it. A stair of runs is traced along its walking line, a click where it starts and one at every turn; a spiral takes its centre, where it starts and how far round it climbs. Its risers are worked out from the height between the two levels.
Picking it
Section titled “Picking it”- In the dock, the Elements group: click it and choose Stair (the group also holds Block, Awning and Walk start). Once picked, the group shows Stair until you pick another of its tools.
- The key GG, in the Structure workspace.
- The search (⌘KCtrl+K): type stair.
The bar
Section titled “The bar”While the tool is on, the bar above the dock reads Stair and holds what the next stair will be. What you set stays for the rest of the session.

- Runs · Spiral: the shape. It starts on Runs. Changing it drops a stair you were tracing.
- Width (runs only): how wide the flights are, from 0.90 m. Type it or drag the arrows; anything above zero.
- At the turns (runs only): Landing (the default) puts a square landing at each turn, Winders turns with wedge-shaped treads instead.
- Column (diameter) (spiral only): the spiral’s central column, from 0.12 m. Zero is allowed; it must stay narrower than the stair.
- Climbs to: …: the level the stair reaches, always the next one up. To send it elsewhere, change Climbs to in the stair’s inspector once it is made.

Using it
Section titled “Using it”A stair of runs:
- Click where the stair starts, at the foot of the walking line.
- Move the way it climbs and click at each turn. After the first run, each next one is square to the one before: only its length follows the pointer.
- End where it arrives: ↵↵, or a double click on the last point. A fourth point ends a U-shaped stair by itself.
While you trace, the stair is drawn as it would be, with its treads and the arrow going up.
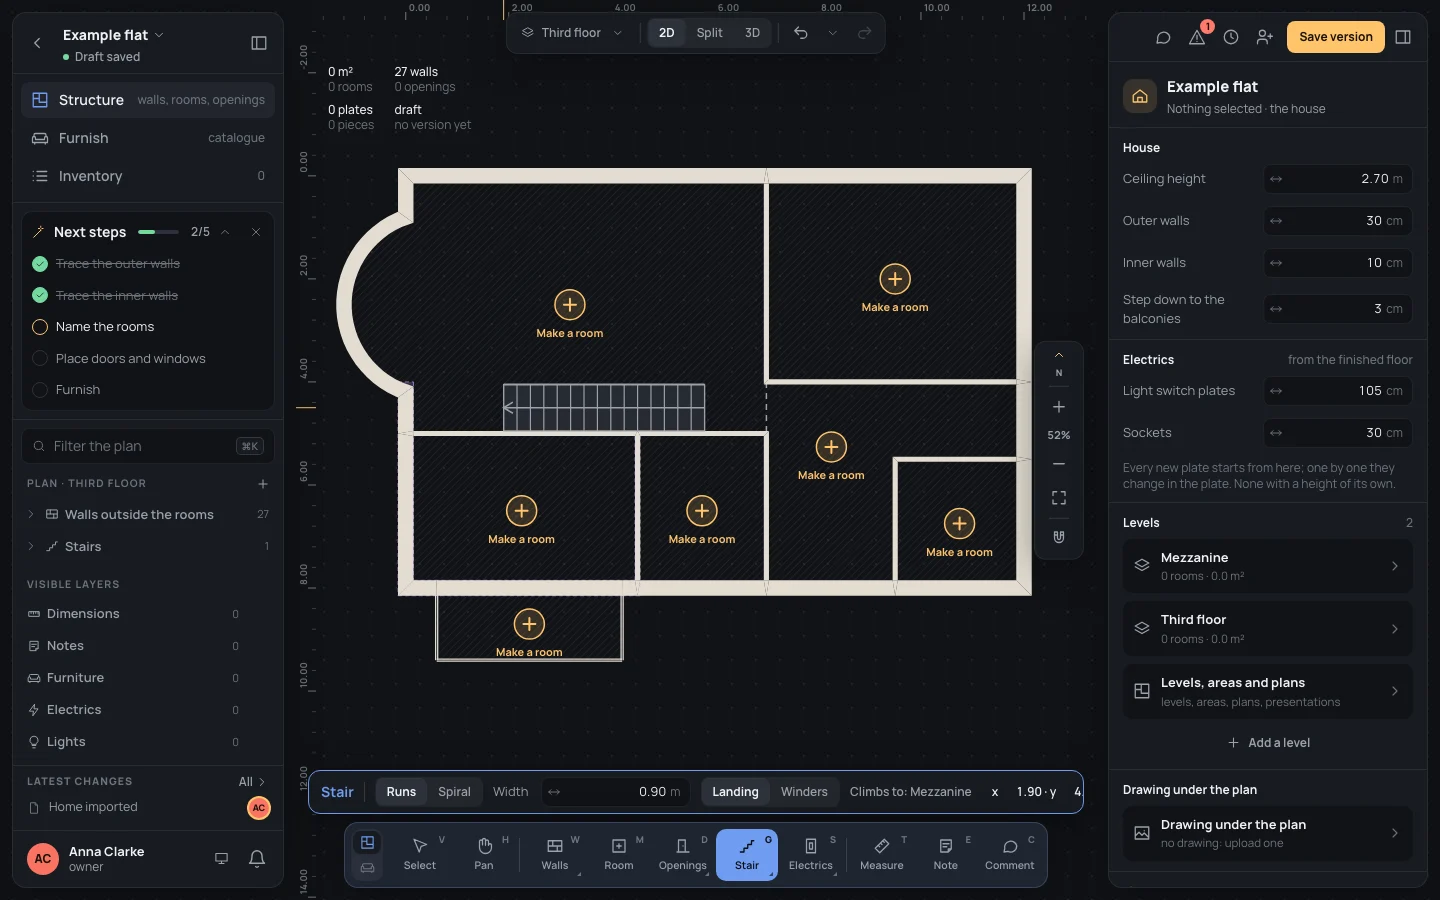
A spiral:
- Choose Spiral in the bar.
- Click its centre.
- Click where it starts: the distance from the centre is its radius.
- Turn round the centre the way it climbs (clockwise or anticlockwise, up to a whole turn) and click where it arrives.
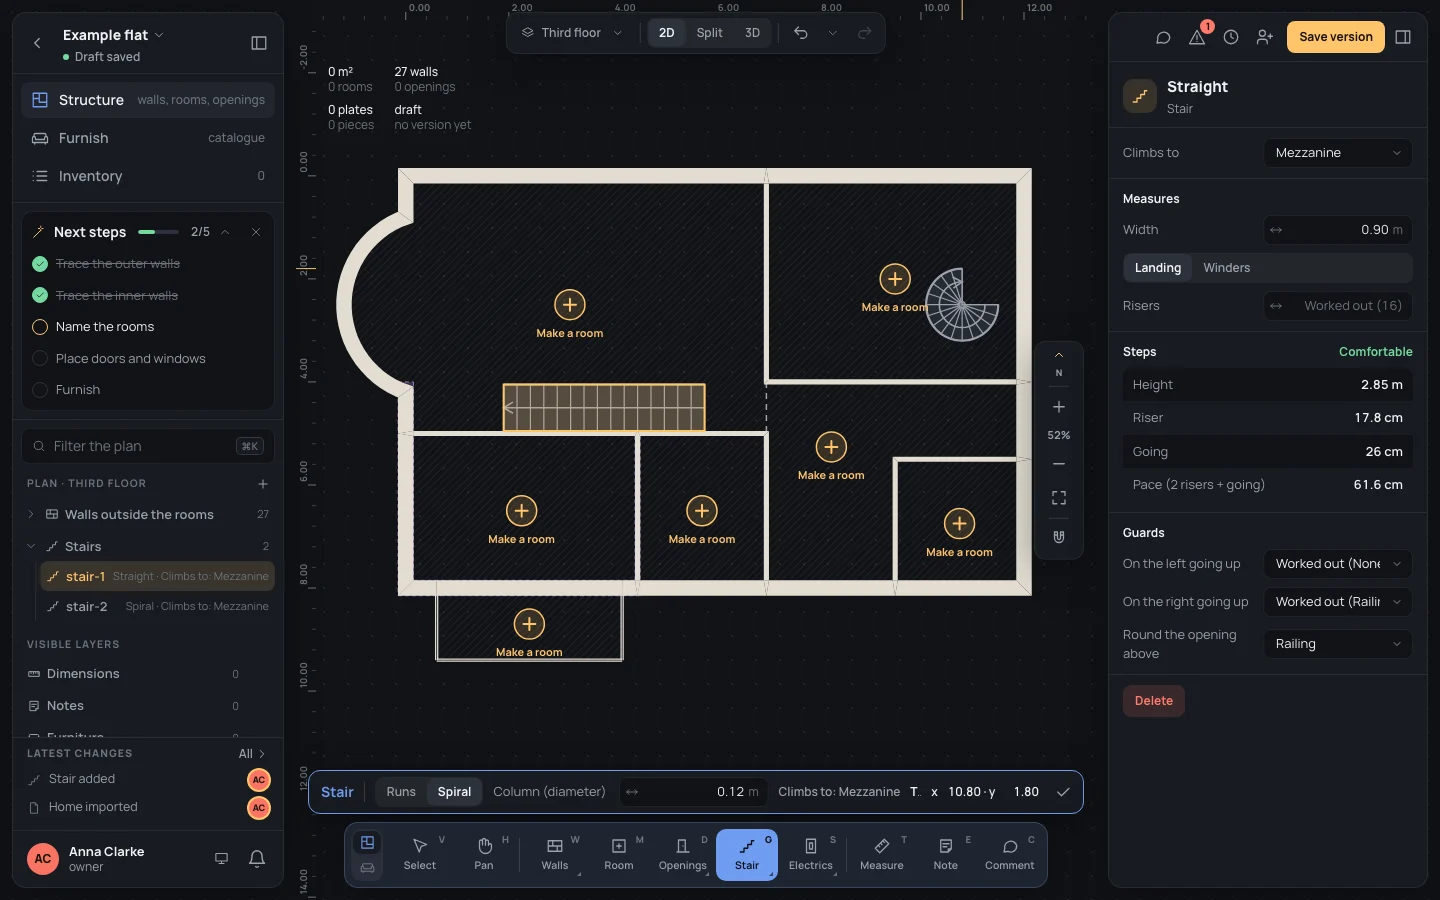
Keys inside it
Section titled “Keys inside it”- ↵↵: ends a stair of runs where its last point is. The pointer’s place alone isn’t a point: click where it arrives first, or double click there.
- ⌫⌫: takes the last point back.
- EscEsc: drops the stair being traced. With nothing traced, it goes back to Select.
- ⇧Shift held: the first run’s angle in 15° steps instead of 45°. ⌘Ctrl held: no snapping.
What it snaps to
Section titled “What it snaps to”The first point, the first run and a spiral’s centre and start snap like a wall’s ends: the ends and middles of walls, points on walls, the guides lined up with corners, and the angle from the last point (every 45°, every 15° with ⇧Shift). Every next run is held square to the one before. The turn of a spiral follows the pointer. How snapping chooses is in Snapping.
What it refuses
Section titled “What it refuses”- No level above this one: a stair climbs to the floor above, which the home has not got yet: on the top level the bar says this instead of its options, and nothing is drawn. Add a level first (Stairs and levels).
- A walking line takes 2 to 4 points, runs of some length, turns that are square and all the same way. A U whose second turn goes the other way (a zigzag) shows nothing and makes nothing when you end it.
- A spiral needs some turn but no more than a whole one, and a column narrower than the stair: otherwise nothing is drawn.
- Width or Column (diameter) that isn’t a length: Type a length, for example 30 or 2.40.

The stair is made in one step (Stair added in the history) and selected: its inspector shows its shape (Straight, L-shaped, U-shaped or Spiral), Climbs to, Width, Risers worked out (18 cm each at most), the height, riser, going and pace, and its guards. The tool stays on for the next stair; EscEsc goes back to Select. On the level above, the floor is opened over the stair.
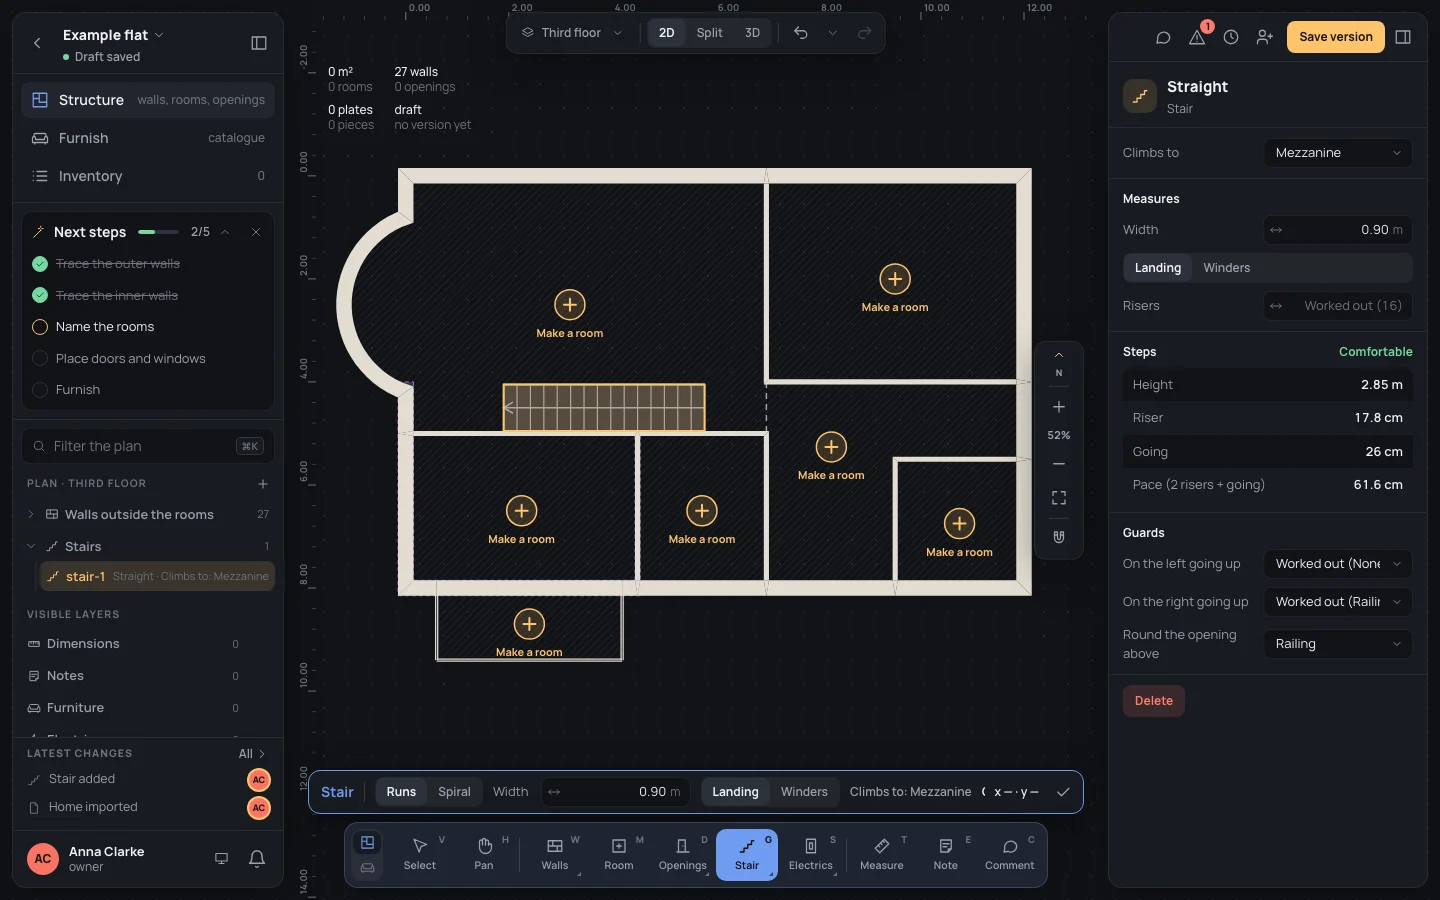
Example: the stair to the mezzanine
Section titled “Example: the stair to the mezzanine”On the example home (the bare one, Third floor), the stair runs along the living room’s south wall, from beside the hall westwards up to the mezzanine.
- Press GG. The bar reads Climbs to: Mezzanine; leave Runs and
Width
0,90. - Click 5.80 m east and 4.50 m south of the flat’s north-west corner (the pointer’s place is in the bar: x 5.80 · y 4.50).
- Move west and click at x 1.90 · y 4.50: a run of Length
3,90. - Press ↵↵.
The inspector says Straight, Risers Worked out (16): 2.85 m between the third floor and the mezzanine, 16 risers of 17.8 cm on goings of 26 cm, a pace of 61.6 cm, Comfortable.
If something goes wrong
Section titled “If something goes wrong”- A point in the wrong place while tracing: ⌫⌫. The whole stair: EscEsc.
- A stair made wrong: ⌘ZCtrl+Z takes it away in one step. Or select it and change it in its inspector, or drag it with Select.
- Nothing appears while you trace: you are on the top level, or the line zigzags, or (for a spiral) the column is as wide as the stair.
See also
Section titled “See also”- Stairs and levels: the stair’s inspector, its risers and guards, and the levels it joins.
- Snapping
- Every key