

Measure
The Measure tool tells you how far apart two points of the plan are. It changes nothing in the home, unless you ask it to keep the measure as a dimension.
Picking it
Section titled “Picking it”- Measure in the dock, or TT. It is in the dock of Structure and of Furnish, and in a viewer’s too: whoever can open the project can measure it.
- The search (⌘KCtrl+K): type Measure.
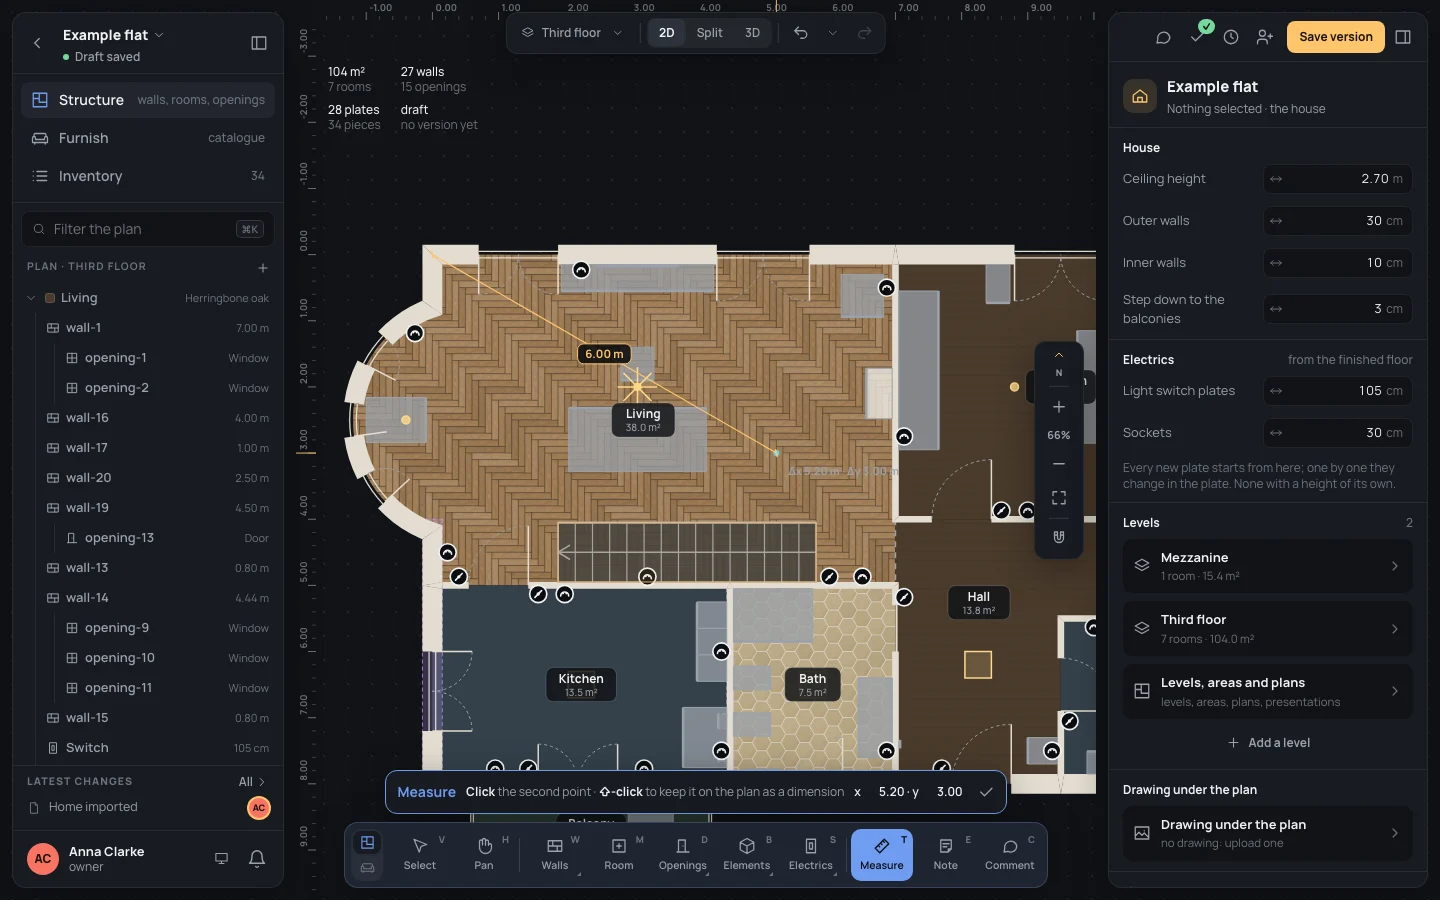
The tool has no options: its bar shows its name, what to do, where the pointer is (x 5.20 · y 3.80, metres from the plan’s origin) and Done (✓).
Using it
Section titled “Using it”- Pick the tool. The bar says Click two points to measure (snapping on) · EscEsc to clear.
- Click the first point. From there a line follows the pointer, with the distance on a pill in its middle; the bar now says Click the second point · ⇧Shift-click to keep it on the plan as a dimension.
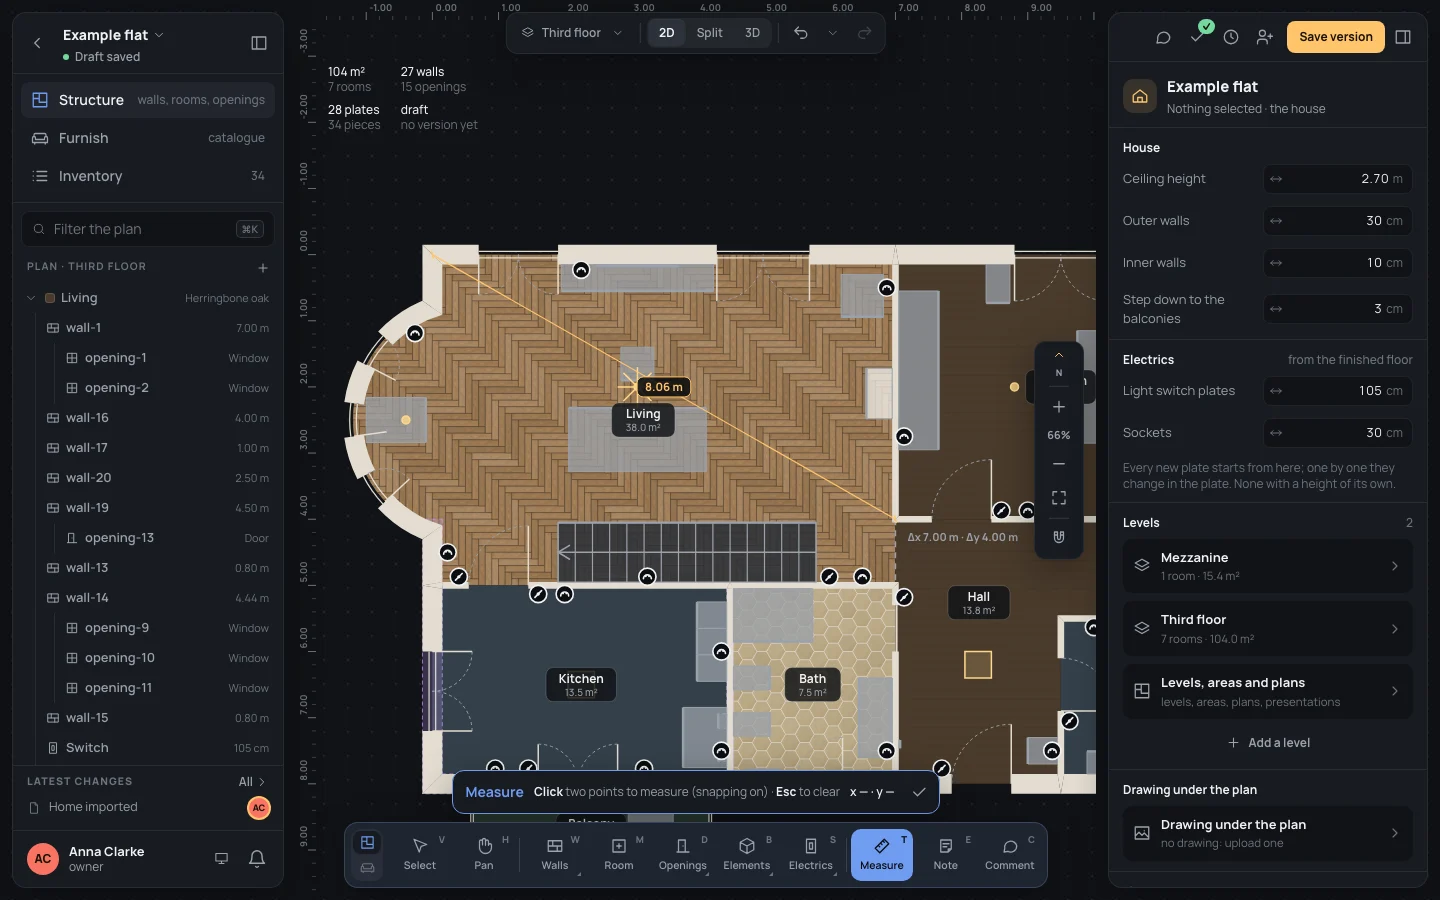
- Click the second point. The line and its pill stay on the plan. When the two points are neither level nor one above the other, a line beside the end says how far across and how far down they are (Δx 7.00 m · Δy 4.00 m).
- Click again to start another measure: the first one goes. EscEsc clears it.
Keeping it as a dimension
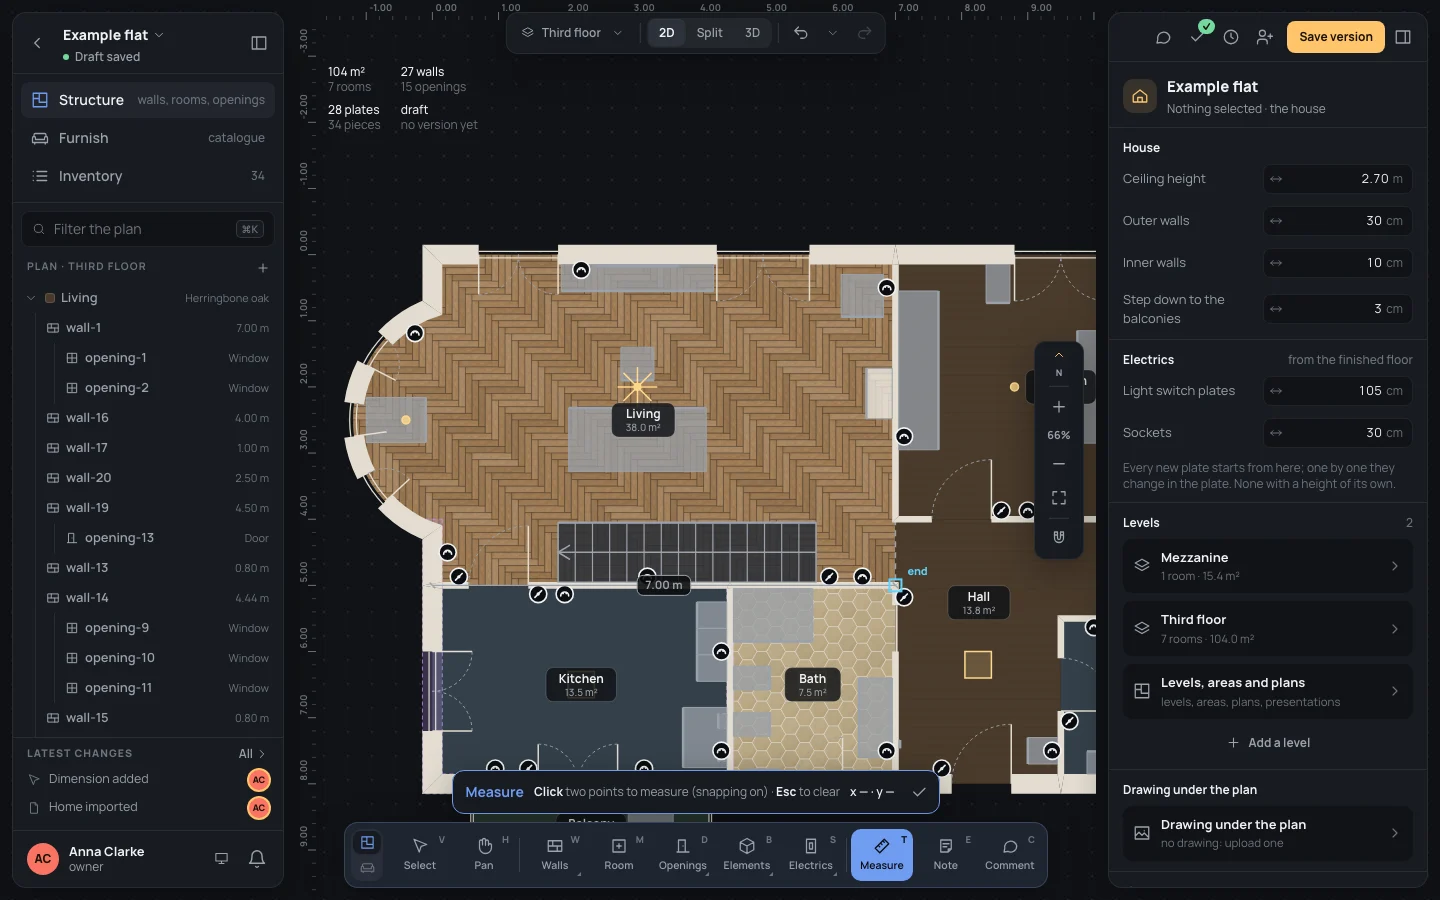
Section titled “Keeping it as a dimension”Hold ⇧Shift while you click the second point: the measure is not left on the plan as a measure, it is added to it as a dimension between the two points, exactly as measured, its label in the middle. It is one step in the history (Dimension added) and stays on the plan and in print; the left panel lists it under Dimensions and notes, and the Dimensions layer shows or hides it. Selected, it says how long it is now, and can take a measure taken on site and its source: Measures and notes.
Keys inside it
Section titled “Keys inside it”- EscEsc: clears the measure, the one being taken or the one left on the plan. With none, back to Select. Done (✓) in the bar goes back to Select too.
- ⇧Shift + click on the second point: keep it as a dimension.
- ⌘Ctrl held: no snapping, the point goes exactly under the pointer.
- ␣␣ held: move the view; ⌘Ctrl with the wheel: zoom.
- Any other tool’s key picks that tool.
What it snaps to
Section titled “What it snaps to”Both points snap as the plan’s snapping is set (Snapping): a wall’s end, a wall’s middle, a point on a wall (on its axis), the alignment with ends already there, and the grid when it is on. A small mark with its name (end, middle…) shows what the point caught. Measure has no angle steps: the second point is not pulled to 45° or 90° from the first.
What it refuses
Section titled “What it refuses”Nothing: any two points can be measured, the same one twice too (0.00 m). Viewers measure, but a measure kept as a dimension is a change to the home, so only who can edit keeps one.
A plain measure is not part of the home: it is not saved, not printed and not seen by others in the project, and it goes as soon as you start another, press EscEsc or leave the tool. A dimension kept is part of the home like any other change.
Example: across the living room
Section titled “Example: across the living room”On the finished example flat, from the corner where the north and west walls’ axes meet to the corner of the bedroom’s wall.
- Press TT.
- Click the north-west corner (x 0.00 · y 0.00): the mark says end.
- Click where the wall between the living room and the bedroom meets the hall’s (x 7.00 · y 4.00). The pill reads 8.06 m, and Δx 7.00 m · Δy 4.00 m beside the end.
- To keep the living room’s south side as a dimension: click x 0.00 · y 5.00, then hold ⇧Shift and click x 7.00 · y 5.00. A dimension of 7.00 m is added along the stair.
If something goes wrong
Section titled “If something goes wrong”- The point jumped somewhere you didn’t want: something near it caught it. Hold ⌘Ctrl while you click, or zoom in.
- A dimension kept by mistake: ⌘ZCtrl+Z, or select it and delete it (⌫⌫or⌦⌦).
- The measure is between walls’ axes, not their faces: the ends and the points on a wall are on the axis. For the clear distance between two faces, see Measures and notes.
See also
Section titled “See also”- Measures and notes: dimensions, a measure taken on site, where a measure comes from.
- Snapping: what the points catch, and how to switch each kind off.
- Note: words left on the plan.