

Wall
The Wall tool draws walls one after the other, as a chain: each click puts a corner, and the chain becomes walls when you end it. A wall can be straight or an arc, and its length can be typed instead of clicked.
Picking it
Section titled “Picking it”- Walls in the dock: a click opens the group, with Wall (click after click), Rectangle (four walls) and Split (a wall in two). The group’s button then shows the last one picked.
- WW picks it at once, from anywhere in Structure.
- ⇧WShift+W picks it already set to draw separators (see Kind). In the search it is Separator.
- The search (⌘KCtrl+K): type Wall.
The bar
Section titled “The bar”While the tool is on, the bar above the dock holds the new walls’ options (New walls), what to do next and where the pointer is. Done (✓) at its end goes back to Select.

The options apply to the walls you draw next, and the bar remembers them until you close the project.
Thickness
Section titled “Thickness”In centimetres. It starts at the house’s Inner walls (10 cm in the example flat; House settings). Type it, or drag the label or the ↔ handle sideways; ↑↑ and ↓↓ step it by 1 cm (10 cm with ⇧Shift). From 2 cm to 1 m. ↵↵ or leaving the field sets it, EscEsc puts back what was there.
Height
Section titled “Height”In metres. Empty, it reads ceiling: the walls go up to the ceiling of their level, and follow it if it changes. Type a height for a lower wall, from 0.10 m to 10 m; empty the field to go back to the ceiling.
Follow
Section titled “Follow”What your clicks are on: Axis (the wall’s centre line, the starting choice), Left or Right (one of its faces, left and right as you walk the chain from its first click). Following a face is handy when you trace from a drawing whose walls you see by their faces: the walls are drawn beside your clicks, half a thickness away. Only for straight chains: an arc’s clicks are always on its axis. Not shown for railings and separators.
Arc (AA) turns arcs on and off for the next pieces of the chain; it is lit while it is on. A toast says which: Arc: click its end, then move to bend it, or Straight walls. See Arcs.
Wall, Parapet, Railing or Separator:
- a railing is a slim barrier, always 4 cm: the thickness field goes;
- a separator is a wall with no body, 0 cm: it divides two rooms where nothing stands, as between the living room and the hall of the example flat. Thickness and Follow go;
- back to Wall or Parapet from those, the thickness is the house’s inner walls again.

Using it
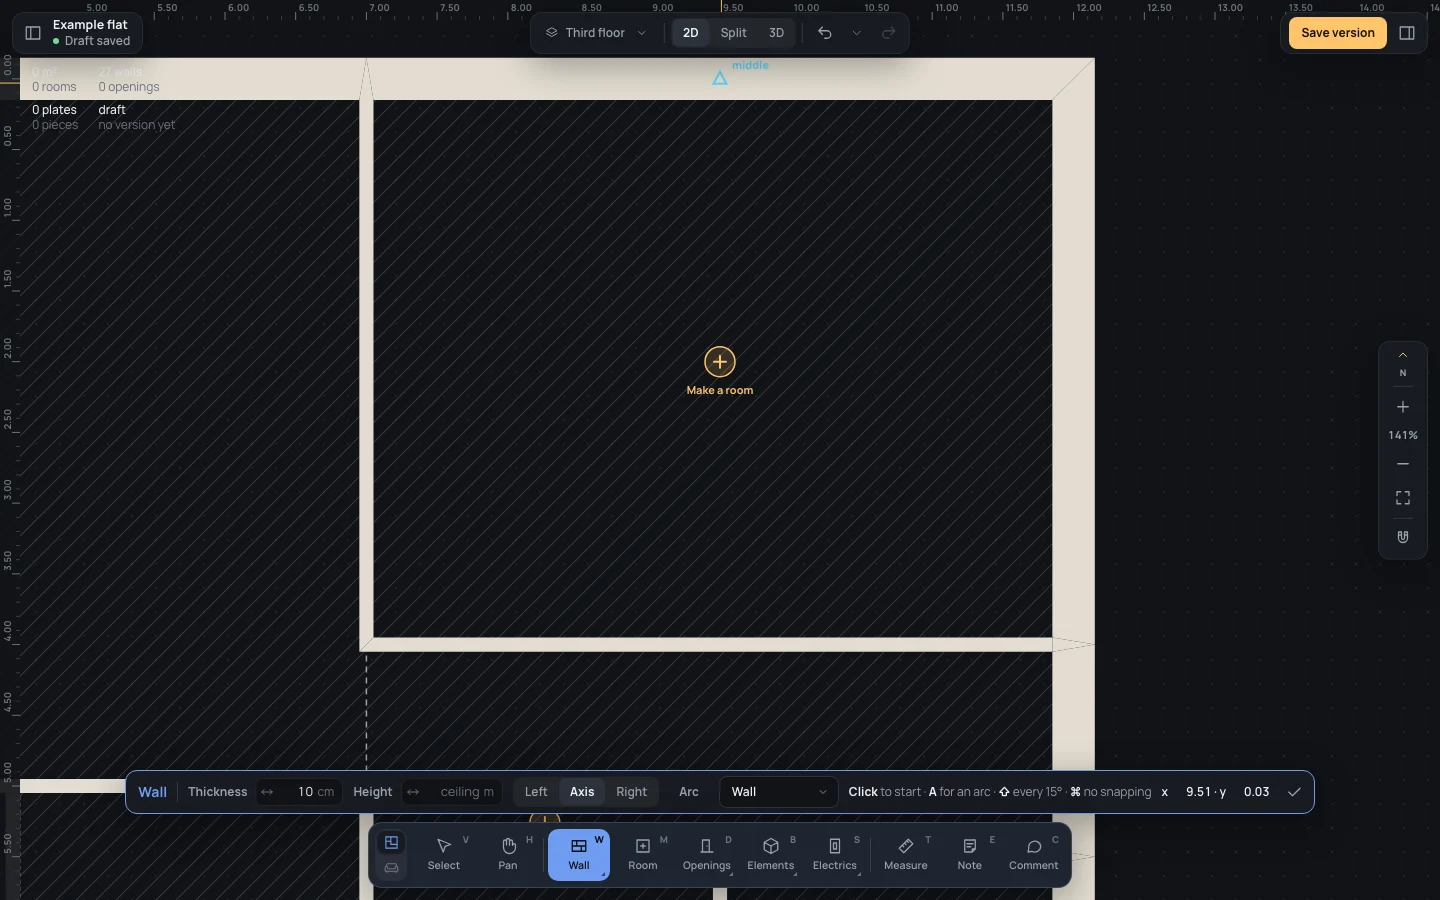
Section titled “Using it”- Pick the tool. The bar’s hint reads Click to start · AA for an arc · ⇧Shift every 15° · ⌘Ctrl no snapping.
- Click where the first wall starts. The pointer snaps as it moves (see What it snaps to).
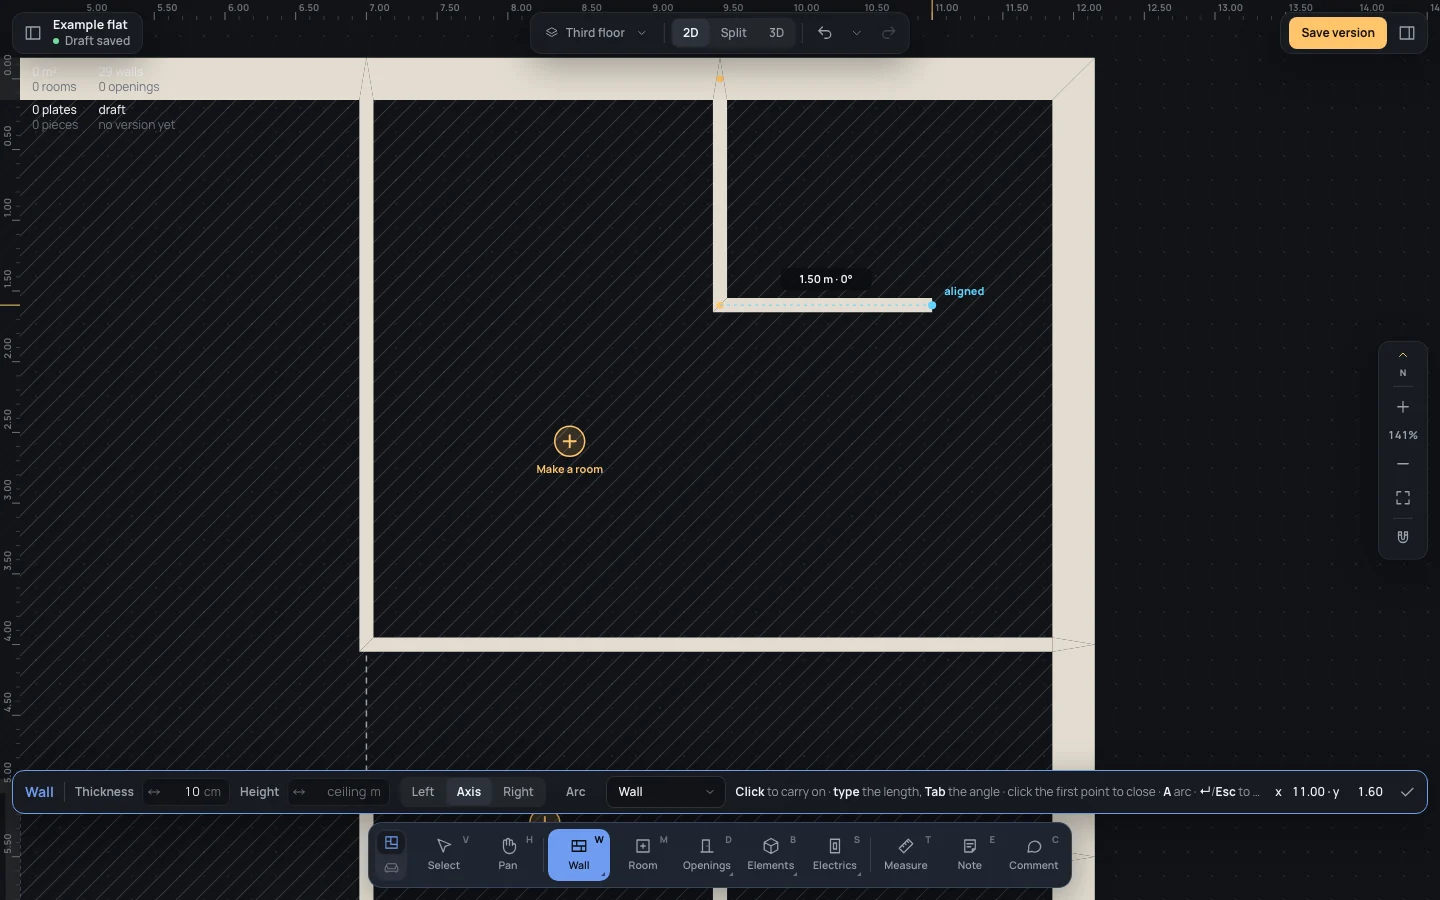
- Move the pointer: the wall follows it, with its length and direction beside it (1.50 m · 0°: 0° east, 90° north). Click where it ends: that corner is the next wall’s start. From here the hint says what comes next: Click to carry on · type the length, TabTab the angle · click the first point to close.
- Go on, click after click. To give a length instead of clicking, type it (see Typing lengths).
- End the chain: ↵↵, EscEsc, a double click on the last corner, or a click on the first corner (once there are three), which closes it into a ring.
Until you end it, the chain is a preview: the walls are made when it ends, all of them in one step of the history (Walls drawn), which one ⌘ZCtrl+Z takes back.
Typing lengths
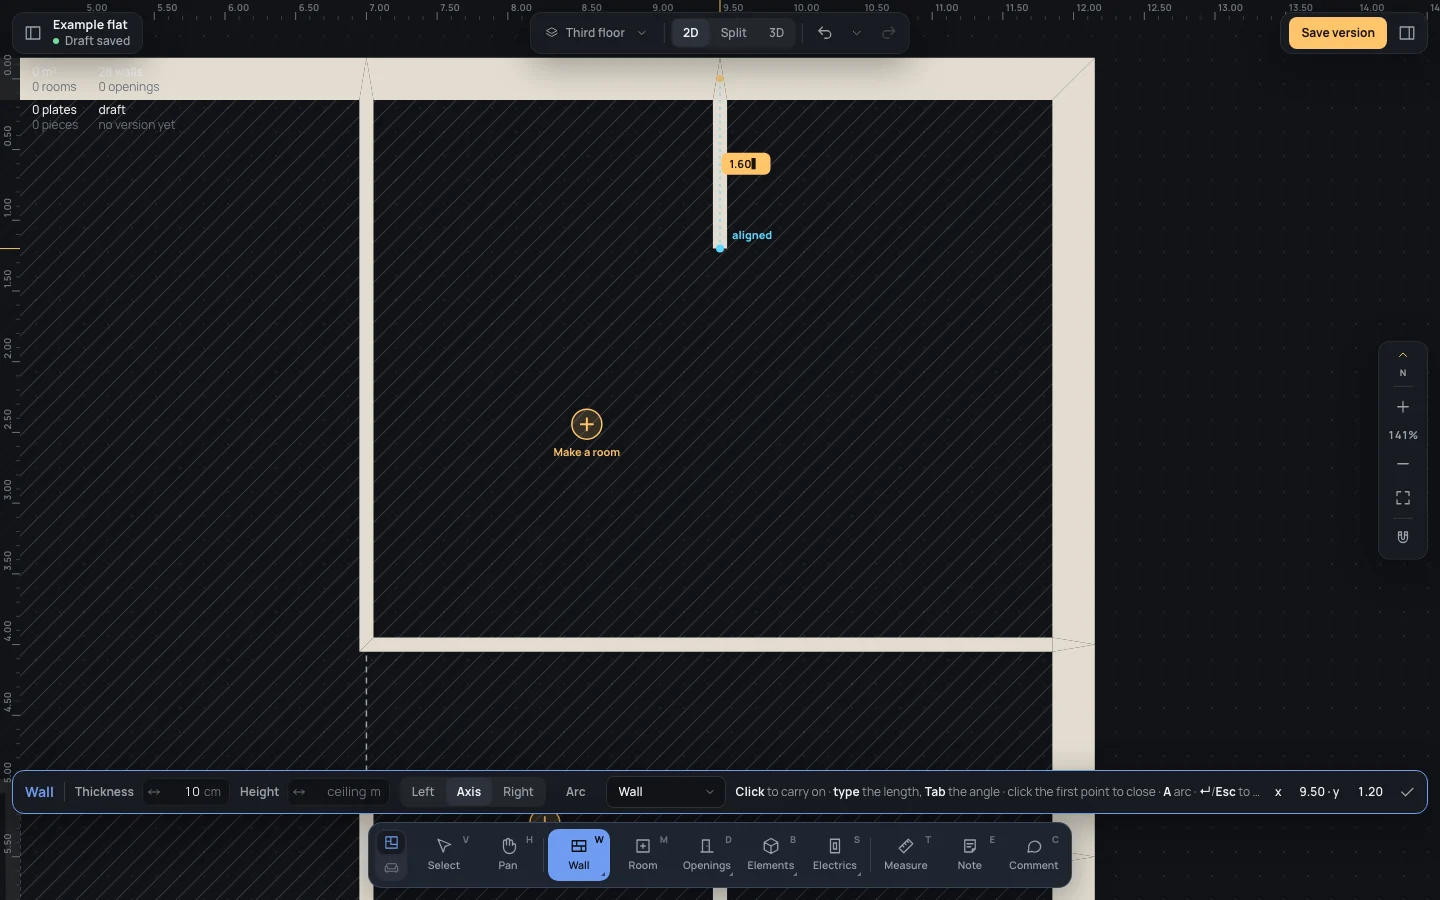
Section titled “Typing lengths”Once the chain has its first corner, type the next wall’s length and press ↵↵: the corner goes at that distance, in the direction of the pointer. What you type shows in amber beside the wall.
- A number alone is metres: To type
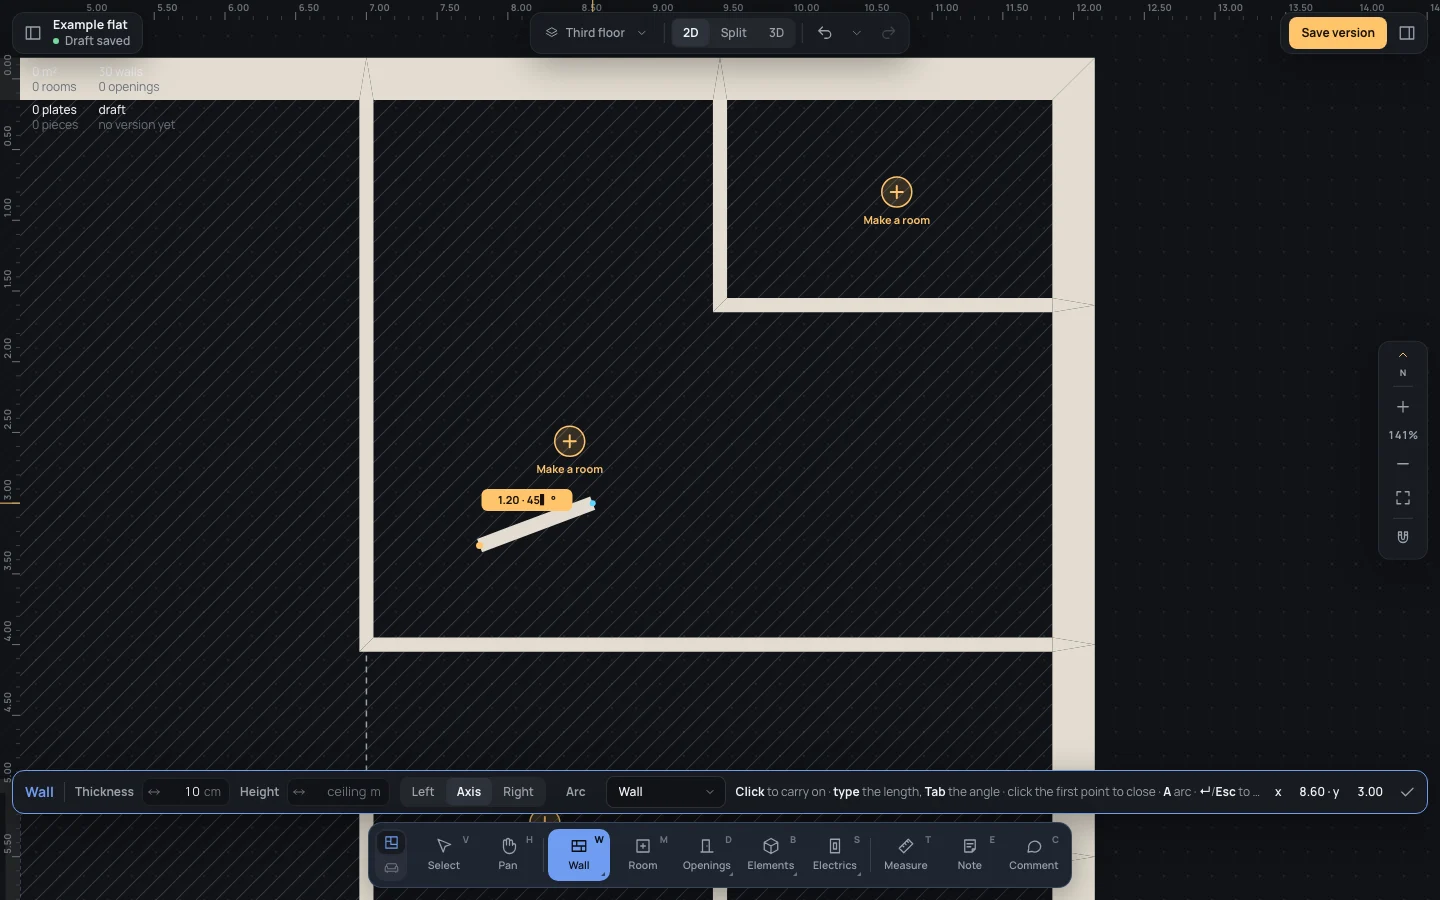
1.60or To type1,60. With a unit: To type160 cm, To type3 m 45(centimetres after the metres). Sums and differences too: To type2.40+0.15. - TabTab goes between the length and the angle. The angle is in degrees, 0° east, 90° north,
counter-clockwise: Angle
45. With an angle typed, the pointer’s direction no longer counts. - ⌫⌫ takes the last character back; EscEsc clears what you typed.
With Arc on, the next piece is an arc:
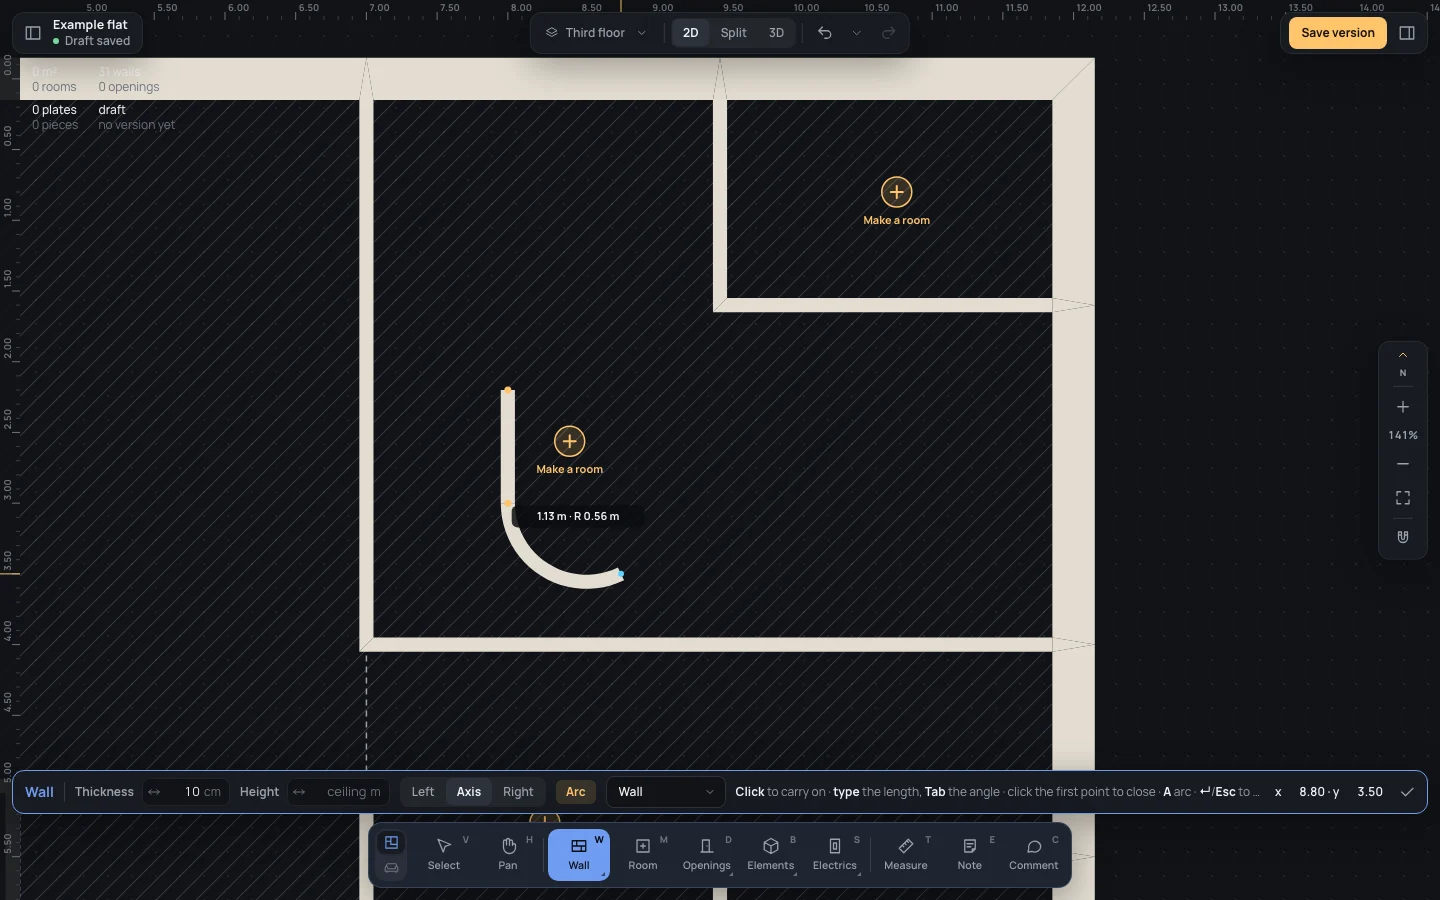
- carrying on from a wall, it leaves tangent to it: you only click where it ends, and the label gives its length and radius (1.13 m · R 0.56 m);
- as the first piece of a chain, click its two ends, then move to bend it and click to fix it (the hint says Move to bend it, click to fix the arc). It bends at most to a half circle.
Press AA again for straight walls. A curved wall can also be bent later with Select, by its ◆ (Editing walls).
Closing the chain
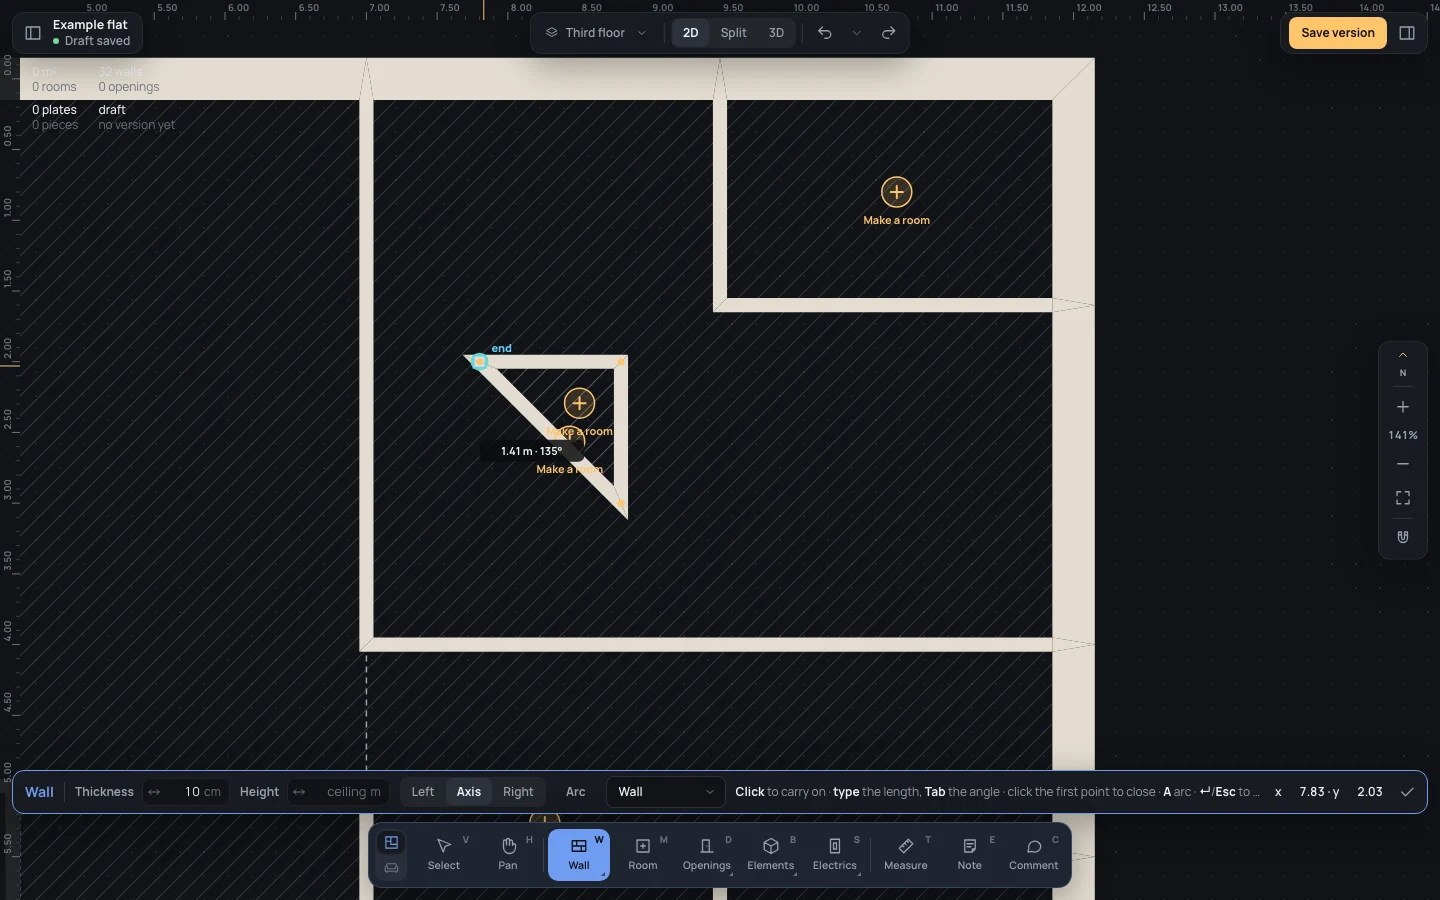
Section titled “Closing the chain”From the third corner, the first one is ringed in green: a click there closes the chain into a ring of walls, and ends it.
Going along a wall
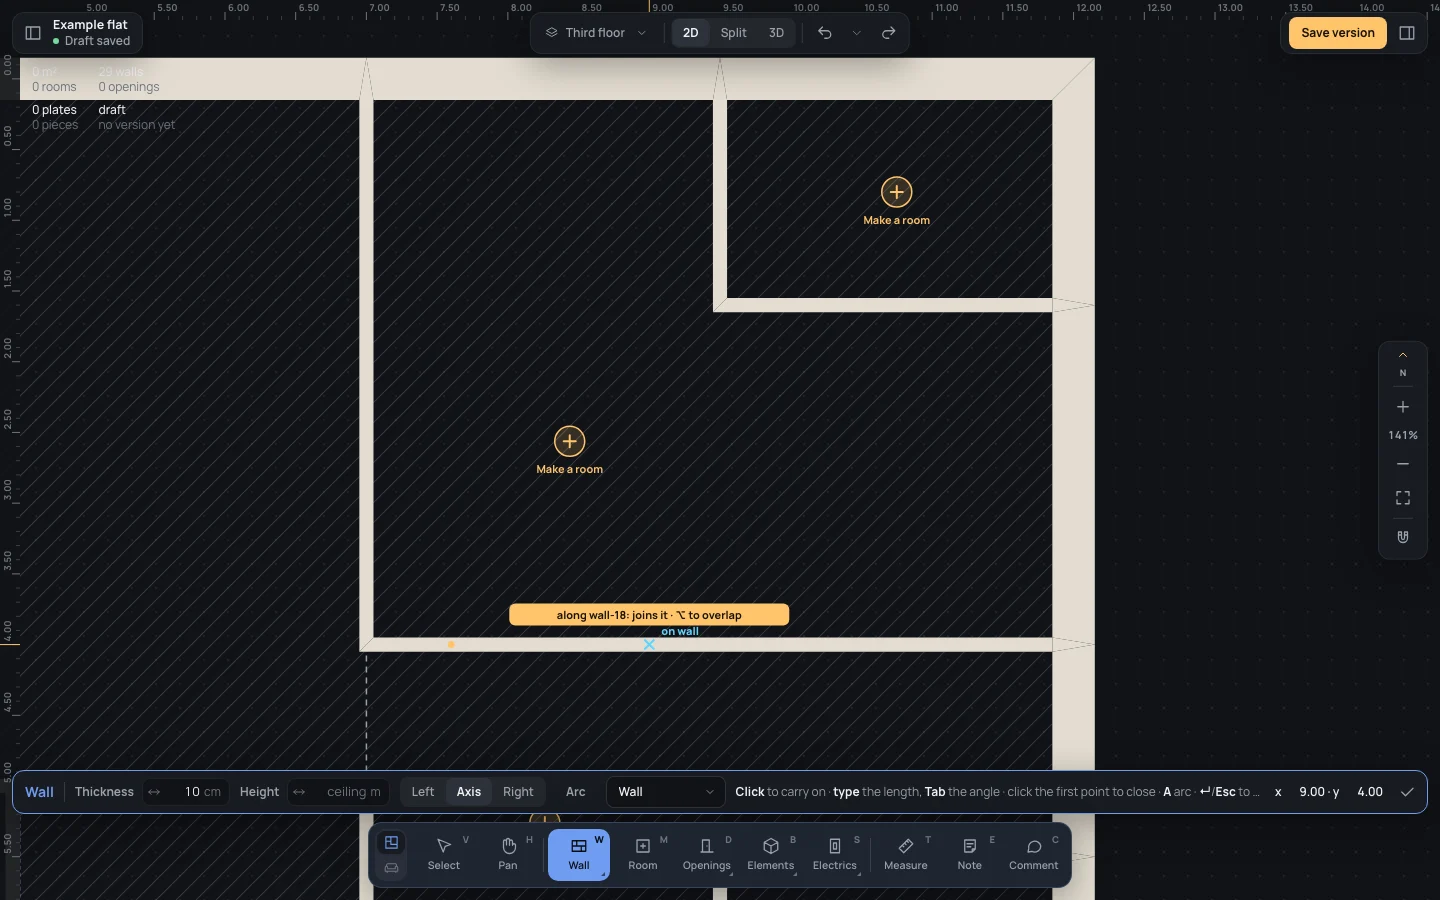
Section titled “Going along a wall”If the wall you are drawing runs over a wall already there, the label says so in amber, along wall-18: joins it · ⌥Alt to overlap: a click ends the chain where it meets that wall, joined to it, and a new chain starts from that wall’s end. When it would run into a wall instead, the label says stops against … and a click places nothing there. Hold ⌥Alt to draw over the wall on purpose. This works with Follow: Axis and for straight pieces only.
Magnetic walls
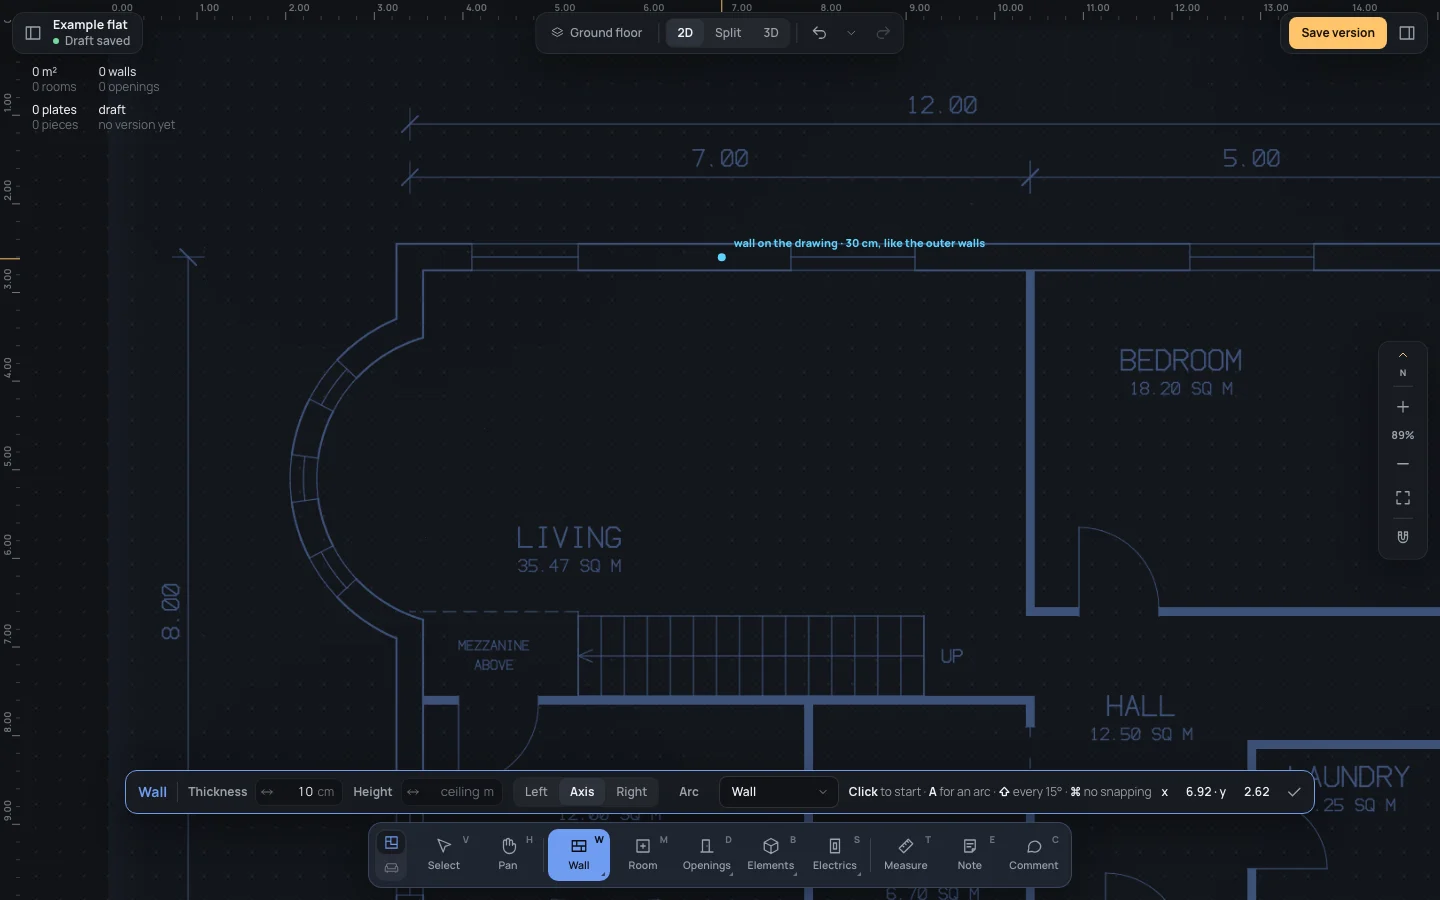
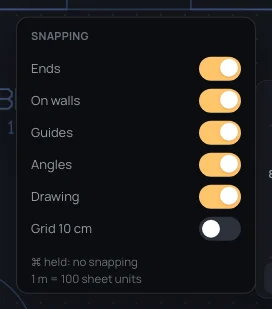
Section titled “Magnetic walls”With a drawing under the plan (The drawing), the pointer is caught by the walls the drawing shows, on their centre line, with their thickness: wall on the drawing · 30 cm, like the outer walls. A wall running along a wall of the drawing takes its thickness, wherever its end lands (on the end of a wall already drawn, or a length typed with the pointer over a door), and so does an arc bent onto a curved wall; only when it is one of the house’s (outer or inner): otherwise the label says not one of the house’s thicknesses, the chosen one stays, and the wall keeps the bar’s. Only with Follow: Axis. To turn it off, switch Drawing off in the snapping switches: Snapping, the magnet at the bottom of the zoom column on the right.
Keys inside it
Section titled “Keys inside it”- ↵↵: puts the corner at the typed length; with nothing typed, ends the chain.
- EscEsc: clears what you typed; then ends the chain, keeping the walls; with nothing drawn, back to Select.
- ⌫⌫: takes back the last character typed, or else the last corner.
- AA: arcs on or off.
- TabTab: between the length and the angle.
- Held while the pointer moves: ⇧Shift every 15°, ⌘Ctrl no snapping, ⌥Alt over a wall already there, ␣␣ to move the view.
What it snaps to
Section titled “What it snaps to”Within 10 pixels of the pointer, in this order: a wall’s end (or a corner of the chain), a wall’s middle, the perpendicular from the last corner, a point on wall, the alignment with ends already there (aligned, a dashed guide), a wall of the drawing, the angle from the last corner (every 45°, every 15° with ⇧Shift), the grid. The mark’s shape and its word say which: a square for an end, a triangle for a middle, a cross on a wall, a dot for the rest. Each kind is switched on and off in the snapping switches; the grid is off until you turn it on, at the step of your settings (10 cm unless you change it). ⌘Ctrl held turns all of them off. More in Snapping.
What it refuses
Section titled “What it refuses”- A thickness or height out of its limits, or not a length: the field turns red and says why, Between 0.02 m and 1.00 m. or Type a length, for example 30 or 2.40., and keeps the one before.
- A wall shorter than 1 cm is not made.
- A click that would run the wall into another one (stops against …) places no corner.

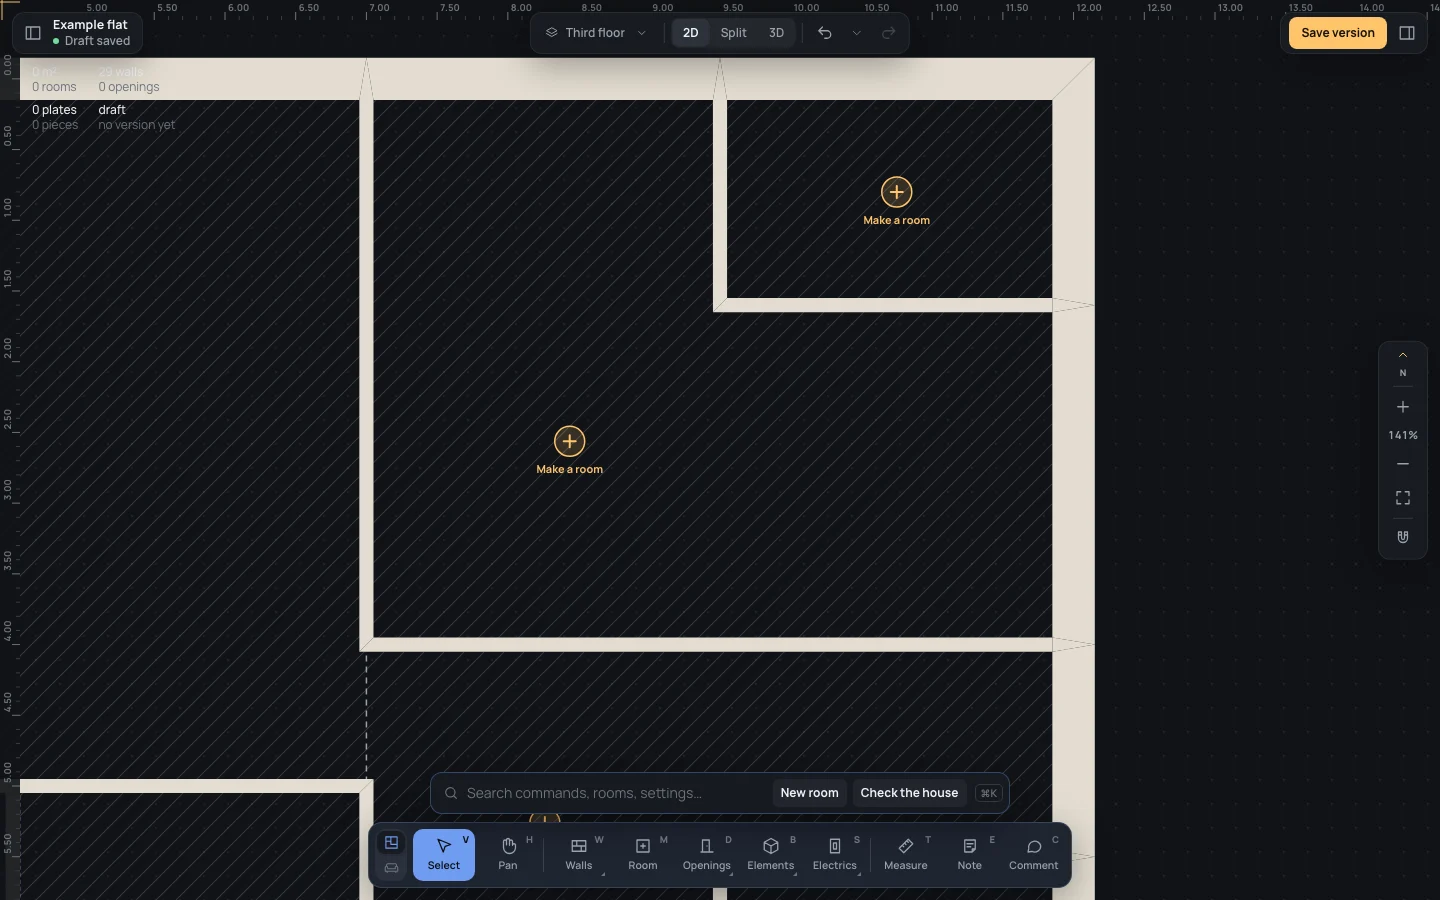
The tool stays on, ready for the next chain; nothing is selected. Where the walls close a region, the plan offers Make a room there (Room). EscEsc with no chain, or Done, goes back to Select, where a wall is selected, dragged, bent or typed (Editing walls).
Example: a walk-in wardrobe in the bedroom
Section titled “Example: a walk-in wardrobe in the bedroom”On the bare example flat, close the bedroom’s north-east corner with two 10 cm walls: 1.60 m south from the middle of the north wall, then 2.50 m east to the outer wall.
- Press WW. In the bar, Thickness 10 cm, Follow Axis, Wall.
- Move onto the bedroom’s north wall until the mark says middle (x 9.50) and click.
- Move the pointer south, type Length
1.60and press ↵↵. - Move the pointer east, type Length
2.50and press ↵↵: the wall ends on the east wall’s centre line. - Press EscEsc to end the chain, and again to go back to Select.
If something goes wrong
Section titled “If something goes wrong”- A corner in the wrong place while drawing: ⌫⌫ takes it back.
- The whole chain is wrong: ⌘ZCtrl+Z takes back its walls, one step.
- The wall came out beside your clicks, not on them: Follow was on Left or Right; set Axis.
- The pointer won’t go where you want: a snap is pulling it; hold ⌘Ctrl, or zoom in (snapping reaches 10 pixels at any zoom).
- Typing does nothing: a length is typed only after the first corner.
See also
Section titled “See also”- Rectangle: four walls and a room in one gesture. Split: a wall in two.
- Editing walls: moving, bending, joining walls; the wall’s inspector.
- Snapping and Numbers: what the pointer catches, how lengths are typed.
- The drawing: tracing over a scanned plan.