

Place
Place is how a product of the catalogue gets into the home from the keyboard: it opens the search on the Catalogue, you find the product, choose its options and its room, and drag it onto the plan.
Picking it
Section titled “Picking it”- Place in Furnish’s dock (from the catalogue), or II. It is Furnish’s own: the key does nothing in Structure.
- In Furnish, the bar above the dock (Search the catalogue: “3-seat sofa”, “Bosch fridge”…) opens the same search.
Only who can edit the project places products: a viewer’s dock has no Place.
Using it
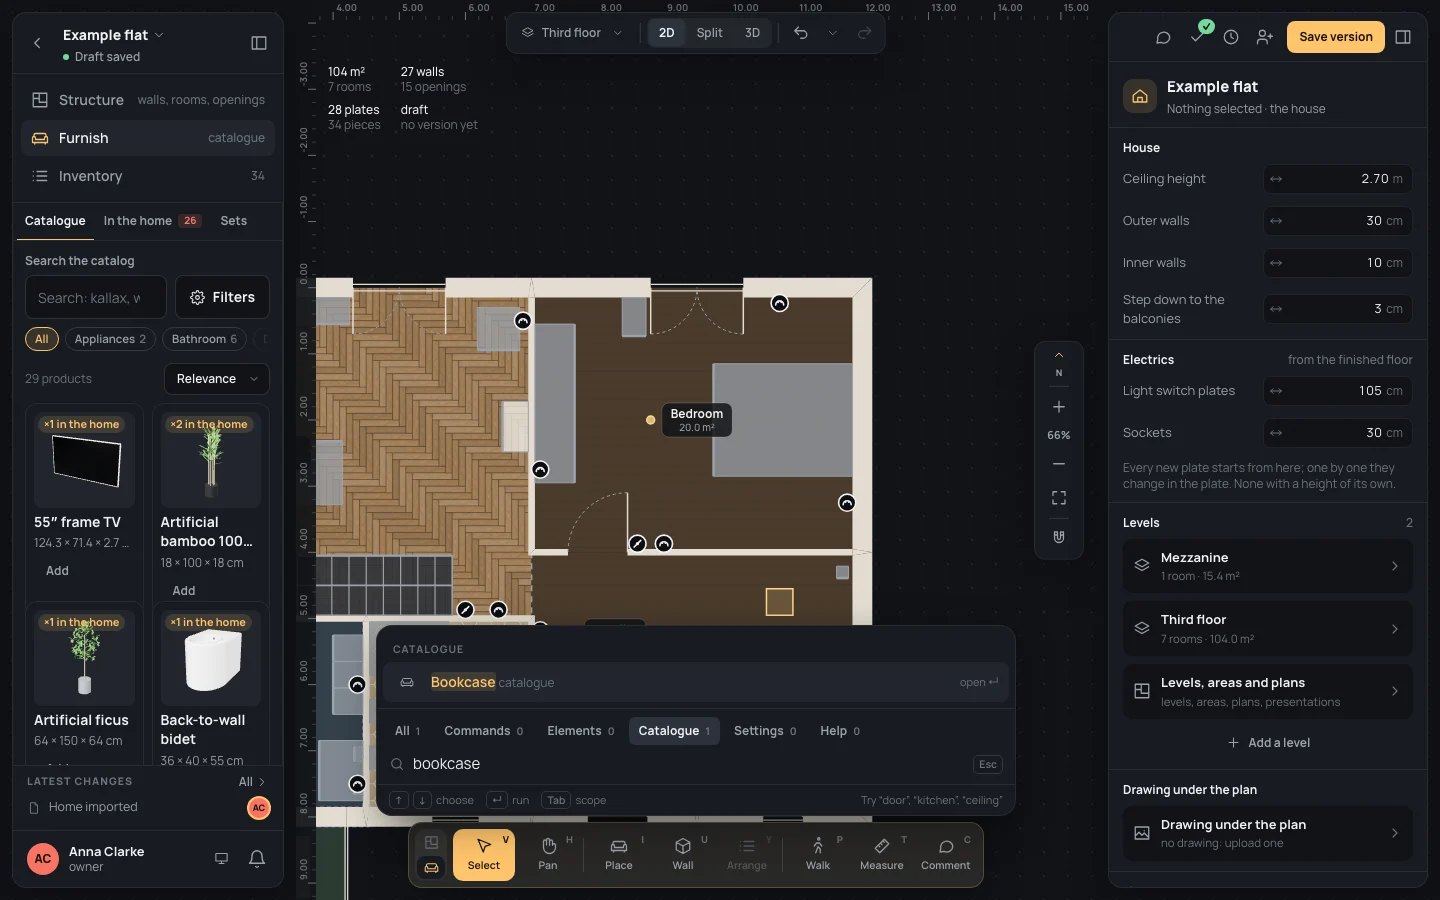
Section titled “Using it”- Press II. The search opens on its Catalogue scope.
- Type the product’s name, its maker or what it is: bookcase, sofa bed, lamp. Each result says catalogue, after its maker when it has one. ↓↓ and ↑↑ move through them; TabTab changes scope.
- Press ↵↵ (or click it) to open it: its sheet opens in the catalogue beside the plan.
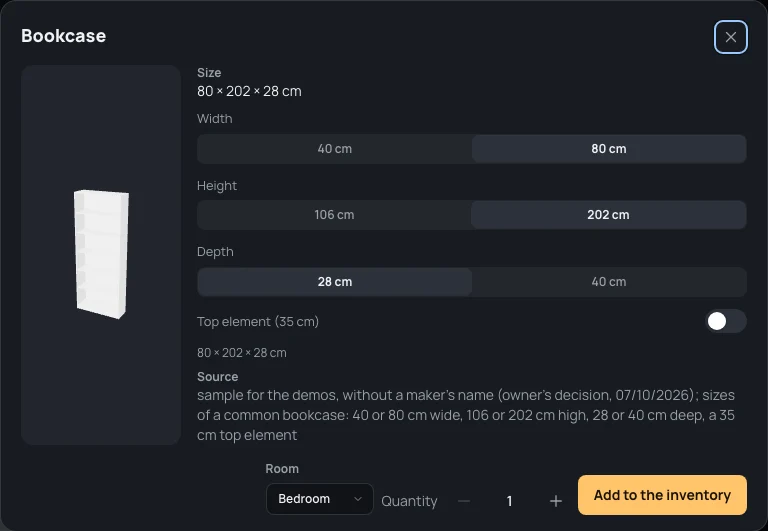
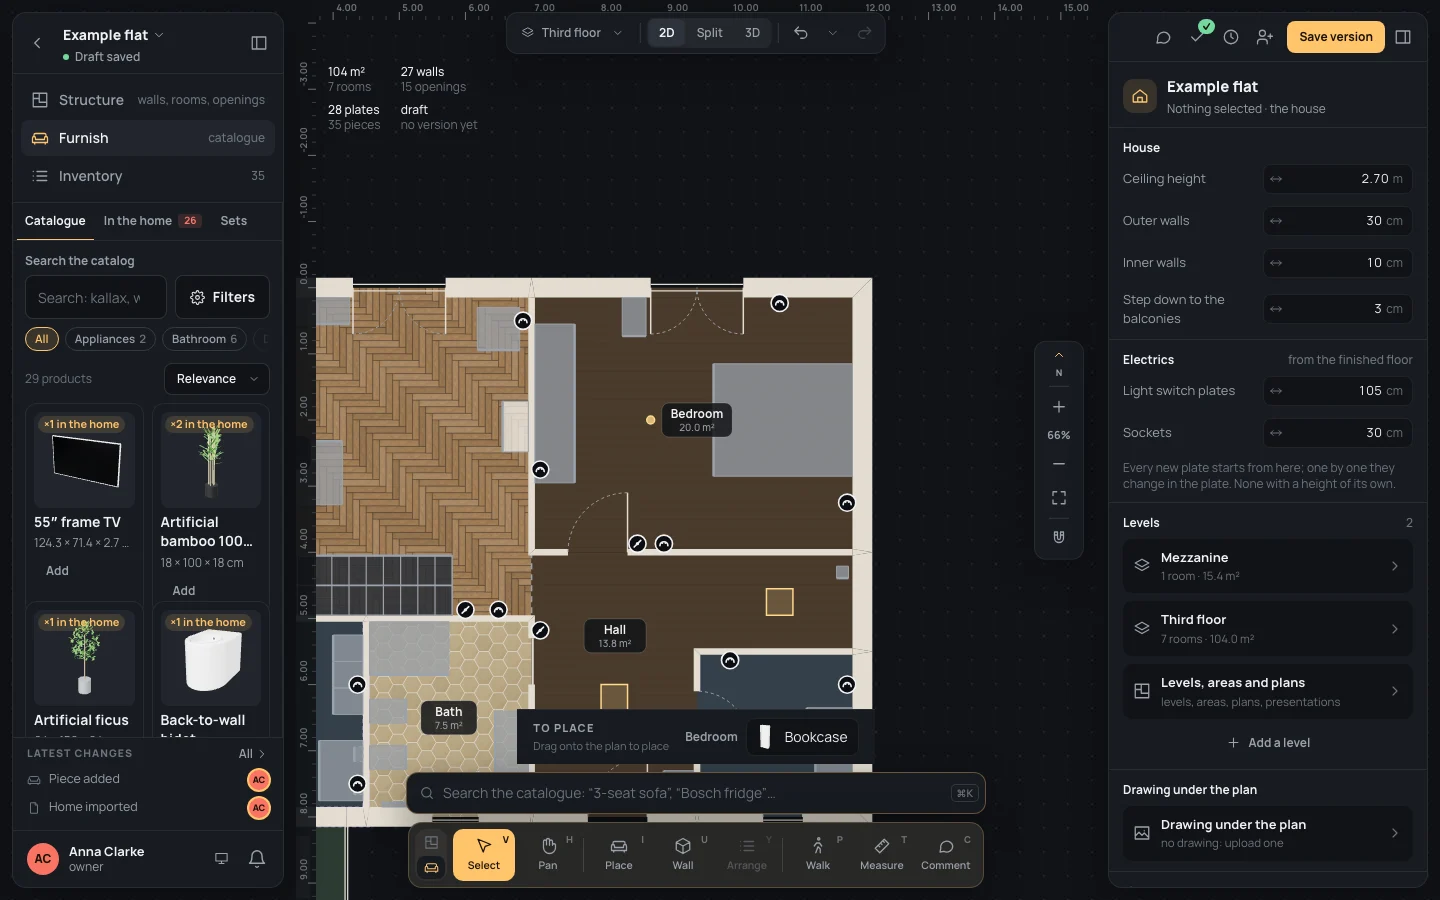
- On the sheet, choose its options (sizes, finishes…), its Room and Quantity (1 to 50), then Add to the inventory. It goes in the home, not yet on the plan: the strip To place, at the bottom of the plan, holds it.
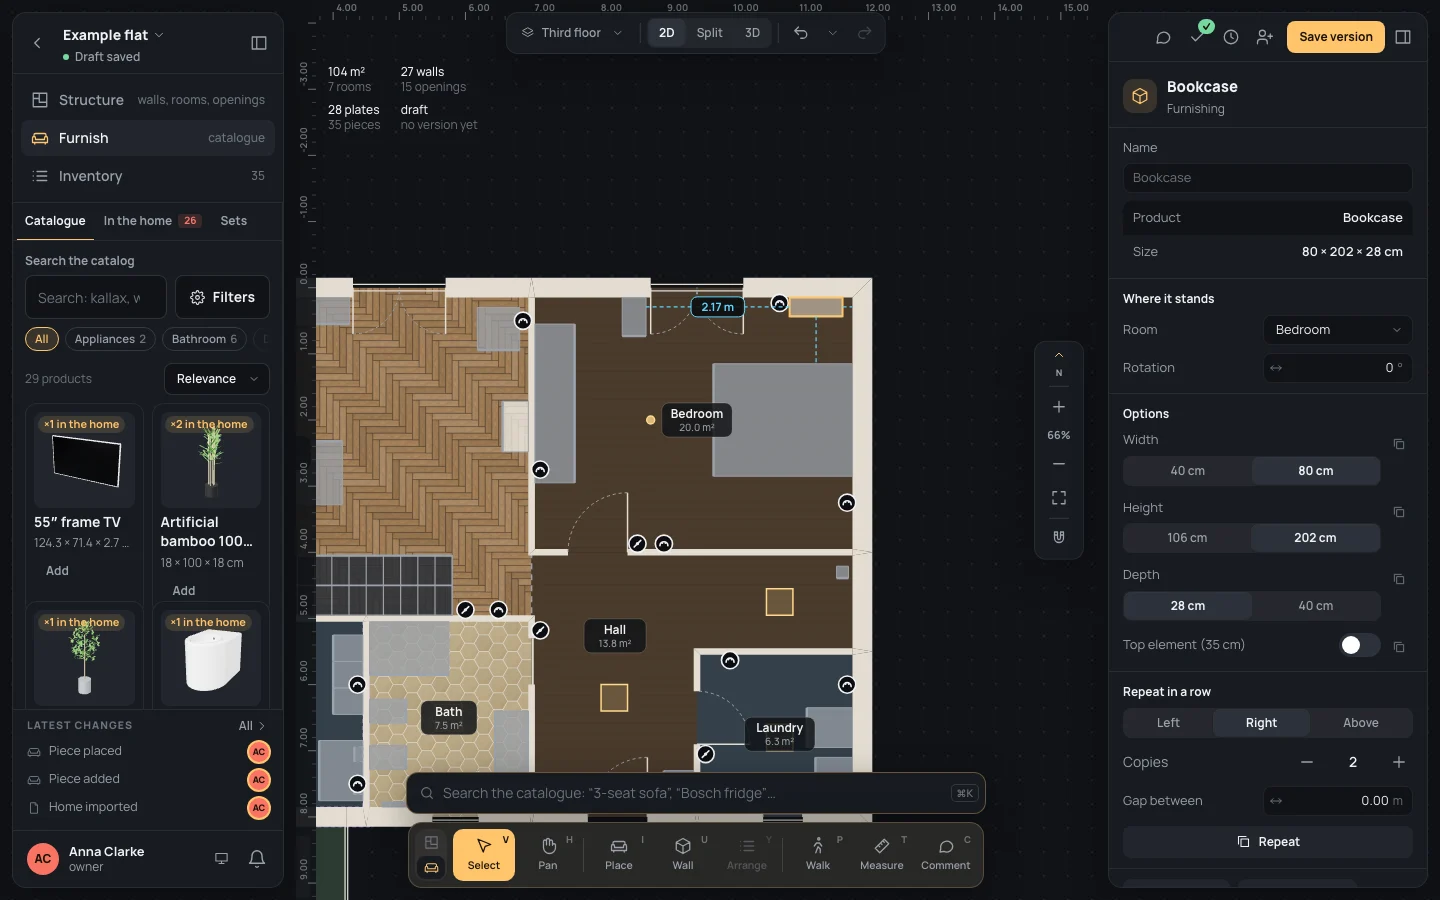
- Drag it from To place onto the plan. While it moves over the plan, the plan shows where it would stand; release where it goes. It is placed and selected.
Quicker, with the options it starts with: drag a product’s card straight from the catalogue panel onto the plan, or click its Add to send it to To place.
Where it stands
Section titled “Where it stands”Where you release it decides how it stands, by how the product is mounted:
- something that stands on the floor, released near a wall (within 30 cm of its face), turns its back to the wall and stands against it; elsewhere it stands where it was released, square to the sheet;
- something that hangs on a wall slides on the face under the pointer (within 60 cm), its middle at 1.50 m;
- something that hangs from the ceiling hangs where it was released; something that goes on a surface lands on the piece under it.
It belongs to the room it was released in, unless it already had one. Turning, moving and the rest of the piece’s inspector: Placing furniture.
Keys inside it
Section titled “Keys inside it”The search’s own keys work while it is open: ↓↓ ↑↑ to choose, ↵↵ to open, TabTab for the next scope, EscEsc to close. With a piece placed and selected, RR turns it 90°, ⇧RShift+R 15°.
What it snaps to
Section titled “What it snaps to”A product dragged onto the plan catches the walls’ faces, as above. Moving it afterwards with Select snaps as pieces do: Placing furniture.
What it refuses
Section titled “What it refuses”- Released outside the plan (on a panel, outside the window), the piece is let go: nothing is placed, and it stays in To place.
- Nothing in the catalogue for the words typed: the search says Nothing for “…”. Try fewer words, or All (TabTab).
Adding it is one step (Piece added), placing it another (Piece placed); a card dragged straight onto the plan is one step. The piece is in the inventory, in the 3D and in the In the home tab of the catalogue.
Example: a bookcase in the bedroom
Section titled “Example: a bookcase in the bedroom”On the finished example flat, in Furnish:
- Press II and type Search
bookcase. - Press ↵↵. On the sheet, set Room to Bedroom and leave the rest as it is: 80 × 202 × 28 cm.
- Add to the inventory.
- Drag Bookcase from To place to the bedroom’s north wall, between the window and the east corner, and release: it stands with its back against the wall.
If something goes wrong
Section titled “If something goes wrong”- The wrong product, or added twice: ⌘ZCtrl+Z, or select the piece and delete it.
- It stood away from the wall: it was released more than 30 cm from it. Drag it nearer, or see Placing furniture.
- II does nothing: you are in Structure. Switch to Furnish.
See also
Section titled “See also”- The catalogue: searching, categories, filters, the product’s sheet.
- Placing furniture: how pieces stand, the tray, the piece’s inspector.
- What fits: only the products that fit a space traced on the plan.