

Compose a wall
The Wall tool of Furnish composes a wall: a click on one side of a wall opens its Composition, the wall seen from the room, to scale, where what hangs on it (wall cabinets, pictures, a TV, a mirror) is dragged into place and lined up. It is the wall’s elevation, for furniture.
Picking it
Section titled “Picking it”- Wall in Furnish’s dock (compose on a wall), or UU. It is Furnish’s own.
- With a piece that hangs on a wall selected, Compose the wall in its inspector opens that wall’s composition straight away.
- The search (⌘KCtrl+K): type Wall.
Only who can edit the project composes walls.
Using it
Section titled “Using it”- Pick the tool. The bar says Click a wall’s face to compose it: its elevation opens with the pieces.
- Click a wall on the side you want to compose, near its face: the side of its axis you click is the side you get.
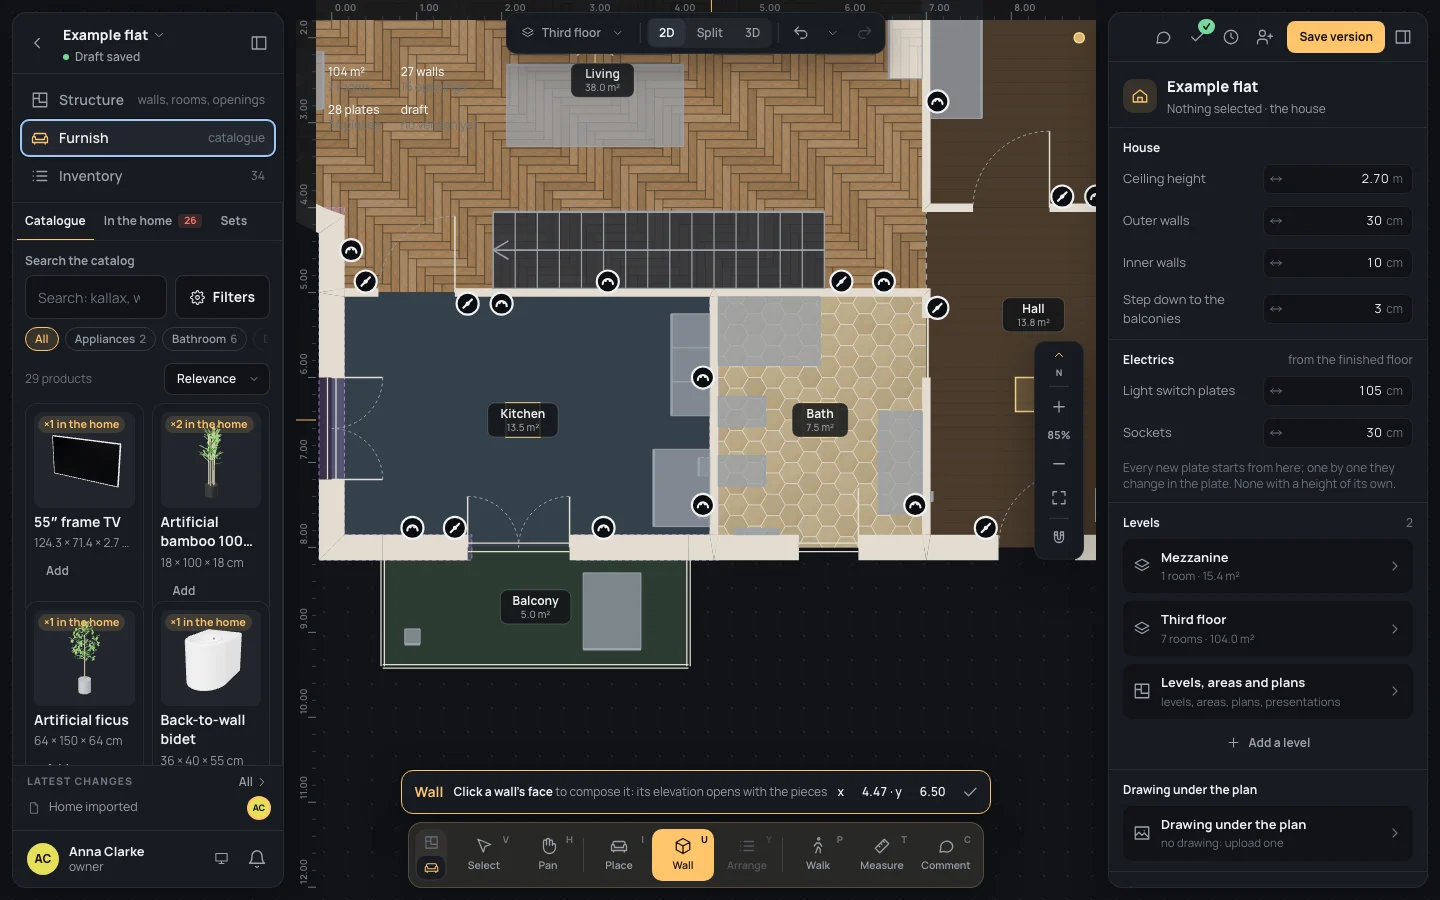
- The Composition opens, titled with the wall (Wall wall-21): the face seen from the room, the tool back to Select.
The composition
Section titled “The composition”The face is drawn to scale, its left as you see it from the room:
- its openings, as holes;
- the pieces standing in front of it (within 60 cm of the face), faint and dashed: shown to hang things over them, not moved here;
- the pieces hanging on it, in their colours: these are the ones you move.
Dragging a piece
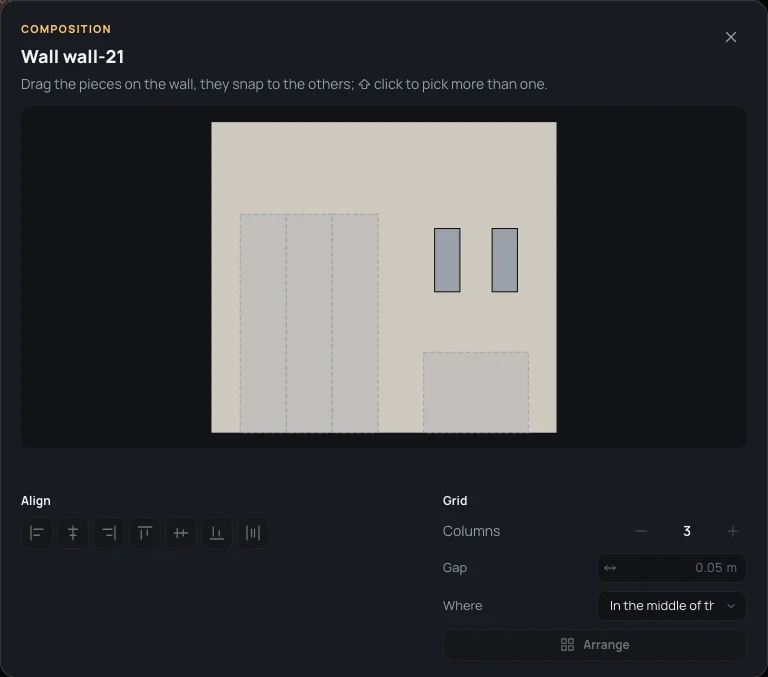
Section titled “Dragging a piece”Drag a hanging piece where it goes. It snaps (within a few pixels) to the lines it meets, drawn in cyan while it moves:
- across: its left, middle or right on another hanging piece’s, an opening’s or a piece in front’s, and on the wall’s ends and middle;
- up and down: its bottom, middle or top on the other pieces’, on sills and heads, on the tops of what stands in front, and its middle at 1.50 m, the height pictures hang at.
Under the face, the piece picked says where it is: 1.94 m from the left edge · 1.23 m from the floor. Each drag is one step in the history (Piece moved).
Picking several
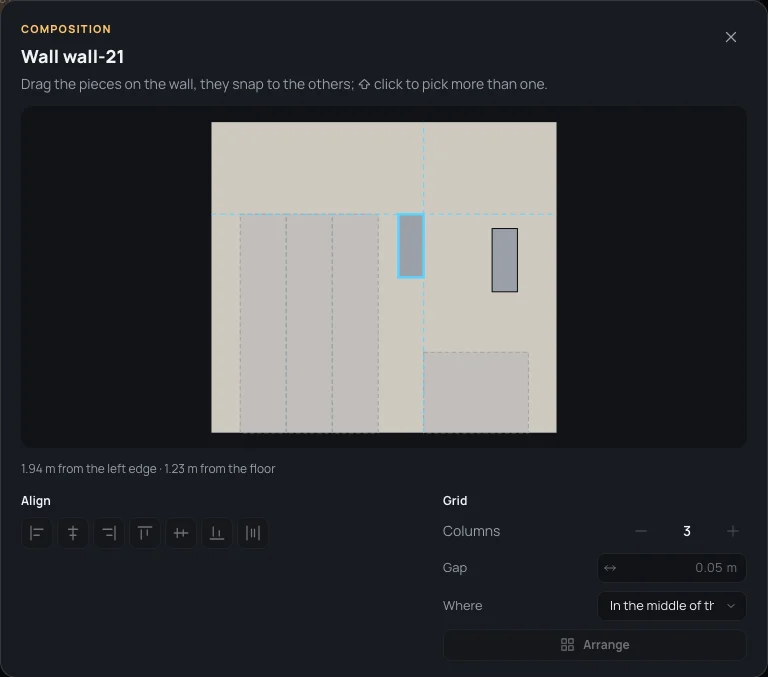
Section titled “Picking several”A click picks a piece; ⇧Shift + click adds one or takes it away. A click on the empty face picks none. What you pick here is the editor’s selection: the plan shows it too.
Six buttons line the picked pieces up on the box round them all: Left, Centre, Right, Top, Middle, Bottom. Two pieces at least. One step (Wall pieces aligned).
Equal gaps
Section titled “Equal gaps”Equal gaps spreads three pieces or more across the face so the spaces between them are the same, the two at the ends staying where they are. One step (Wall pieces distributed).
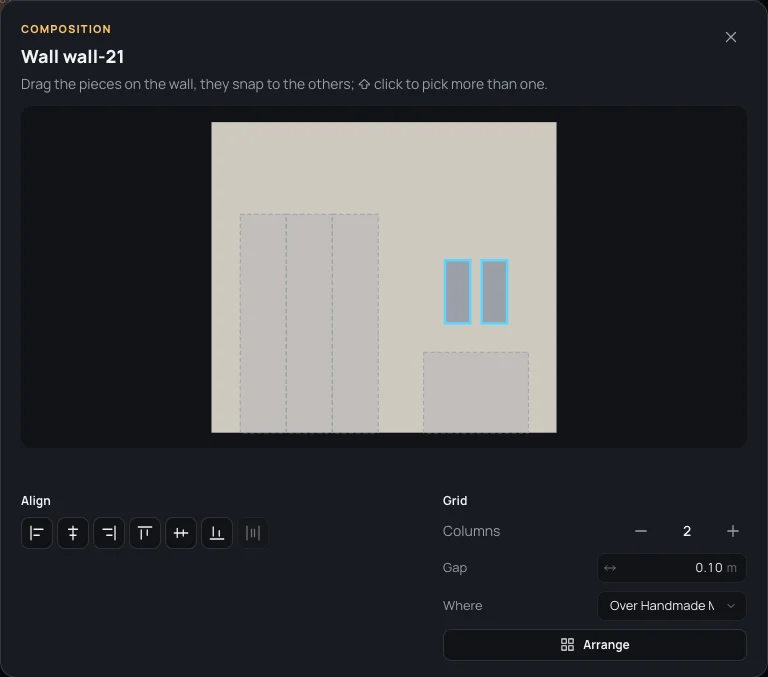
The picked pieces (two at least) laid out in rows, read as they hang: the top row first, left to right.
- Columns: how many in a row, 1 to 12 (3 to start with).
- Gap: the space between them, across and down (5 cm to start with). Not a length, or below zero: Type a length, for example 30 or 2.40.
- Where: In the middle of the wall (the grid centred on the wall, its middle at 1.50 m), or Over each piece standing in front (the grid centred on it, 25 cm above its top).
- Arrange lays them out. Each row is centred. One step (Wall pieces in a grid).
Keys inside it
Section titled “Keys inside it”- ⇧Shift + click: pick more than one.
- EscEsc, or the ✕ in the composition’s corner, closes it.
- Before the click on a wall, EscEsc or Done (✓) in the bar takes you back to Select.
- ⌘ZCtrl+Z works once the composition is closed: each change made in it is one step.
What it snaps to
Section titled “What it snaps to”The tool takes the face nearest to the click, within the wall’s half thickness and a few pixels more. In the composition, a dragged piece snaps as above.
What it refuses
Section titled “What it refuses”- A click away from every wall opens nothing: the tool stays on.
- Railings and separators have no face to compose: a click on them opens nothing.
- Align and Grid stay greyed out with fewer than two pieces picked on this face, Equal gaps with fewer than three.
- Only what hangs on the wall moves here. What stands in front is moved on the plan, and lined up with Arrange.
Example: the kitchen’s wall cabinets
Section titled “Example: the kitchen’s wall cabinets”On the finished example flat, the kitchen’s east wall (the one it shares with the bath, at x 4.50) has two glass-door wall cabinets, with three tall cabinets and a drawer unit standing in front.
- In Furnish, press UU.
- Click the wall at x 4.50, a little to its left (the kitchen’s side), round y 6.50. The composition opens.
- Click the first wall cabinet, then ⇧Shift + click the second.
- Under Grid: Columns 2, Gap Gap
10 cm, Where Over Handmade MDF drawer unit. - Arrange: the two cabinets hang side by side, 10 cm apart, centred over the drawer unit and 25 cm above it.
If something goes wrong
Section titled “If something goes wrong”- The other side of the wall opened (the bath’s, in the example): close it and click again on the other side of the wall’s axis.
- A piece moved by mistake: close the composition and press ⌘ZCtrl+Z.
- A piece isn’t in the composition: it doesn’t hang on this face. A piece that stands on the floor shows only as dashed in front, if it is within 60 cm.
See also
Section titled “See also”- Arranging furniture: align, distribute, repeat, compose a wall, as tasks.
- Arrange: lining up pieces on the floor.
- Placing furniture: hanging a piece on a wall in the first place.