

Rooms
Walls make spaces; a room gives one a name. Its floor, its measures, the paint on its walls and how the home dashboard shows it all belong to the room. It has no walls of its own: it fills the space its walls close, and follows them when they move.
Making one
Section titled “Making one”Where walls close a space with no room in it, the plan hatches it with a +. Click it with the Room tool (MM), or right click it and choose Make a room here: the room is made, named Room 1 (the next number), and its Name is ready to type.
A space the walls leave open makes no room: close it first, or the right-click item is greyed.
Its inspector
Section titled “Its inspector”Select a room (a click on it with Select, or its row in the outline). The heading says its name and its floor (Room · Herringbone oak, or Room · no floor); three tabs follow: General, Finishes, Views.
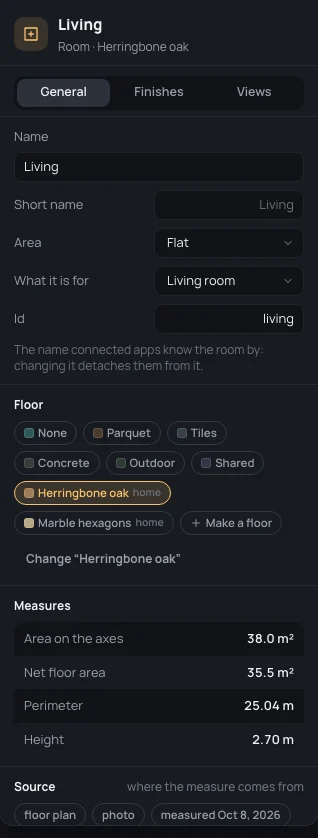
General
Section titled “General”- Name: the room’s name, as you write it (it isn’t translated). It can’t be empty (Give it a name.).
- Short name: where space is tight; empty, the name is used.
- Area: which of the house’s areas the room belongs to (the flat, a garage, a cellar). A choice that would leave a presentation impossible to show is refused, and says why (Stairs and levels).
- What it is for: Living room, Bedroom, Kitchen, Bathroom, Balcony or terrace and the rest, or Not said. The minimum sockets the norm asks for (CEI 64-8) go by it (Checking the home).
- Id: the name connected apps know the room by. Changing it detaches them from it, so change it only on purpose. No spaces, and no two rooms with the same one (No spaces., Another room already has this id.).
- Floor: the same chips as in Finishes, below.
- Measures, read: Area on the axes (inside the walls’ centre lines), Net floor area (inside their faces), Perimeter and Height (the plan’s ceiling). They follow the walls.
- Source: where its measures come from (Measures and notes).
Two warnings can sit at the top, in red: The walls don’t close this room. (a wall around it was moved or deleted: close the space again) and The rooms «…» take up the same space. (two rooms claim one space: delete one).
On the example: select the Living. Its measures read 38.0 m² on the axes, 35.5 m² net, 25.04 m of perimeter and 2.70 m high. Give it a short name for the dashboard:
Short nameLiv
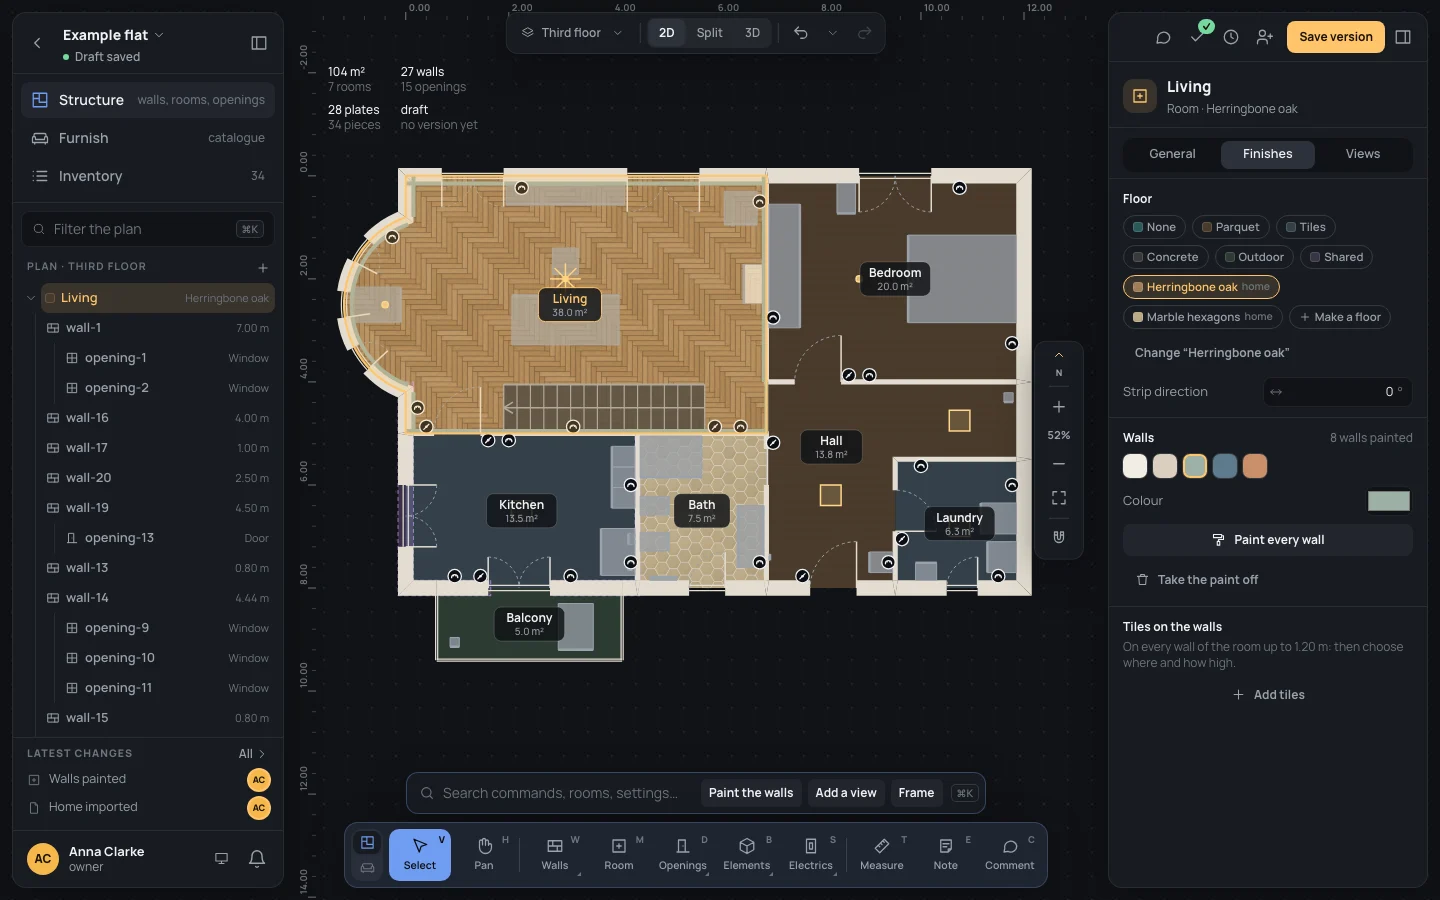
Finishes
Section titled “Finishes”- Floor: None, one of Blupinta’s kinds (Parquet, Tiles, Concrete, Outdoor, Shared), the home’s own floors (tagged home) and your kits (your kit), each with its swatch, then Make a floor. A floor of the home’s own can be changed from here (Change “Herringbone oak”). Until it has a floor, the room keeps its own colour on the plan. Floors and kits have their own page: Floors and kits.
- Strip direction, for parquet and the home’s own floors: the angle of the strips, from 0 to 180°, typed or dragged.
- Walls, the paint on the room’s walls: five colours (Warm white, Sand, Sage, Dusty blue, Clay), and once the walls are painted, a sixth square that opens your system’s colour picker, for any other. The first colour chosen paints every wall around the room; after that, a colour changes the faces already painted. Paint every wall puts every face of the room in its paint, Take the paint off removes it; the group’s note says how many are painted (8 walls painted). One face at a time is painted or left white from the wall’s Faces tab (Editing walls).
On the example: in the Living’s Finishes, click Sage: its eight walls are painted, and the 3D shows them.
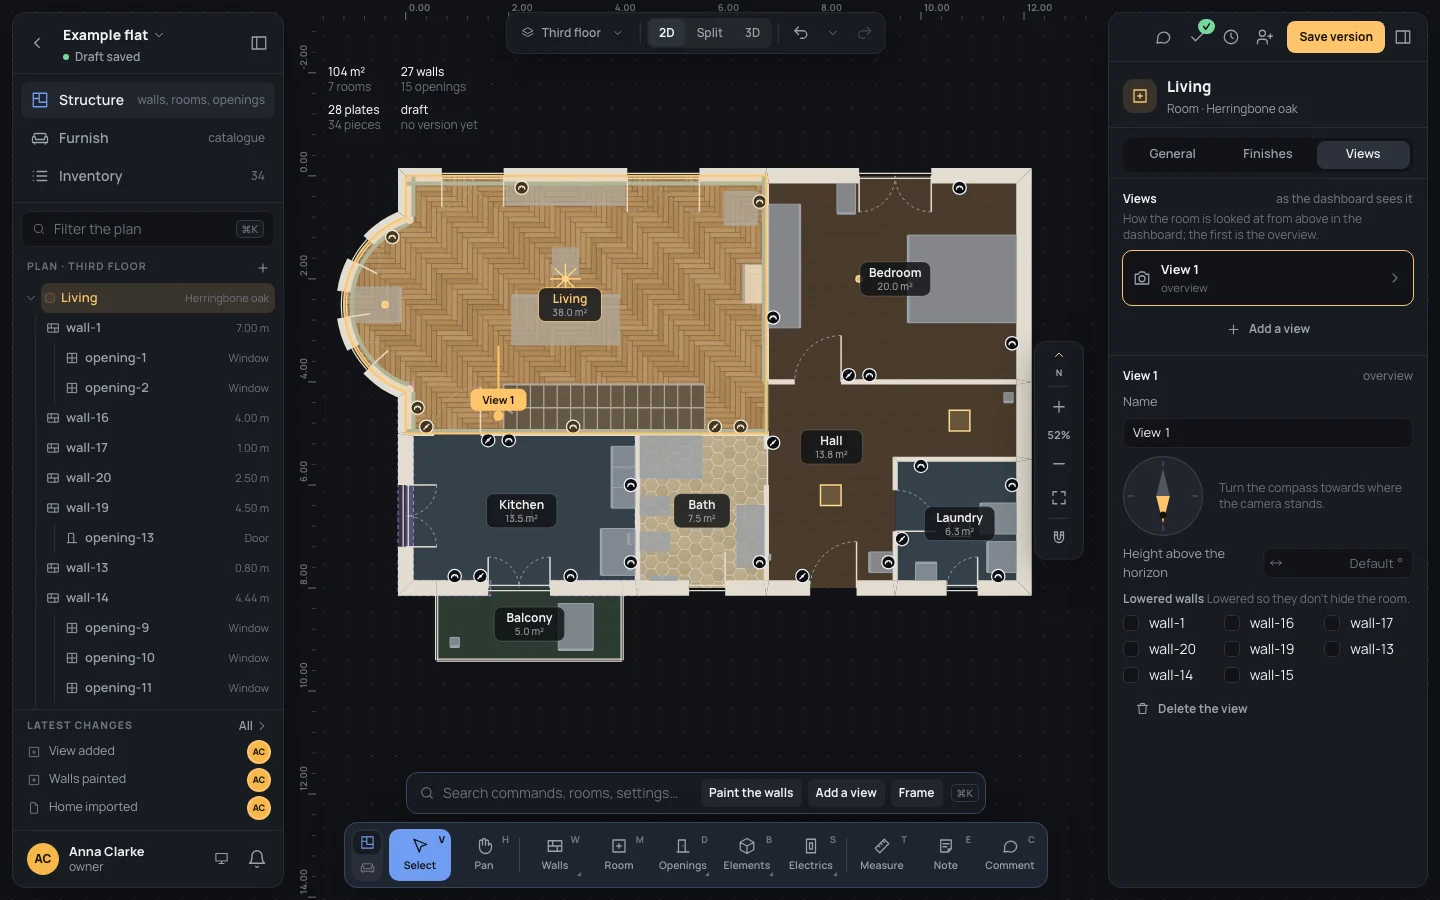
How the home dashboard looks at the room from above. Views · as the dashboard sees it lists them; the first is the overview, the one the dashboard opens with. With none, No views: the dashboard shows it from the south.
- Add a view (here, in the room’s right-click menu, or among the command bar’s suggestions) adds View 1, and opens it.
- Name: what the dashboard calls it.
- Looking from: turn the compass towards where the camera stands; the plan shows the view as it turns, and the release is one step. On the compass, ←←or→→ turn it 1°, 15° with ⇧Shift.
- Height above the horizon: from 1 to 90 degrees; empty, the dashboard’s own.
- Lowered walls: tick the walls around the room to lower in this view, so they don’t hide the room.
Make it the overview moves a view to the top of the list; Delete the view deletes it.
Its right-click menu
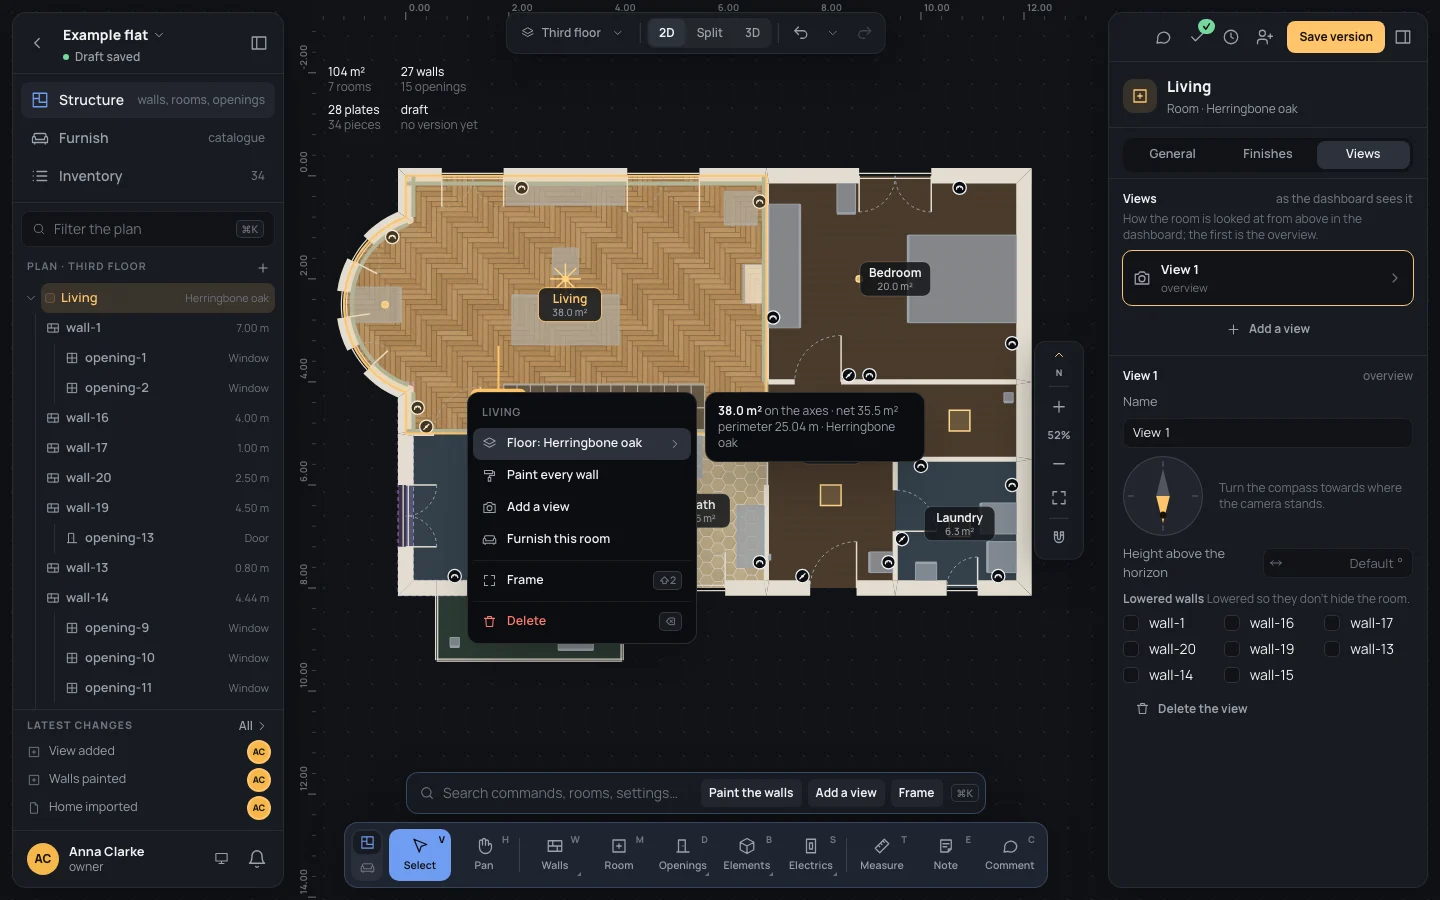
Section titled “Its right-click menu”Right click a room: the menu has its name as its title and, beside it, a card with its area on the axes, its net area, its perimeter and its floor.
- Floor: Herringbone oak opens the floors, ticked on the room’s, with Make a floor… at the end.
- Paint every wall and Add a view, as in the inspector.
- Furnish this room takes you to the Furnish workspace, to put furniture in it.
- Frame and Delete. Deleting a room leaves its walls, and the furniture in it, which then belongs to no room (No room in the inventory).
What can go wrong
Section titled “What can go wrong”- The walls don’t close this room: a wall around it moved, or was deleted. Close the space again: the room finds it by itself.
- The id is refused: it has a space, or another room has it.
- The dashboard lost a room: its id was changed. Put the old one back, or connect the dashboard again.
- Every change here is a step: ⌘ZCtrl+Z takes it back.
See also
Section titled “See also”- The Room tool.
- Floors and kits.
- Checking the home: the sockets each room should have, by what it is for.