

Door
The Door tool puts a door in a wall: move over the wall and its stretch lights up with the distances to what is beside it, click and it is there. Window and French window work the same way: this page explains the bar and the gesture they share.
Picking it
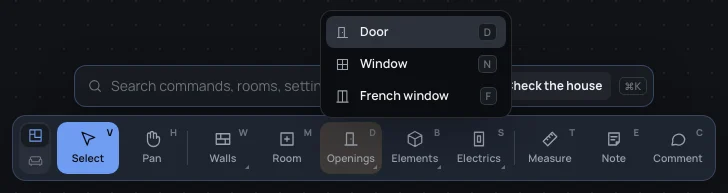
Section titled “Picking it”- Openings in the dock: a click opens the group, with Door, Window and French window. The group’s button then shows the last one picked.
- DD picks it at once, NN the window, FF the French window.
- With one wall selected, the command bar suggests Add a door. The right click on a wall offers Add a door here and Add a window here: they pick the tool, then you click where it goes.
- The search (⌘KCtrl+K): type Door.
The bar
Section titled “The bar”While the tool is on, the bar above the dock is New openings:

- Type: No type, then the house’s types of doors (in the example flat Interior door, Pocket sliding door, Entrance door). A door of a type comes with its parts and its size, and changes when its type changes (Opening types). Choosing a type sets the width to the type’s. The chips are there only when the house has types of that kind.
- Width, in centimetres: 70, 80 or 90 for a door. It starts at 80 and keeps the last one chosen for the next doors. Another width is typed in the door afterwards, in the inspector.
Each tool starts on the house’s type for it: The tools’ starting type, in the house’s To start with (in the example flat, Interior door). Changing it there changes the bar too.
The door’s height comes from its type; with No type, a door is 2.10 m high on the floor (Sill 0.00 m, Head 2.10 m).
Using it
Section titled “Using it”- Pick the tool and choose the type and width in the bar.
- Move over a wall. The stretch the door would take lights up in amber, centred on the pointer, with its width over it and, on each side, the distance from its edge to what is next to it: the wall’s end or the next opening.
- Click. The door is placed there and selected; the tool stays on for the next one.
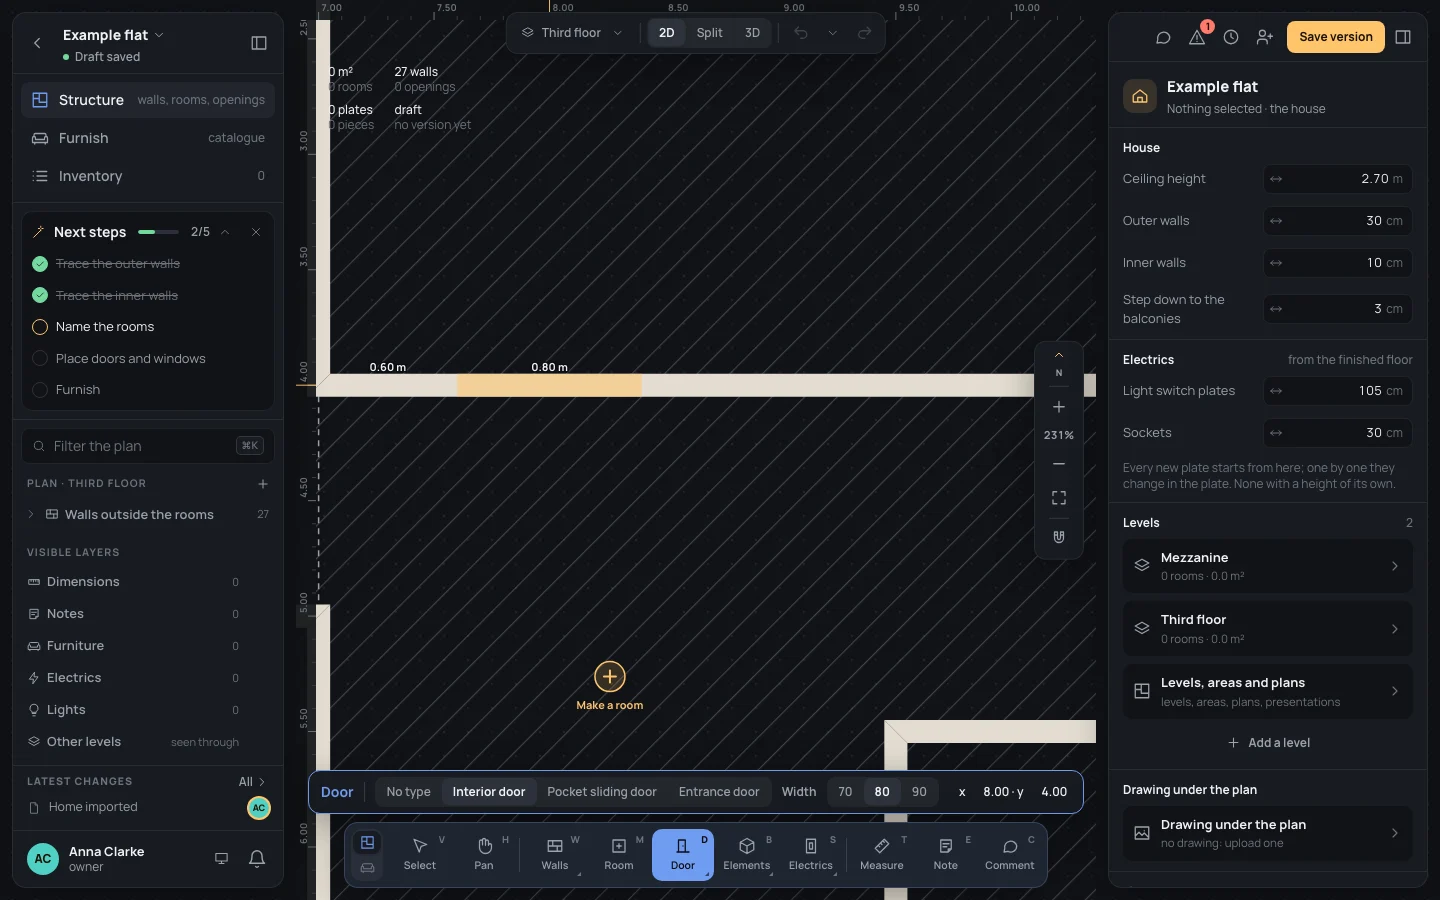
Distances are measured along the wall’s centre line, from its ends (the corners where the axes meet). The bar’s hint says it too: Move over a wall: see where the door falls and its distances · click to place it.
Keys inside it
Section titled “Keys inside it”- EscEsc or Done (✓) in the bar: back to Select.
- ␣␣ held: move the view; ⌘Ctrl with the wheel: zoom. Zooming in makes the placing finer.
- NN and FF switch to the other openings, keeping each tool’s own type and width.
What it snaps to
Section titled “What it snaps to”Within 10 pixels on screen, the opening’s stretch catches:
- its middle on the wall’s middle;
- its edges on the wall’s ends;
- its edges on the edges of the openings already in that wall, so two openings can stand side by side.
It always stays inside the wall. The snapping switches of the status bar and ⌘Ctrl don’t change it.
What it refuses
Section titled “What it refuses”When the door doesn’t fit, its stretch turns red and a click doesn’t place it but says why:
- It overlaps another opening: move along the wall.
- The wall is shorter than this opening: choose a smaller width above.
Railings and separators take no openings: over them nothing lights up and a click does nothing.
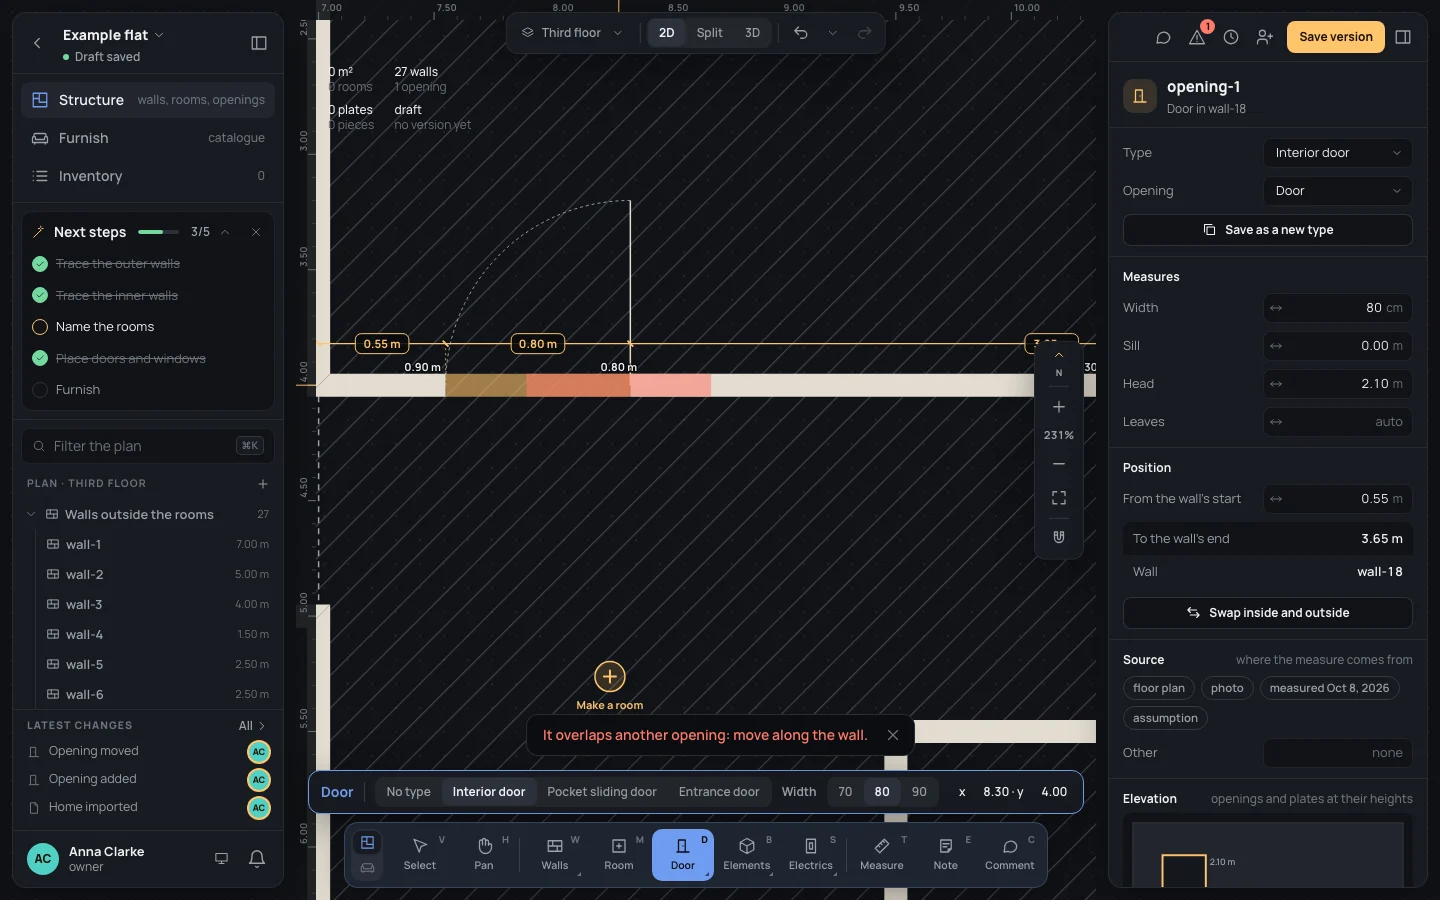
The door is selected: the inspector shows its Type, Width, Sill, Head, Leaves and From the wall’s start, and the plan its distances, which you can type. Drag it with Select to slide it along the wall. Which side it opens to and where its hinges are: Openings. Each door is one step in the history (Opening added).
Example: the bedroom’s door
Section titled “Example: the bedroom’s door”On the bare example flat, the bedroom’s door is in the wall between the bedroom and the hall (the one at y 4.00, from x 7.00 to 12.00), 0.55 m from its west end.
- Press DD. In the bar, Interior door and width 80.
- Move over the wall between the bedroom and the hall, near its west end, and click.
- In the inspector, type From the wall’s start
0.55and press ↵↵.
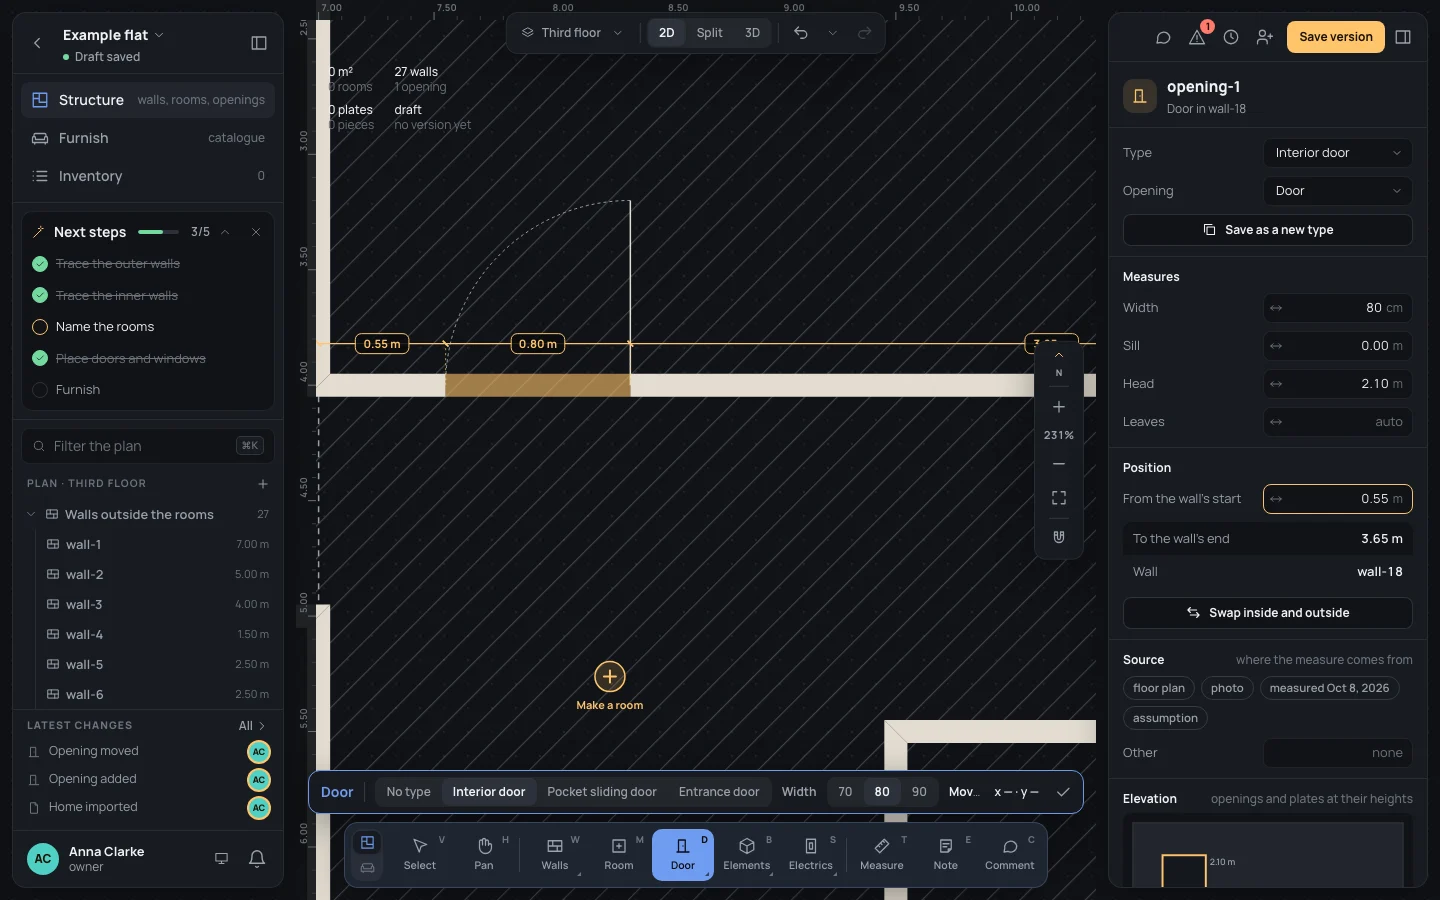
To the wall’s end then reads 3.65 m.
If something goes wrong
Section titled “If something goes wrong”- In the wrong place: drag it along the wall with Select, or type its From the wall’s start.
- The wrong opening: ⌘ZCtrl+Z takes it away; or delete it once selected (⌫⌫or⌦⌦).
- Nothing lights up over a wall: it’s a railing or a separator, which take no openings, or the pointer is too far from it.
See also
Section titled “See also”- Openings: the inspector, sides and hinges.
- Opening types: making the house’s types.
- Window and French window.
- Selecting: sliding an opening along its wall.