

Editing walls
Once a wall is drawn, everything about it can still change: where it is cut, whether it bends, which way it runs, how thick and high it is. This page is about changing walls that exist; drawing them is the Wall tool’s page.
The wall’s right-click menu
Section titled “The wall’s right-click menu”Right click a wall: it is selected, and a menu opens with the wall’s name as its title and, beside it, a card with its length, its kind and the rooms on its two sides (between outside and Living).
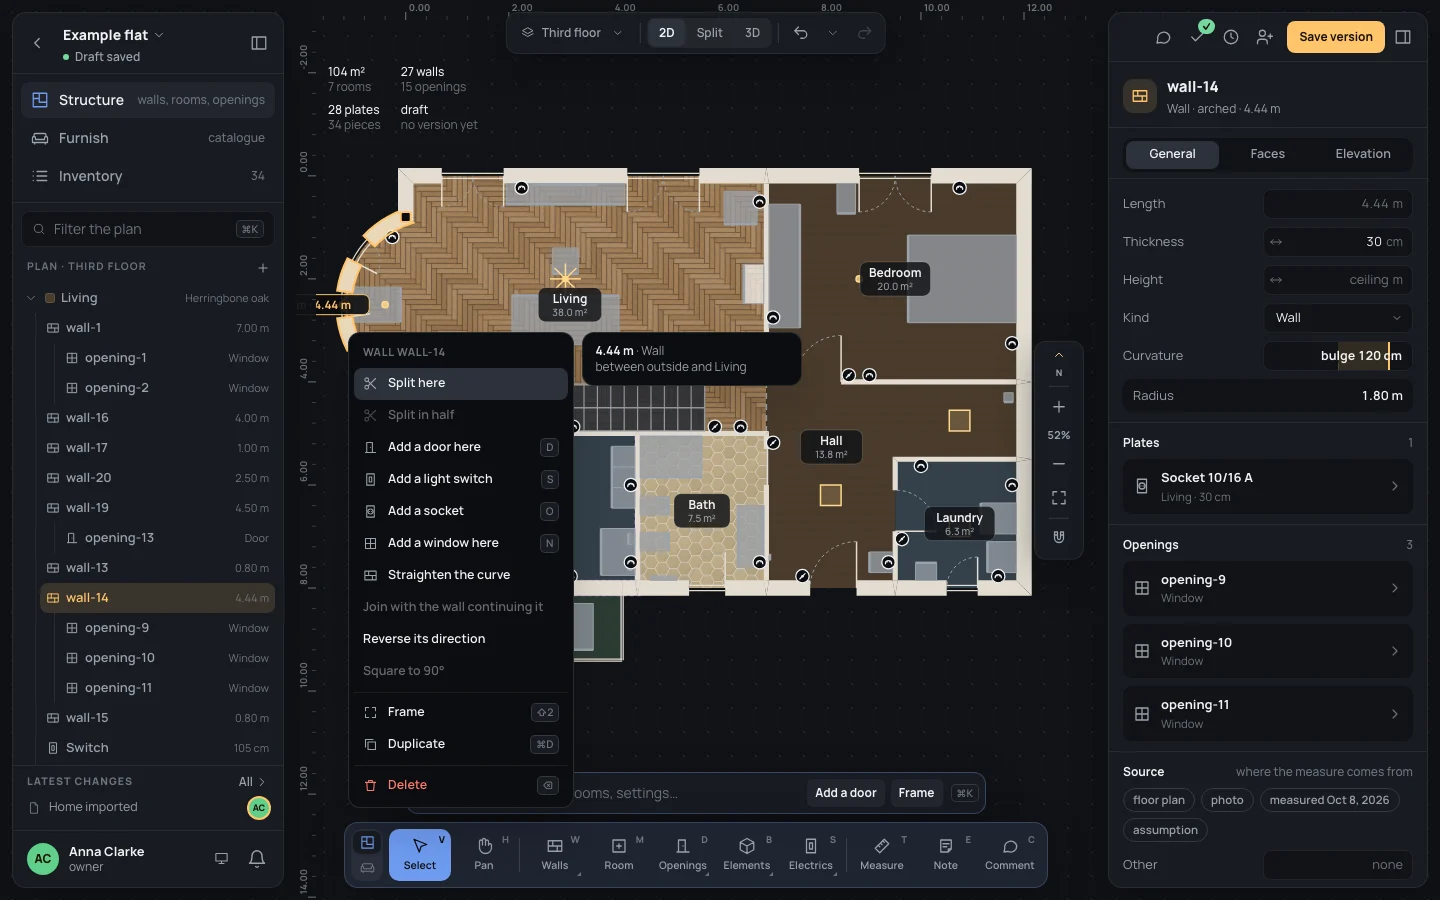
- Split here cuts the wall where you right clicked. Split in half cuts it in its middle (it is also in the search and among the command bar’s suggestions when one wall is selected). A double click on a wall with Select splits it there too, and the Split tool (XX) splits at a distance you type. Each piece keeps the openings standing on it, and a curved wall is cut on its own circle.
- Curve the wall bends a straight wall into a gentle arc (its bulge a sixth of its length); on a curved wall it reads Straighten the curve and makes it straight again.
- Tangent to wall-15 (one item for each wall meeting it alone at one of its ends) bends it so it leaves that neighbour with no corner, as an S curve does.
- Join with the wall continuing it makes one wall of two. It is only offered when the other wall meets this one alone, carries on in the same line (or on the same circle), and is of the same kind, thickness and height.
- Reverse its direction walks the wall the other way: its ends swap, and its left face becomes its right. Its openings, plates and awnings stay where they are, on the same face.
- Square to 90° turns a straight wall about its start to the nearest right angle; its end moves, and the walls joined there follow. It is greyed when the wall is square already, or curved.
- Add a door here, Add a light switch, Add a socket, Add a window here pick those tools, to click where they go (Openings, Switches and sockets).
- Frame, Duplicate and Delete, as for anything selected (Selecting and moving).
Split here is greyed where the wall can’t be cut: too close to one of its ends, or inside an opening. The Split tool says why as you point (Too close to an end of the wall., opening-3 is here: split before or after the opening.).
Bending and dragging with Select
Section titled “Bending and dragging with Select”Select a wall and drag on the plan:
- the ◆ in its middle bends it: the curve follows the pointer, straight again when you come back near the line between its ends, and it catches the curve tangent to a neighbour on the way (tangent to wall-15);
- a corner (the square at an end) moves that corner: every wall ending there follows;
- the wall’s body moves the wall, the walls joined to it stretching.
Each drag is one step. A dragged wall stops where it would run into another (stops against wall-3 · ⌥Alt to go through): hold ⌥Alt to go through on purpose. The Select tool has every gesture and key.
Walls that cross, walls left in line
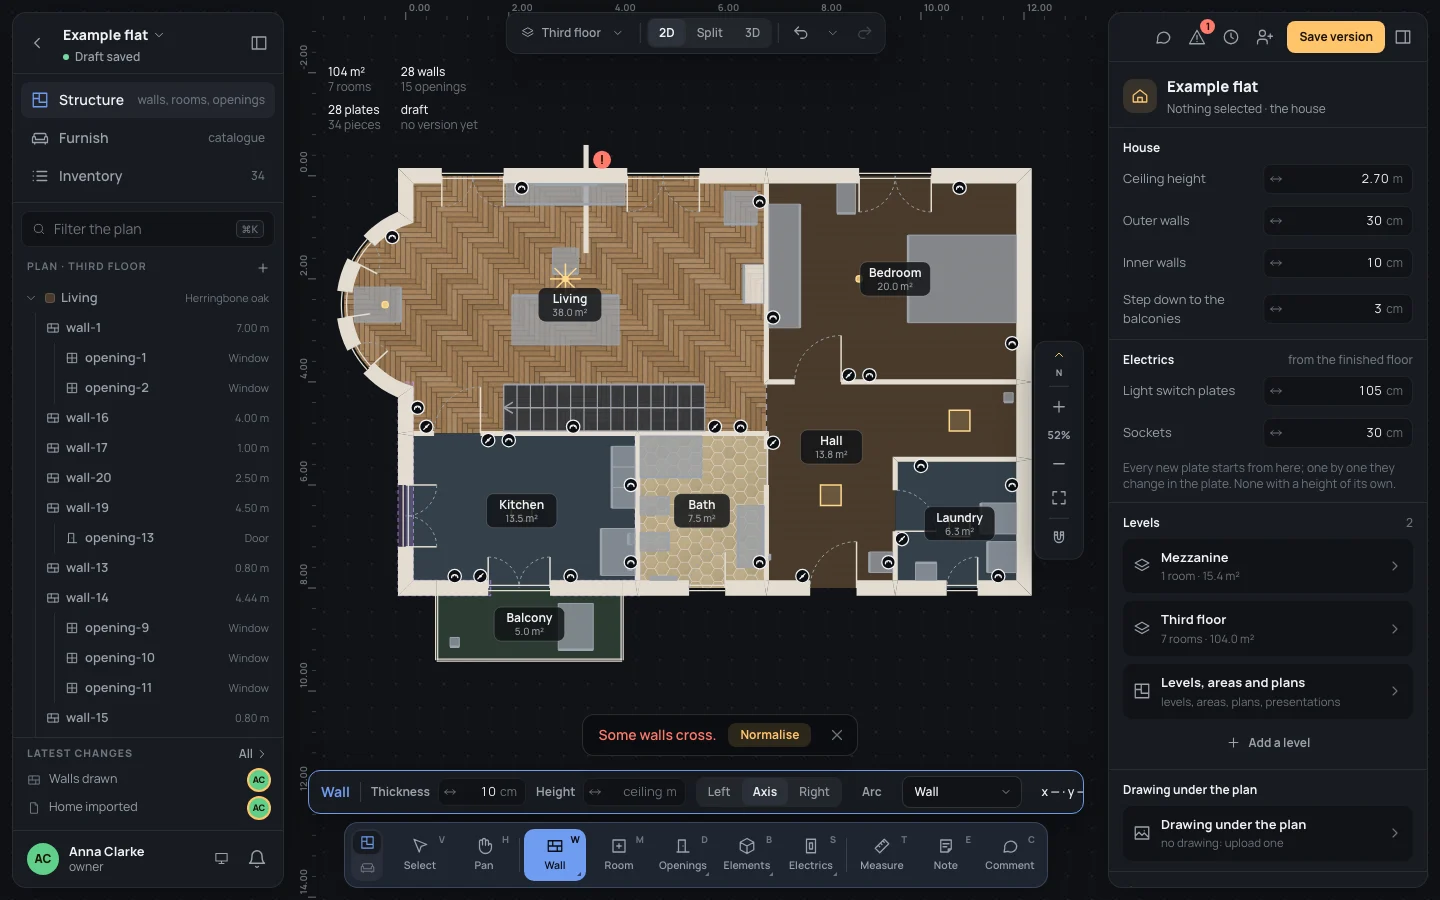
Section titled “Walls that cross, walls left in line”- After a step that makes walls cross, or leaves a wall’s end inside another wall, a toast says Some walls cross or end inside another. with Normalise. When walls run into each other otherwise, it says Some walls run into each other: they need putting right by hand., and Show opens the checks on them.
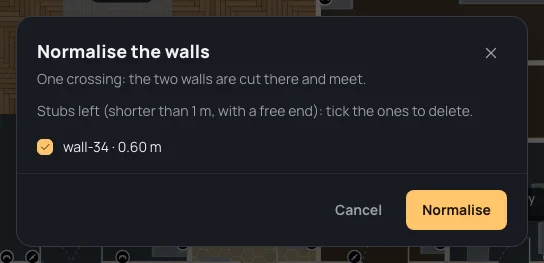
- Normalise the walls (⇧NShift+N, the toast, or Normalise the walls in the checks) shows first what it will do: the ends left inside another wall it brings on to that wall’s centre line, each ticked (Ends left inside another wall: they go on along their own wall to its centre. Tick the ones to bring.), how many crossings it cuts (One crossing: the two walls are cut there and meet.), how many fall inside an opening and are left to you, and the stubs it would leave (Stubs left (shorter than 1 m, with a free end): tick the ones to delete.), each ticked to be deleted. Normalise does it, as one step.
- After you delete walls, where two walls are left meeting alone and in line, a toast offers Two walls are left in line: join them? with Join.
On the example: with the Wall tool (WW), draw a wall from just outside the north wall of the living room into the room, across it. The toast comes; Normalise cuts both walls at the crossing and offers to delete the 60 cm stub left outside.
The wall’s inspector
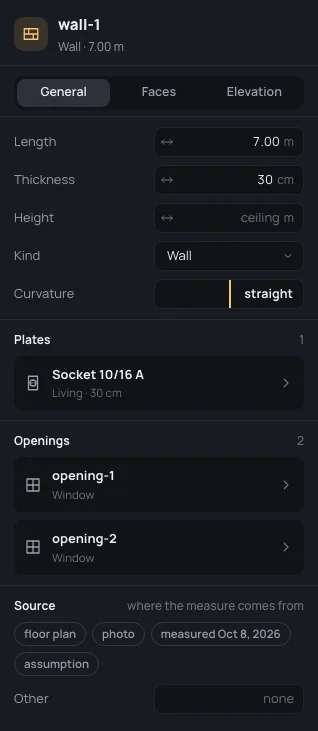
Section titled “The wall’s inspector”Select one wall: the right panel shows its id as its name, and under it its kind, arched when it bends, and its length (Wall · 7.00 m). Three tabs: General, Faces and Elevation (the last two for a wall or a parapet, one at a time).
General
Section titled “General”| Field | What it does |
|---|---|
| Length | A straight wall’s length, from its start: its end moves and the corners joined there follow. Between 0.05 and 100 m. On a curved wall it is only read. |
| Thickness | In centimetres, from 2 to 100 cm, for walls and parapets. |
| Height | Empty (it reads ceiling): up to the ceiling. Otherwise from 0.10 to 10 m. Empty it again to go back to the ceiling. |
| Kind | Wall, Parapet, Railing, Separator. A separator has no thickness (it divides two rooms with nothing built), a railing is 4 cm. |
| Curvature | The bulge, as a bar either side of straight: drag it and the plan follows, or double click it to type the bulge in cm. Up to half the wall’s length either way. |
| Radius | A curved wall’s radius, read. |
Below them, Plates and Openings list what stands on the wall, each leading to it, and Source says where its measures come from (Measures and notes).
On the example: select wall-16, the inner wall between the living room and the bedroom, and type its thickness:
Thickness12
It grows from 10 to 12 cm about its centre line, and both rooms lose a centimetre. ⌘ZCtrl+Z puts it back.
Every number here can be typed in any unit, dragged by its label, or stepped with the arrows (Typing and dragging numbers). With several walls selected, a field they don’t share shows —: what you type there goes to all of them.
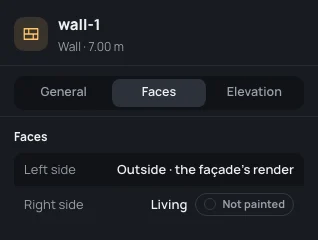
Walking from the wall’s start, its Left side and Right side: what each looks into (a room, two rooms joined by a separator, Region with no room, or Outside · the façade’s render). Towards a room, the pill says Painted or Not painted: a click puts that face in the room’s paint, or takes it out. The room’s colour is chosen in the room (Rooms).
Elevation
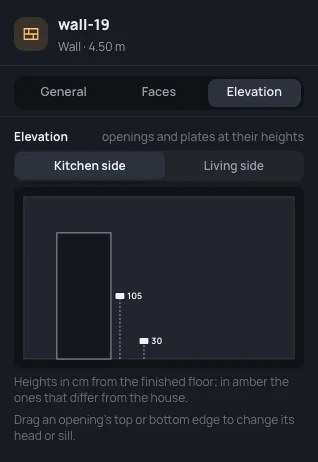
Section titled “Elevation”The wall seen from the front, to scale: its openings from sill to head, and the plates on that face at their heights in cm from the finished floor, each with a dashed line to the floor, in amber the ones not at the house’s height. With plates on both faces, a switch picks the face, named by the room it looks into (Kitchen side, Living side).
Drag an opening’s top edge to change its head, its bottom edge to change its sill: the plan and the 3D follow, and the release is one step.
The same elevation opens from elsewhere:
- in an opening’s inspector, with that opening in the accent colour (Openings);
- from a plate: See it on the wall’s elevation in its inspector, See it on the elevation in its right-click menu, opening its wall’s elevation on its face (Switches and sockets).
What can go wrong
Section titled “What can go wrong”- Join with the wall continuing it is greyed: the walls don’t continue each other, or a third wall meets them there, or they differ in kind, thickness or height. Make them the same in the inspector first.
- A drag stops short: a wall is in the way. Hold ⌥Alt to go through, then normalise.
- A wall bent by mistake: drag its ◆ back near the line, or Straighten the curve.
- Every change here is one step: ⌘ZCtrl+Z takes it back.
See also
Section titled “See also”- The Wall tool and the Split tool.
- Selecting and moving, Snapping.
- Checking the home: crossings and walls running into each other are problems there too.