

Light switch
The Light switch tool puts a light switch’s plate on a wall: switch, two-way switch, push button or shutter control. It goes on the side of the wall you click, in the room that side faces, at the house’s height for light switches.
Picking it
Section titled “Picking it”- Electrics in the dock, then Light switch (switches, two-way, controls), or SS.
- The right click on a wall: Add a light switch picks the tool; then click the side where it goes. Railings and separators don’t offer it.
- The search (⌘KCtrl+K): type Light switch.
The bar
Section titled “The bar”
- Type: Switch, Two-way switch, Push button or Shutter control. It starts at Switch and keeps the last one chosen while the project is open.
- Height: the height every new light switch takes, from the finished floor to the plate’s centre, marked from the house. It is read only here: it comes from the house (Light switch plates in the house’s Electrics, 105 cm unless you change it, see The house’s settings). To give one plate a height of its own, change it in the plate once it is placed.
Every new plate has 3 modules (3 places); change it in the plate.
Using it
Section titled “Using it”- Pick the tool and choose the Type.
- Move the pointer onto the wall, on the side the plate goes: a ghost of the plate follows it along the wall, on that face.
- Click: the plate is placed there, in the room that side faces.
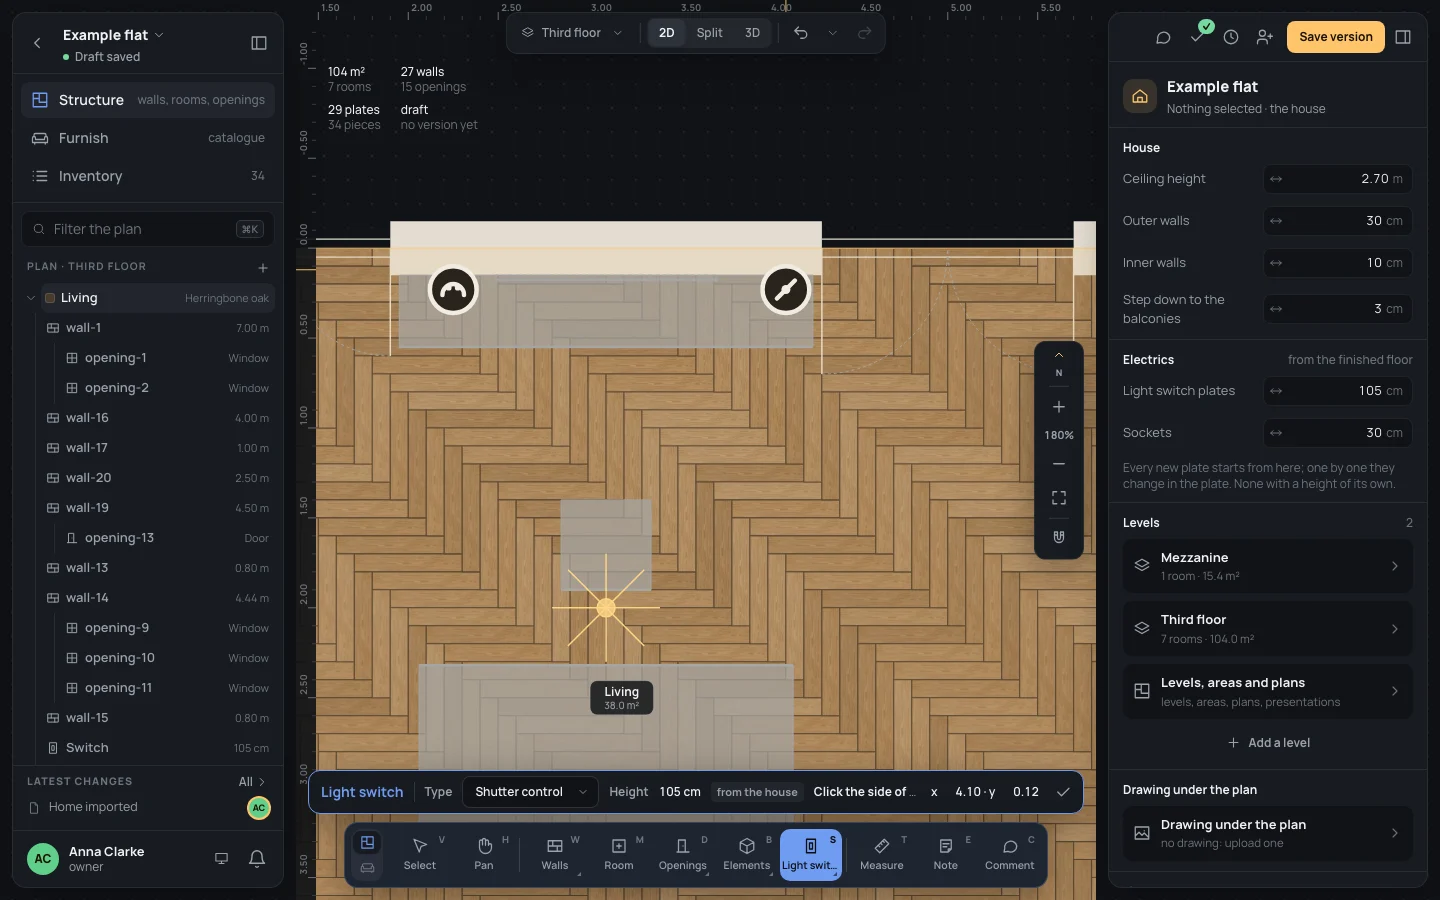
Keys inside it
Section titled “Keys inside it”- EscEsc or Done (✓): back to Select.
- ␣␣ held: move the view; ⌘Ctrl with the wheel: zoom.
- OO and LL: the other tools of Electrics.
What it snaps to
Section titled “What it snaps to”Nothing but the wall: the plate takes the nearest wall under the pointer (within half the wall’s thickness and a dozen pixels on screen), the face the pointer is on, and the point along the wall straight across from it. Its centre stays at least 6 cm from the wall’s ends. It doesn’t catch openings or other plates: two plates may sit side by side, so look before you click.
What it refuses
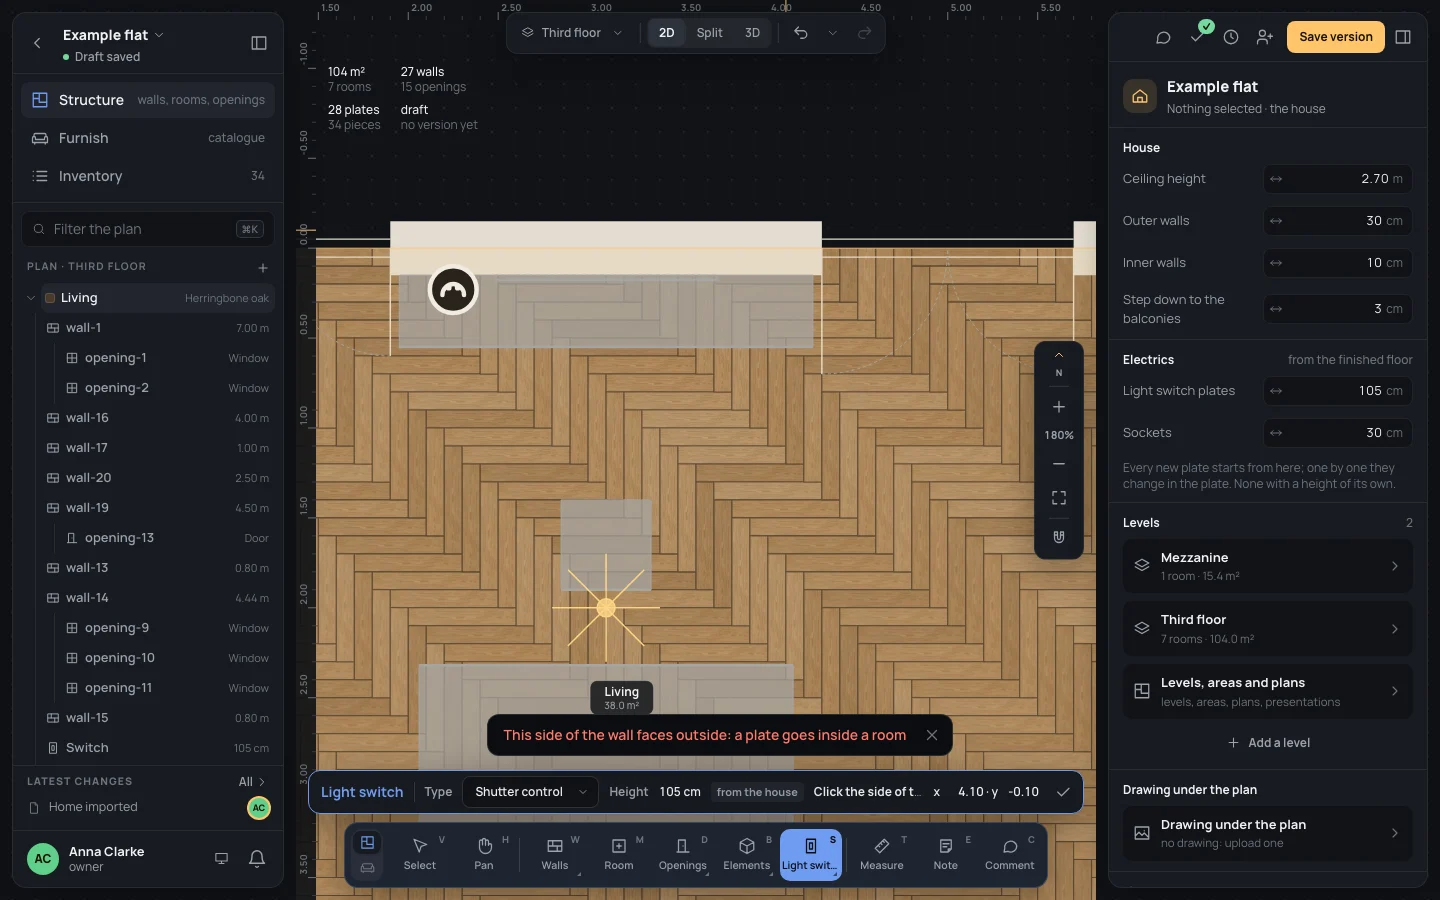
Section titled “What it refuses”- A side of the wall that faces outside: the click places nothing and says This side of the wall faces outside: a plate goes inside a room. The side has to face a room: draw the rooms first (Room).
- Railings and separators: the ghost doesn’t show on them, and a click there does nothing.
The plate is selected and its inspector open; the tool stays on for the next one. In the inspector you change its type, its own height (Back to the house’s height undoes it), its modules, its place along the wall (From the wall’s start) and its series (Switches and sockets). One step in the history (Plate added).
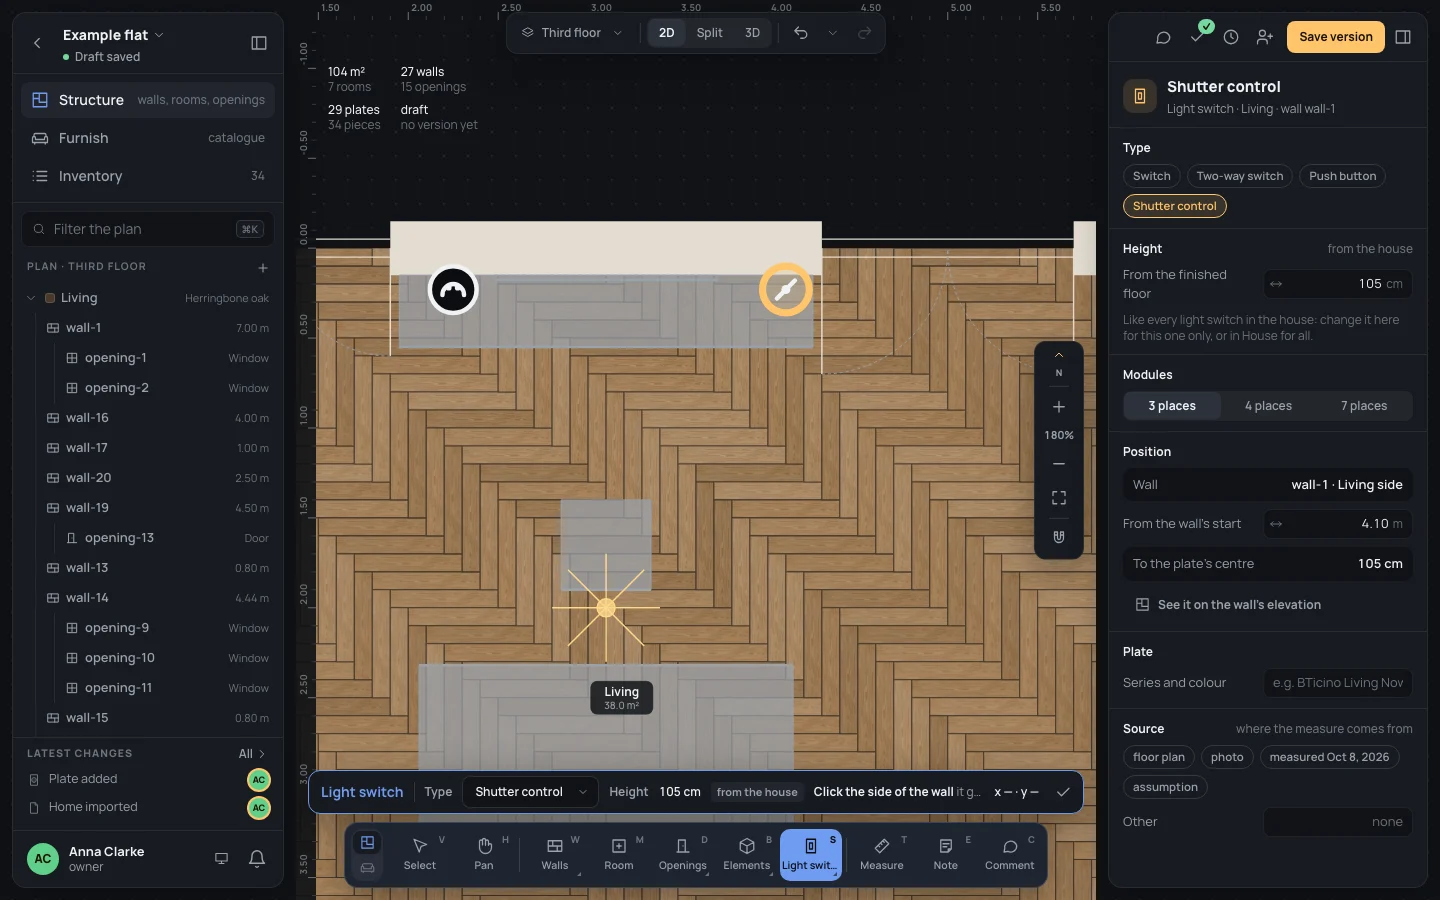
Example: the living room’s shutter control
Section titled “Example: the living room’s shutter control”On the finished example flat, a shutter control for the living room’s second north window, just west of it.
- Press SS. In the bar, choose Shutter control.
- Move onto the north wall, on the living room’s side, a little left of the window on the right: the bar’s pointer reads about x 4.10 · y 0.12.
- Click. The inspector reads Light switch · Living · wall wall-1, at 105 cm from the house.
- To put it exactly, type From the wall's start
4.10in its Position.
If something goes wrong
Section titled “If something goes wrong”- This side of the wall faces outside: you clicked the outer face, or the room isn’t drawn yet. Click the inside, or make the room first.
- On the wrong wall or face: ⌘ZCtrl+Z and click again; or slide it along in the inspector’s Position.
- No ghost at all: the pointer is too far from the wall. Zoom in and move onto the wall itself.
See also
Section titled “See also”- Switches and sockets: the plate’s inspector, its height, the wall’s elevation.
- Socket · Light · The house’s settings.