

Measures and notes
A drawing is only as good as its numbers. This page is about the numbers you check: the dimensions kept on the plan, the tape’s figure that puts two walls right, where each measure comes from, and the notes you leave for people.
To measure two points and keep the measure as a dimension, use the Measure tool (TT); to pin a note, the Note tool (EE). Their own gestures are on their pages; here is what you do with what they leave.
A dimension on the plan
Section titled “A dimension on the plan”Select a dimension (click its line, or find it in the left panel’s tree) and the inspector shows Dimension:
- On the plan: how long it is on the plan now. A dimension between two wall faces follows the walls when they move; if those walls are no longer straight and parallel, it says can’t be read.
- Measure taken and On: when the dimension holds a figure from the tape, the figure and the day it was taken.
- Source: where it comes from, when the home’s file says so.
A dimension is selected, moved and deleted like anything else on the plan (⌫⌫or⌦⌦).
A measure taken on site
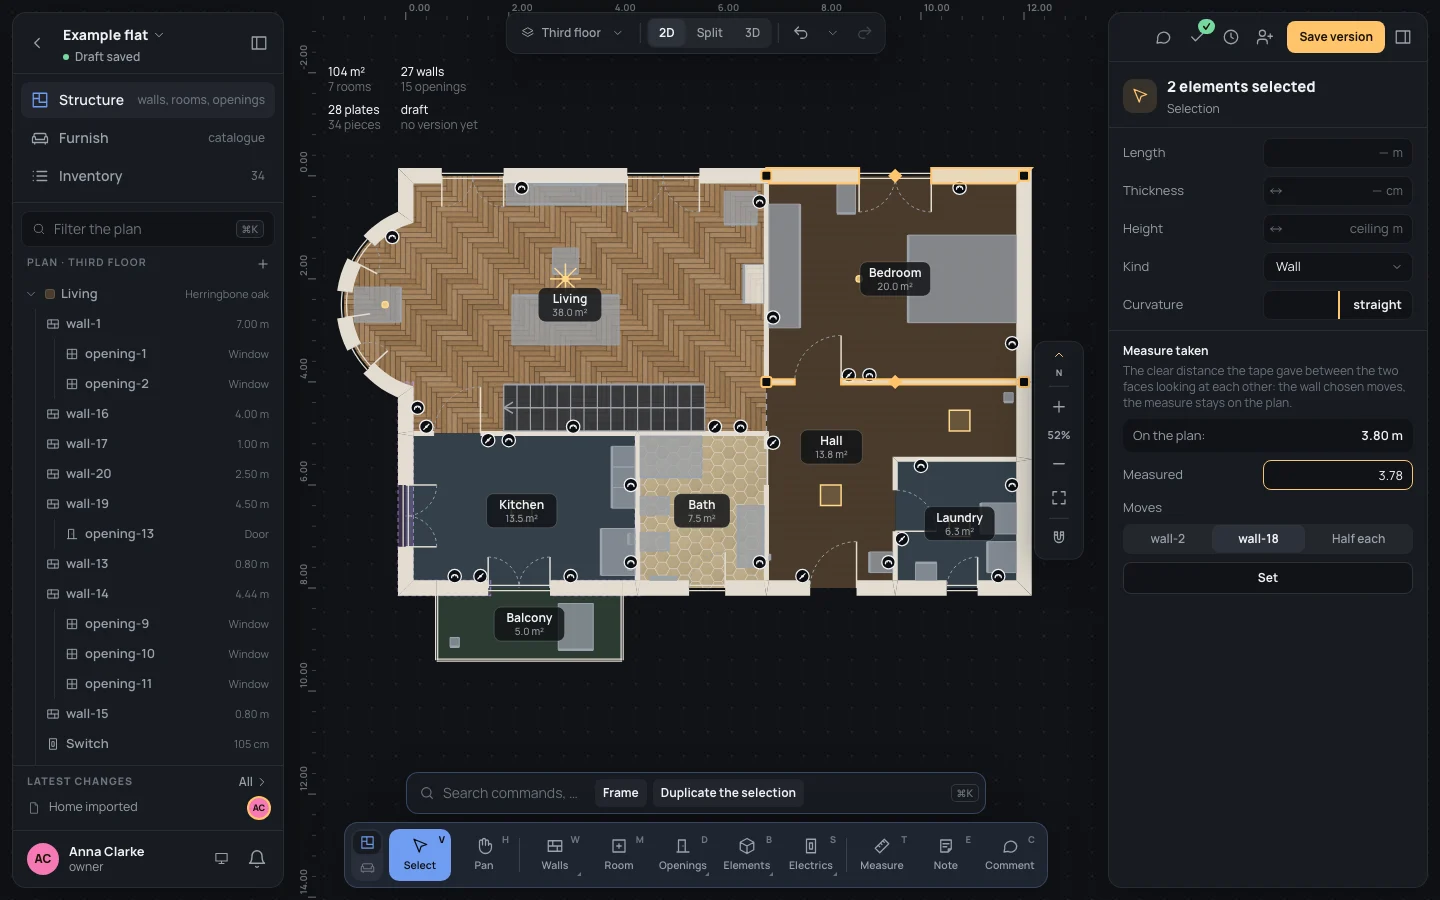
Section titled “A measure taken on site”The plan says the bedroom is 3.80 m deep; the tape, wall to wall, says 3.78 m. A measure taken puts the plan right: you give the clear distance between two walls that face each other, and one of them moves to agree.
- Select the first wall, then hold ⇧Shift and click the second. They must be straight, parallel and face each other: only then does Measure taken appear at the bottom of the inspector, with what the plan reads between their faces now (On the plan:).
- Type the tape’s figure in Measured, in any unit the editor reads (Typing numbers).
- In Moves, choose the wall that moves: either one by its name, or Half each. It starts on the wall you selected second, unless that one is already held by an earlier measure and the first isn’t.
- Set, or ↵↵.
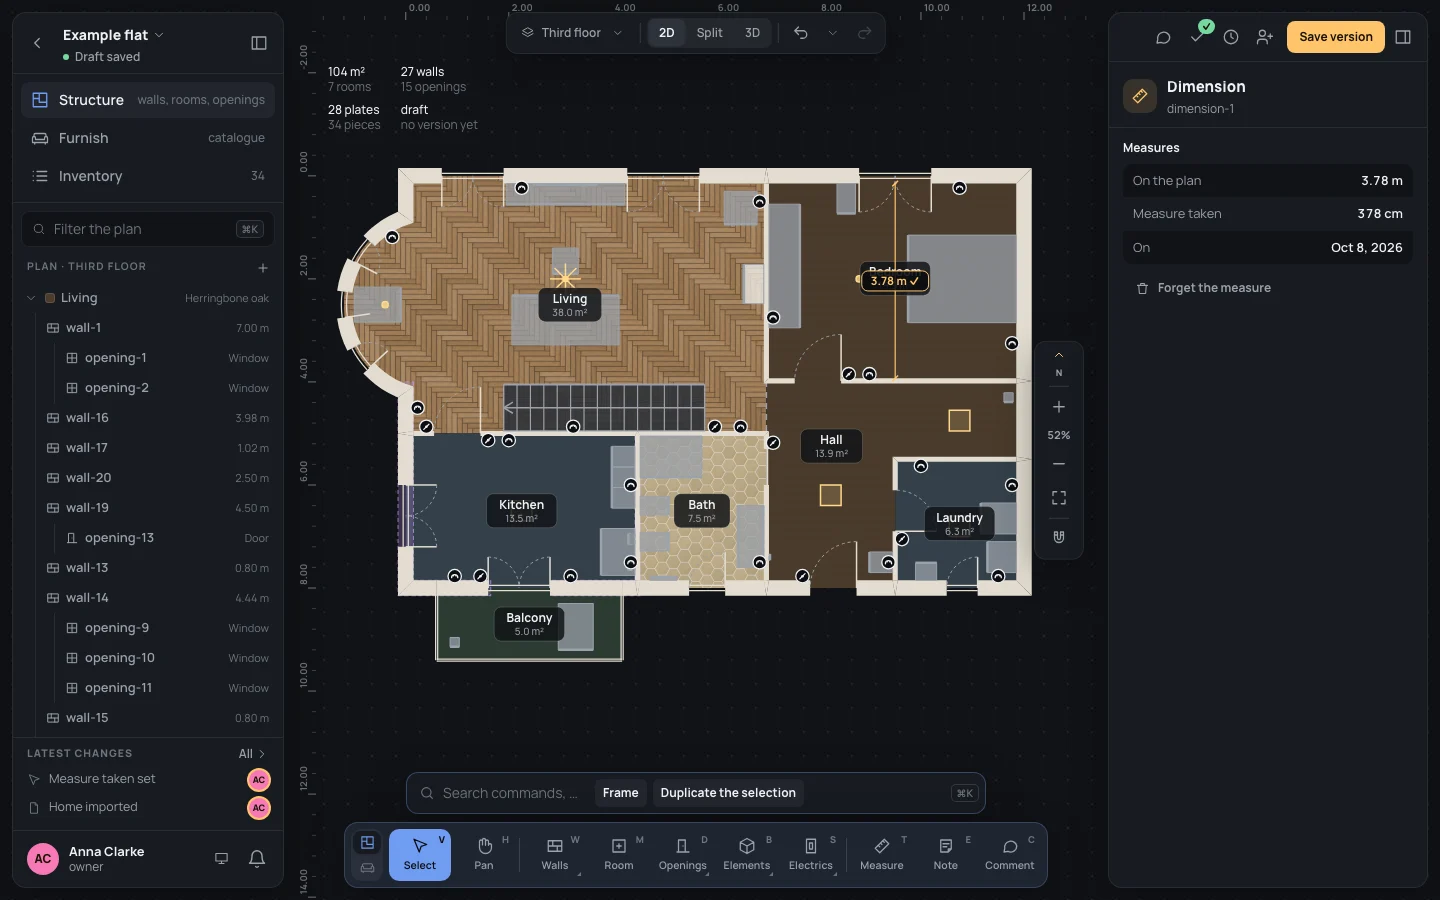
The wall chosen moves across itself and the walls joined to it stretch with it. A dimension stays on the plan between the two faces, with the figure and the day, and the wall that moved says in its Source that a measure set it (measured Oct 7, 2026). Measuring the same two faces again replaces the figure on that dimension.
Try it on the example home. Select the bedroom’s north wall, wall-2, then ⇧Shift-click the
wall between the bedroom and the hall, wall-18. On the plan: reads 3.80 m. Type
Measured3.78, leave wall-18 in Moves, and Set: wall-18 moves 2 cm north, the hall
grows to 13.9 m² and the dimension reads 3.78 m with a tick.
If what you type isn’t a length, the field says Write the measure, e.g. 3.72 or 372 cm. and nothing moves. ⌘ZCtrl+Z takes the whole measure back in one step: the wall returns and the dimension goes.
When the plan no longer agrees
Section titled “When the plan no longer agrees”A wall held by a measure is meant to stay where the tape put it. If it moves anyway (dragged or nudged) and the plan differs from the tape by more than 5 mm, the dimension says in red The plan no longer agrees with the measure taken: something moved since., and the checks list it as a warning with both figures.
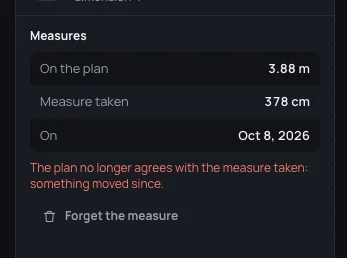
Put it back with ⌘ZCtrl+Z, or measure again. If it was the tape that was wrong, Forget the measure removes the figure and the day: the dimension stays as a plain one and the walls stay where they are.
On the example, with the dimension in place, select wall-18 and press ⇧↓Shift+↓: it moves 10 cm south, the dimension reads 3.88 m and the warning appears. ⌘ZCtrl+Z puts it right.
Where a measure comes from
Section titled “Where a measure comes from”Walls, rooms, openings, plates, lights, awnings and blocks each have a Source: where their measure comes from. On a wall, a room and a plate it is a group of its own, where the measure comes from; elsewhere it is a field with the same choices under it.
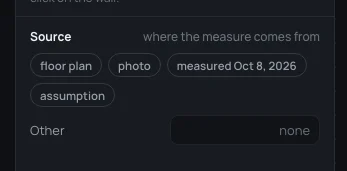
- The chips are the usual answers: floor plan, photo, measured with today’s date, and assumption. A click sets it; the chip that matches lights up.
- Other (or the field itself) takes anything in your own words, laser meter, 2 Oct: press ↵↵ or leave the field. Empty, it reads none.
What you write stays in your words: it isn’t translated for the people you share the home with. A source that starts with assumption marks a guess: on a wall, an opening or a room, the checks list it as a note, the measure is a guess, to be checked, so you know what to measure on your next visit.
A note is for people: it is printed with the plan and never shown by the 3D or the host apps. Pin one with the Note tool, then select it to change it: Text takes the new words (↵↵ or leave the field), and Colour, under it, changes its colour. A note can’t be empty: the field says Write something in the note. and keeps the old words.
On the example, press EE, click in the hall by the bedroom’s door and write
TextThe fuse box goes here, then ↵↵.
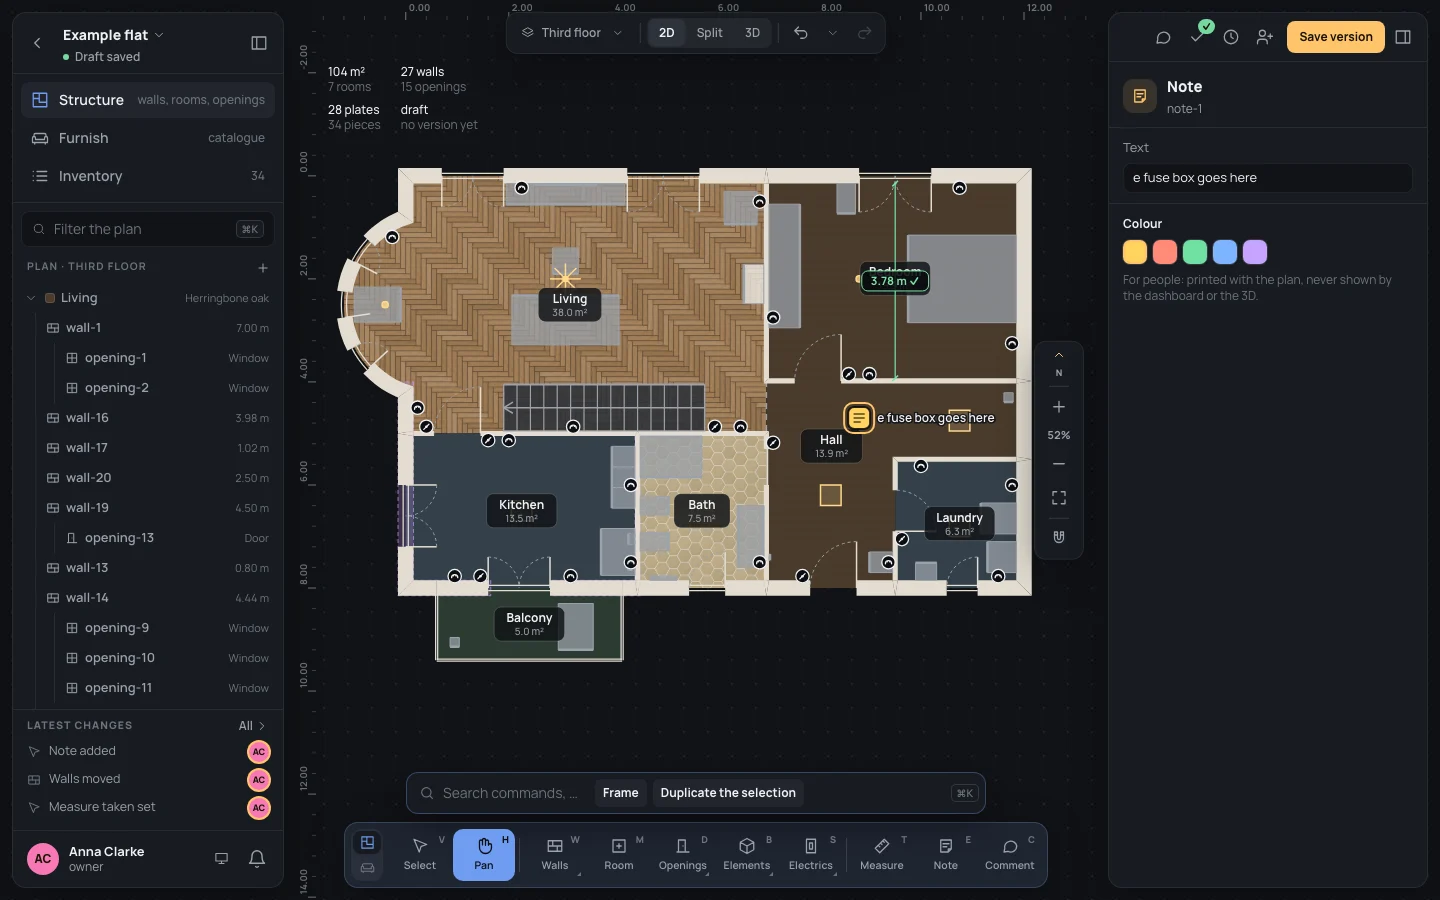
Delete a note as anything else (⌫⌫or⌦⌦); every change is one step that ⌘ZCtrl+Z takes back.
See also
Section titled “See also”- Measure tool and Note tool: how they place.
- Checking the home: the measures that no longer hold and the guesses, listed.
- Typing numbers: the units a field reads.