

Floors and kits
A room’s floor can be one of the kinds (parquet, tiles, concrete…) or a floor you make: its material, how it is laid, the size of its pieces and its joints. The plan draws it piece by piece inside the room, and the 3D lays the same pieces. A floor you keep among your kits is yours in every project.
Where to make one
Section titled “Where to make one”- In a room’s inspector, the Floor group (on General and on Finishes): + Make a floor, after the floors to choose from. The floor made there can be laid in that room at once.
- Right-click a room: Floor: … lists the floors to lay, and Make a floor….
- With nothing selected, the house’s inspector, Library: Floors, with its +.
- The search (⌘KCtrl+K): Make a floor.
The floor dialog
Section titled “The floor dialog”Make a floor opens with the 2 × 2 m preview on the left, as it will be on the ground, with a 1 m bar, and on the right what makes the floor. A new floor starts as an oak herringbone, 60 × 10 cm with 1 mm brown joints, named Oak herringbone when it is the home’s first, otherwise after how many floors the home has (Floor 3 in the example flat). The preview follows every change.
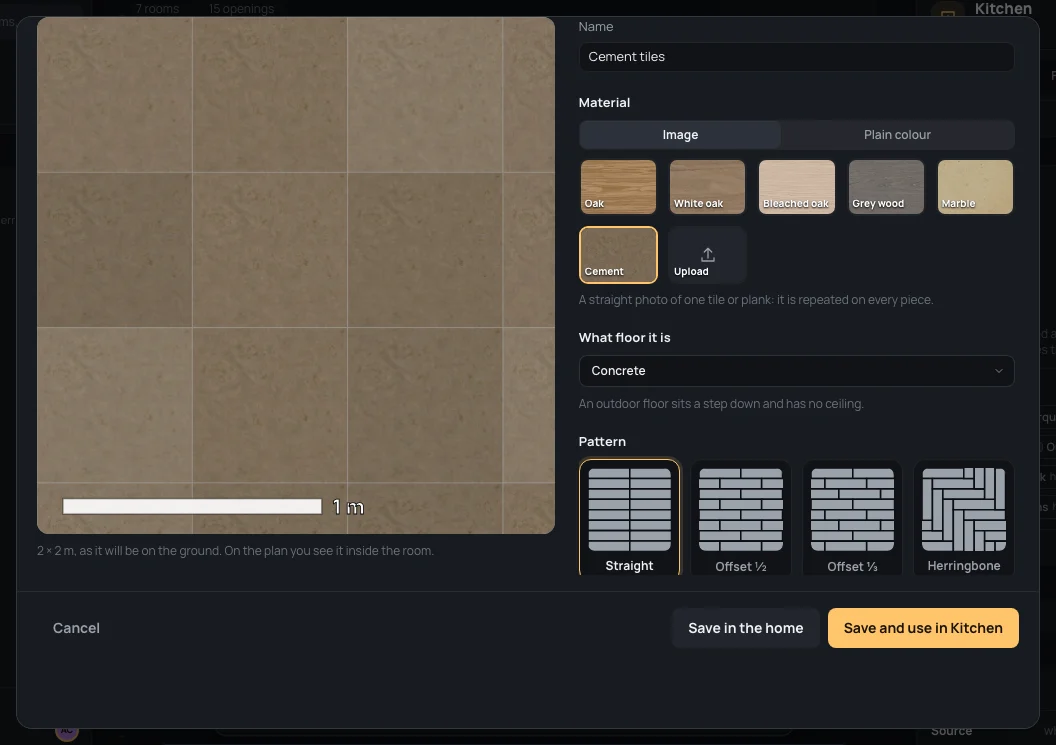
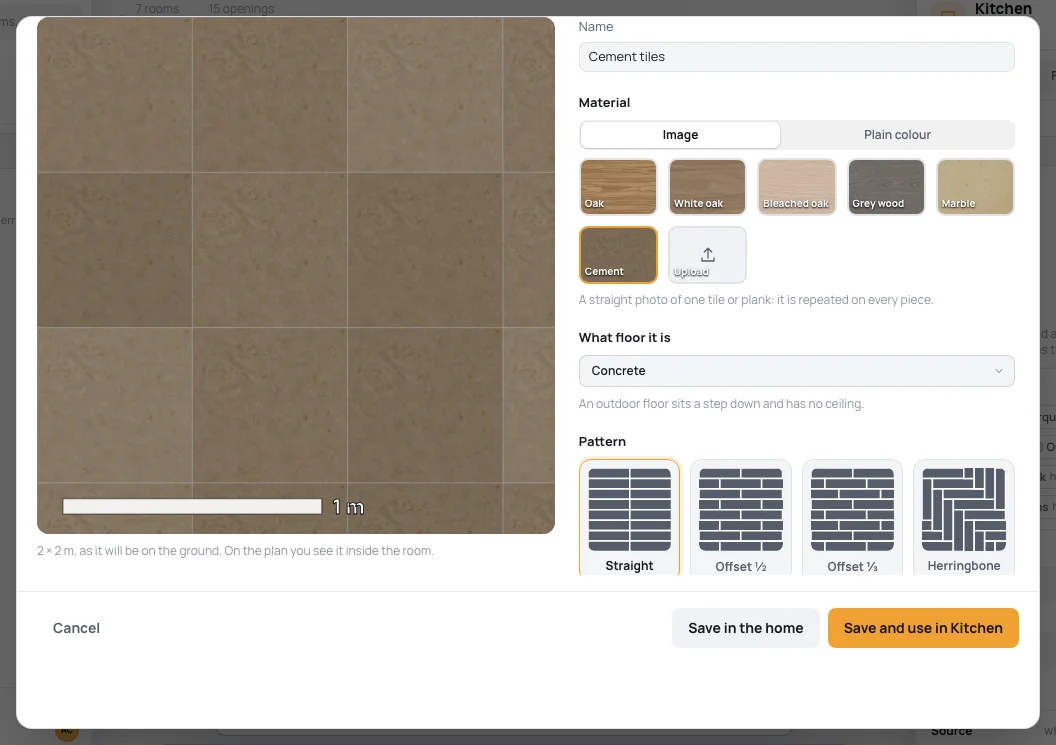
- Name: it can’t be empty (Give the floor a name.).
- Material:
- Image: one of Blupinta’s photos (Oak, White oak, Bleached oak, Grey wood, Marble, Cement), or Upload one of yours: A straight photo of one tile or plank: it is repeated on every piece. PNG, JPEG or WebP; it stays in the project (Yours brings it back after trying another);
- Plain colour: Honey, Ivory, Grey, Anthracite, Sand, Walnut, or Another colour.
- What floor it is: Parquet, Tiles, Concrete, Outdoor, Shared. An outdoor floor sits a step down and has no ceiling. Choosing a photo chooses the kind that goes with it (wood is parquet, marble tiles, cement concrete); change it after if you like.
- Pattern: Straight, Offset ½, Offset ⅓, Herringbone, Chevron, Basket, Hexagons.
- Size: Length × Width in centimetres, each side between 1 and 300 cm; a hexagon is measured Across the flats. Herringbone and basket say how many widths make a length (ratio 6:1).
- Joints: their Width in millimetres, 0 to 30, and their colour (Brown, White, Grey, Black, or Another colour).
- Direction of the laying: 0°, 45°, 90°.
- Variation between pieces, from one piece to the next: 0 to 50 %, how much each piece differs from the next.
- Finish: Matte, Satin, Gloss.
- Product (optional): brand and model, e.g. Marazzi Treverk 10×60. Whoever looks at the home knows what product it is.
Numbers are typed, or dragged by their ↔. A number out of its limits is refused, and says why.
In this home or among your kits
Section titled “In this home or among your kits”Where you keep it:
- This home only: In this home only. The button says Save in the home.
- My kits: A kit of yours: you find it in every project, and change it in one place. The button says Save the kit. A new floor starts here.
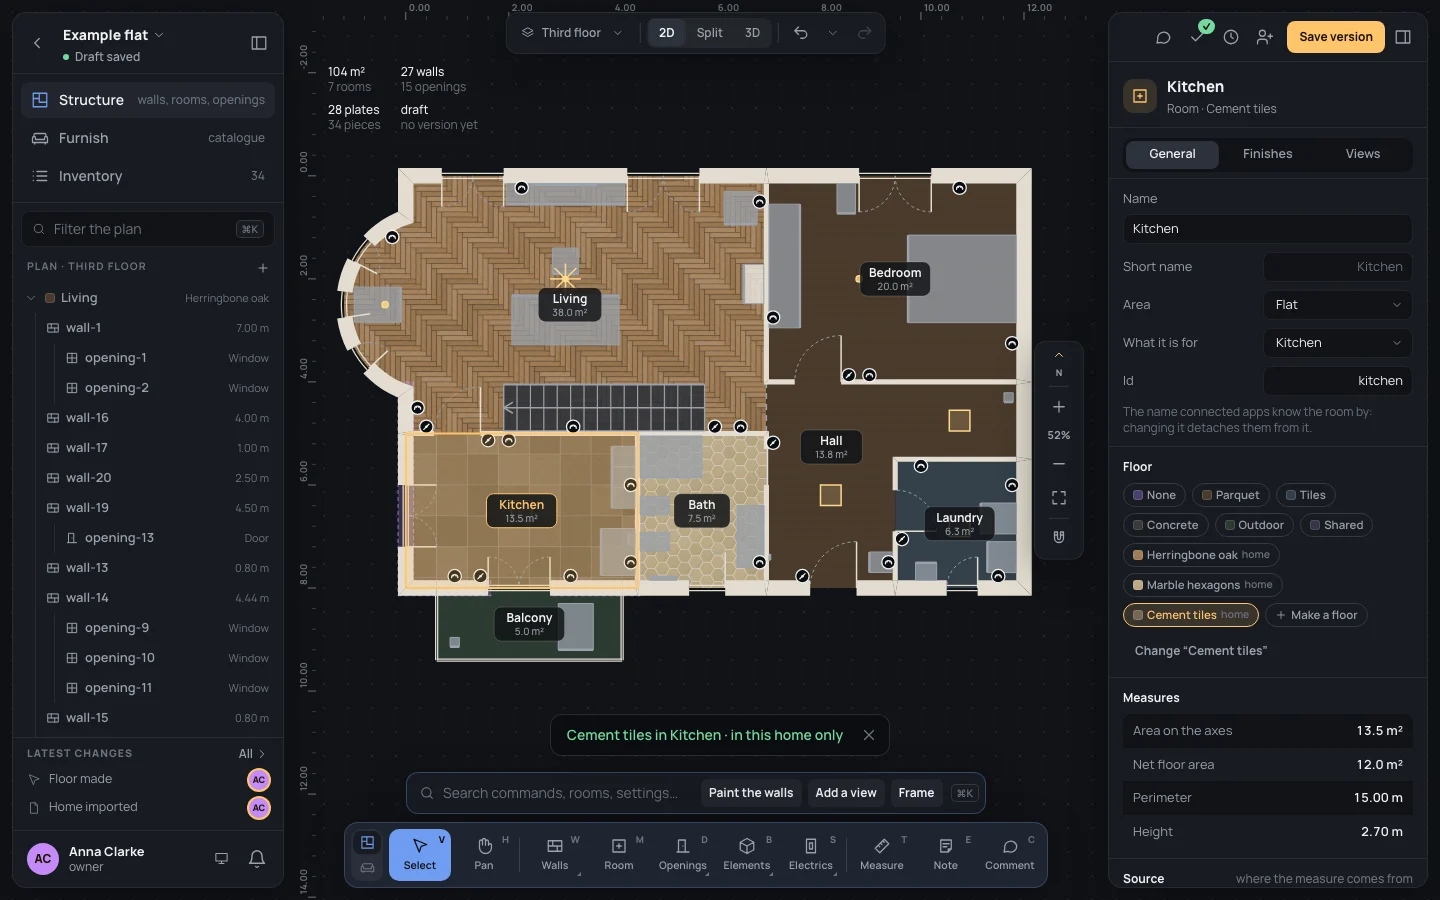
Opened from a room, Save and use in Kitchen (the room’s name) saves it and lays it in that room at once. A message says where it went: Cement tiles in Kitchen · in this home only. Cancel, ✕ or EscEsc leave without saving.
Example: cement tiles for the kitchen
Section titled “Example: cement tiles for the kitchen”On the finished example flat, in Structure:
- Select the Kitchen (a click on it, or its row in the left panel).
- In its inspector, in Floor, click + Make a floor.
- Name: Name
Cement tiles. Material: Image, Cement (the kind becomes Concrete). Pattern: Straight. - Size: Length Length
60, Width Width60. Joints: Width Width2, colour Grey. - Where you keep it: This home only.
- Click Save and use in Kitchen.
The kitchen is laid with 60 cm tiles. Its Floor chips now have Cement tiles, tagged home, chosen, and under them Change “Cement tiles” opens the dialog again; Save the changes saves them.
Choosing a floor for a room
Section titled “Choosing a floor for a room”The room’s Floor chips are: None (until it has one, the room has its own colour), the five kinds, the home’s own floors (tagged home, or your kit for a kit’s copy), your kits not in this home yet (tagged your kit: taken into the home when you choose one) and + Make a floor. The right-click menu’s Floor: … offers the same.
For a parquet and for a floor of the home’s own, Finishes also has Strip direction, in degrees.
A kit changes in one place
Section titled “A kit changes in one place”Open a kit in any project that uses it (Change “…”) and save the changes: It is a kit of yours: the changes reach every project using it, as a proposal. That makes a new version of the kit. Every other home using it keeps the version it had, and the room laid with it says so: The kit “Bleached oak planks” has a new version (v2). with Update. A home is never changed without you.
My kits
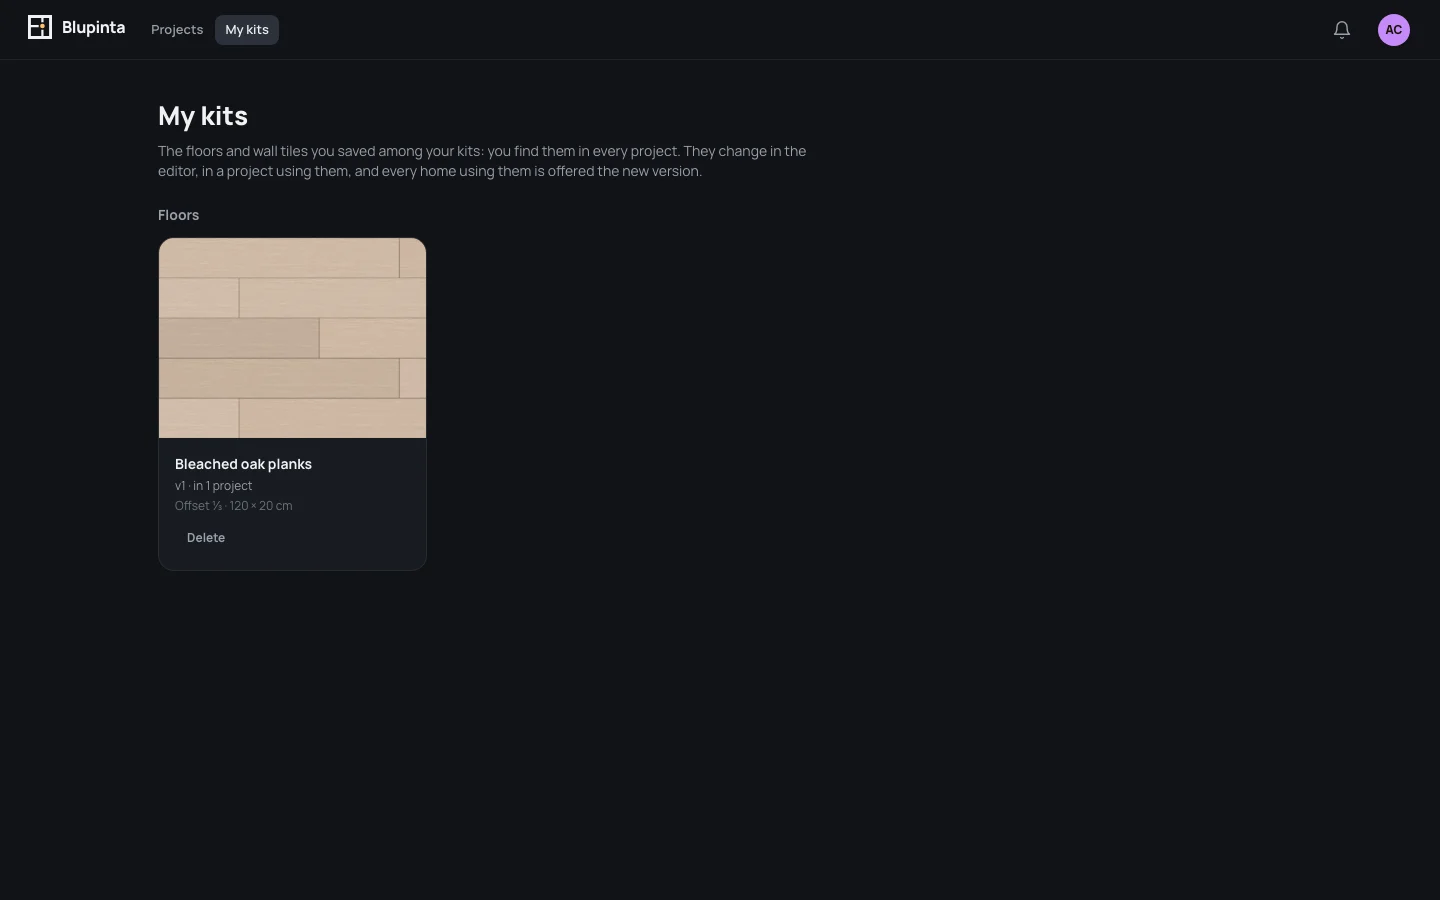
Section titled “My kits”My kits, beside Projects at the top of the projects page, shows each kit with a piece of it laid, its name, its version and how many of your projects use it (v1 · in 1 project), its pattern and size. With none yet: No kits yet.
Delete asks first: Delete the kit “Bleached oak planks”? You won’t find it in your projects any more. The homes using it keep their copy. Your kits are in your account’s export.
Example: a kit for every project
Section titled “Example: a kit for every project”- With nothing selected, in the house’s inspector, click Floors (+).
- Name: Name
Bleached oak planks. Material: Bleached oak. Pattern: Offset ⅓. Size: Length120× Width20. - Where you keep it: My kits. Click Save the kit.
- Back on the projects page, open My kits: the kit is there, v1 · in 1 project. In any other project, a room’s Floor chips offer it, tagged your kit.
Wall tiles
Section titled “Wall tiles”Tiles on walls, in a bathroom or behind a kitchen’s worktop, are made the same way: Make wall tiles has the same 2 × 2 m preview, as they will be on the wall, and the floor’s parts from Material to Product, but no What floor it is. New wall tiles start as gloss white 10 × 20 cm offset by a half, with white 2 mm joints, and are called Gloss white 10×20 when they are the home’s first, Wall tiles 2, Wall tiles 3… after; the plain colours are White, Cream, Sage, Powder blue, Midnight blue, Black.
- They open from the search (⌘KCtrl+K), Make wall tiles, or from the house inspector, Library: Wall tiles, with its +.
- Where you keep it, as for floors: This home only (Save in the home) or My kits (Save the kit, where new wall tiles start). With no name they are refused: Give the wall tiles a name.
- A wall tiles kit is found in every project: in Tiles on the walls it is among the wall tiles to choose, marked your kit, and Add tiles in a home with none lays your latest kit. Changed from one project, it reaches the others as a proposal (The kit “…” has a new version (v2). Update). In My kits the wall tiles have their own section, under the floors.
Where the tiles go and how high
Section titled “Where the tiles go and how high”In a room’s inspector, in Finishes, the group Tiles on the walls lists its areas. Add tiles lays the home’s last wall tiles on every wall of the room up to 1.20 m; when the home has none yet, it opens Make wall tiles, and Save and use in … lays them there. With the room selected, Make wall tiles from the search has Save and use in … too. Each area has:
- Wall tiles: which, and Change “…” to change them (in every area using them).
- Where: Whole walls, chosen among the room’s walls, from corner to corner, as the room sees them; or A stretch of one Wall, From the corner and Width, measured from the left corner, looking at the wall from the room: a kitchen’s splashback.
- From the floor: where they start, above the worktop for instance.
- Up to: 1.20 m, 1.50 m, 2.10 m, Ceiling, or a height of your own. An area higher than a wall stops at the wall’s top.
- Remove the area.
An area that would not lie on the walls is refused: That would not lie on the walls: the top goes above the start, the stretch inside the wall. A room can have several areas: the shower up to 2.10 m, the rest up to 1.20 m.
With a wall selected, Faces says how high the tiles reach on each face (tiles up to 2.10 m), and Elevation draws them to scale, from the first whole row at the bottom, cut around doors and windows: drag the tiles’ top or bottom edge to change their height (taken to the wall’s top, they reach the ceiling).
On the plan a dashed band, in the tiles’ colour, runs just inside the tiled faces; in the 3D the tiles stand on the walls as you lay them, piece by piece, around doors and windows.
What can go wrong
Section titled “What can go wrong”- Save does nothing: a number is out of its limits or the name is empty; the message beside the buttons says which (Each side between 1 and 300 cm., Joints between 0 and 30 mm.).
- The image could not be uploaded: use a PNG, JPEG or WebP, and try again.
- Laid in the wrong room: choose the room’s floor again from its chips; ⌘ZCtrl+Z takes back laying it and making it. A kit saved stays among your kits: delete it in My kits.
- A kit’s change isn’t in another project: that project is offered Update; it is never changed by itself.