

Split
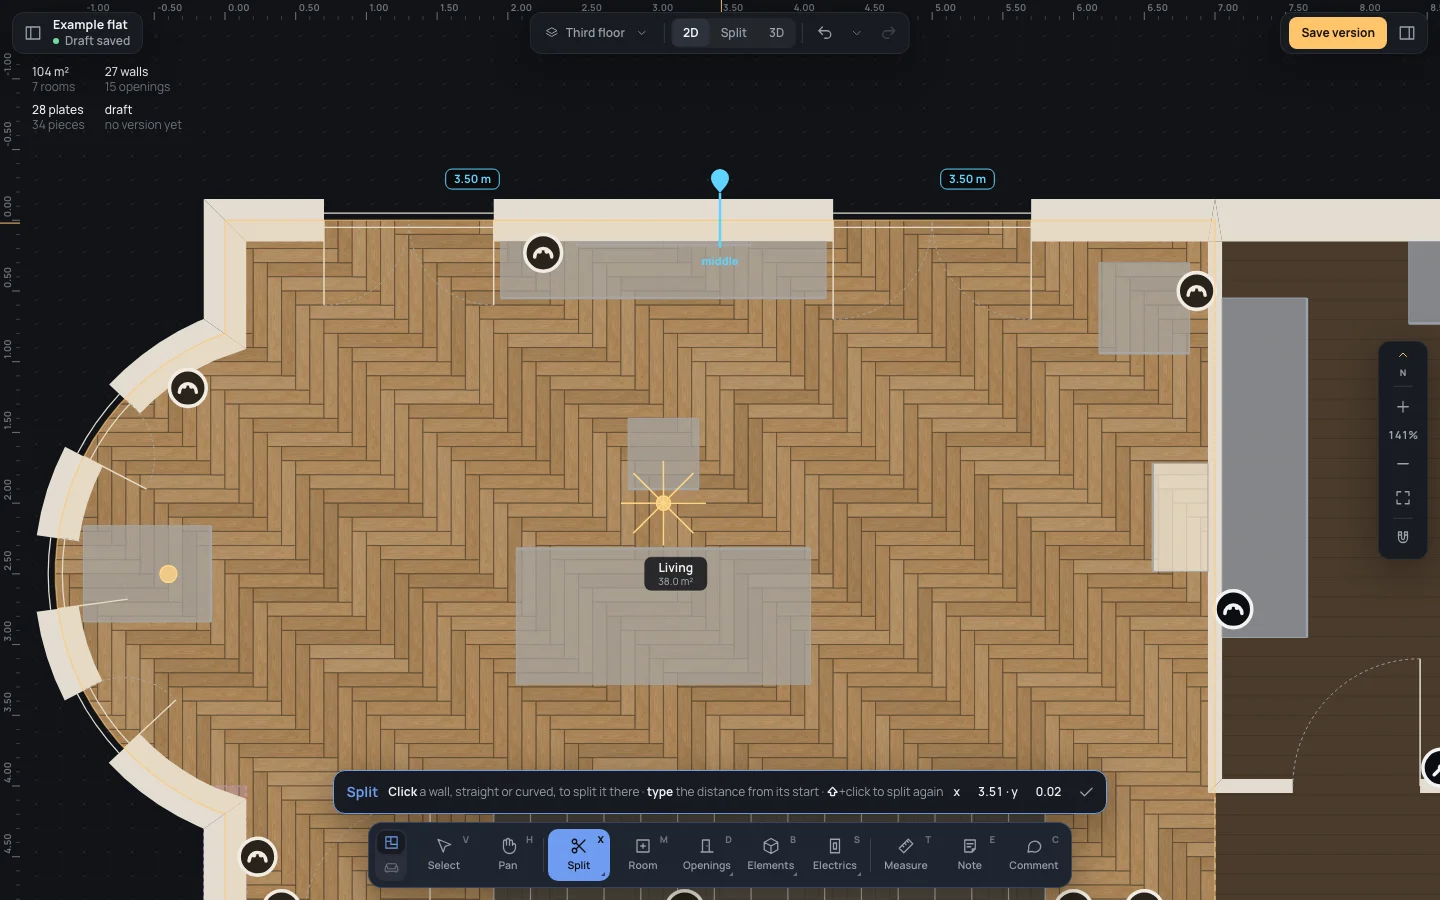
The Split tool cuts a wall in two: over a wall a cut follows the pointer, with the length of each piece, and a click splits it there. Each piece is then a wall of its own, to move, bend or finish apart.
Picking it
Section titled “Picking it”- Walls in the dock: a click opens the group, then Split (a wall in two).
- XX picks it at once, in Structure.
- The search (⌘KCtrl+K): type Split.
Without the tool, a wall is also split from its right-click menu: Split here cuts it where you clicked, Split in half in its middle; with one wall selected, the command bar suggests Split in half too. With Select, a double click on a wall splits it there.
The tool has no options: its bar holds its name, the hint, the pointer’s place and Done (✓).

Using it
Section titled “Using it”- Pick the tool and move over a wall, straight or curved.
- A cut across the wall follows the pointer, in cyan, with a pin over it and the length of the two pieces on either side.
- Click: the wall is split there, and the editor goes back to Select. Hold ⇧Shift as you click to keep the tool for another split.
Typing where
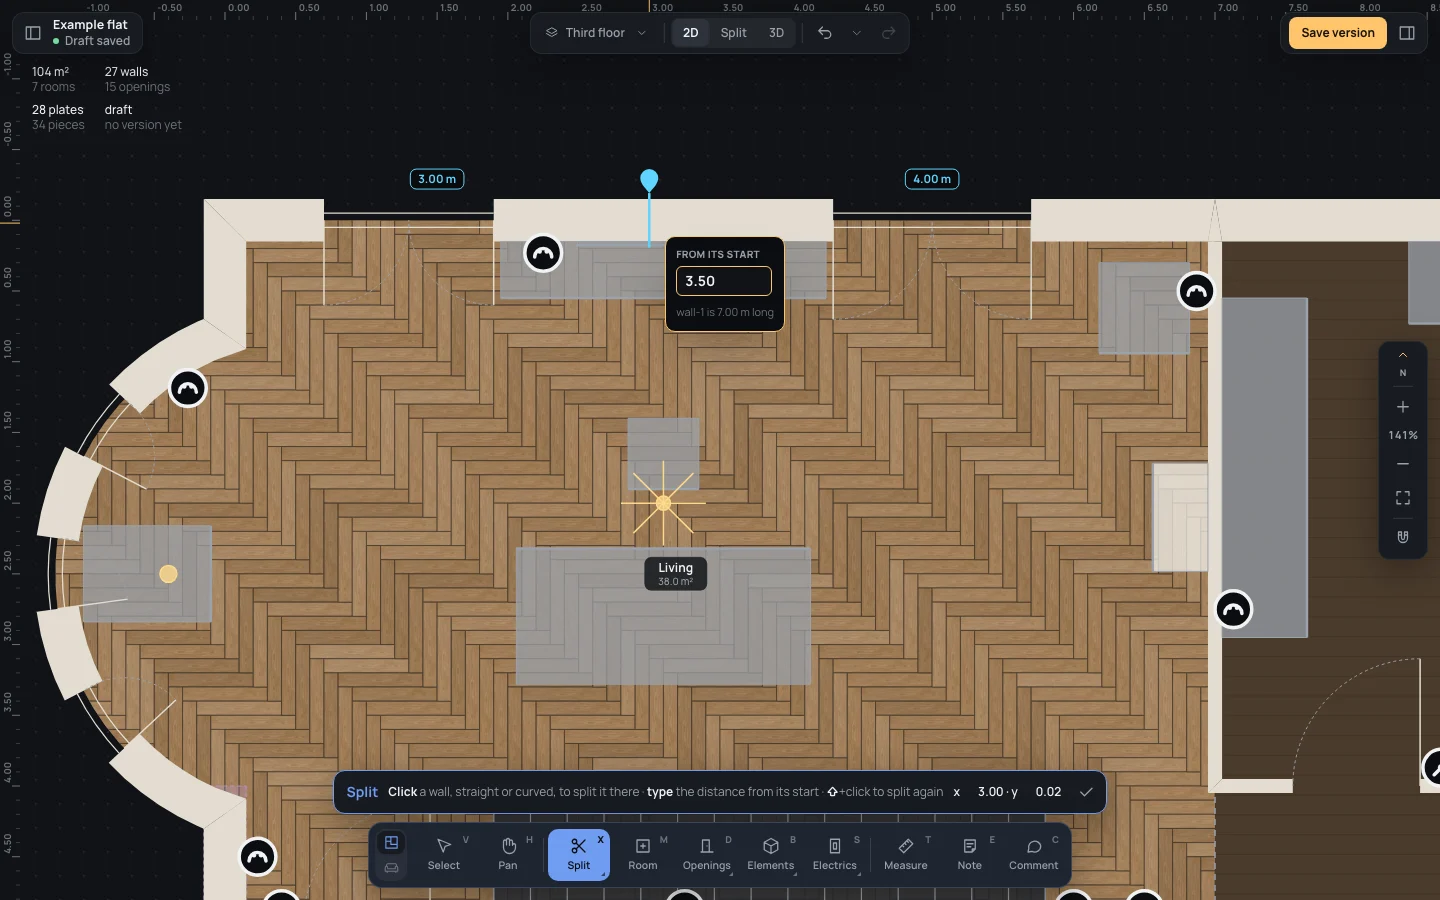
Section titled “Typing where”Over a wall, type a digit: a box opens by the cut, From its start, with the wall’s name and length under it
(wall-1 is 7.00 m long). Finish the distance from the wall’s start, for example From its start3.50,
and press ↵↵. Lengths are typed as everywhere in the editor: To type350 cm,
To type3 m 50. EscEsc closes the box.
Keys inside it
Section titled “Keys inside it”- A digit, over a wall: starts typing where to cut.
- ↵↵ in the box: cuts there. EscEsc: closes the box; with no box, back to Select.
- ⇧Shift held while clicking: keeps the tool after the split.
What it snaps to
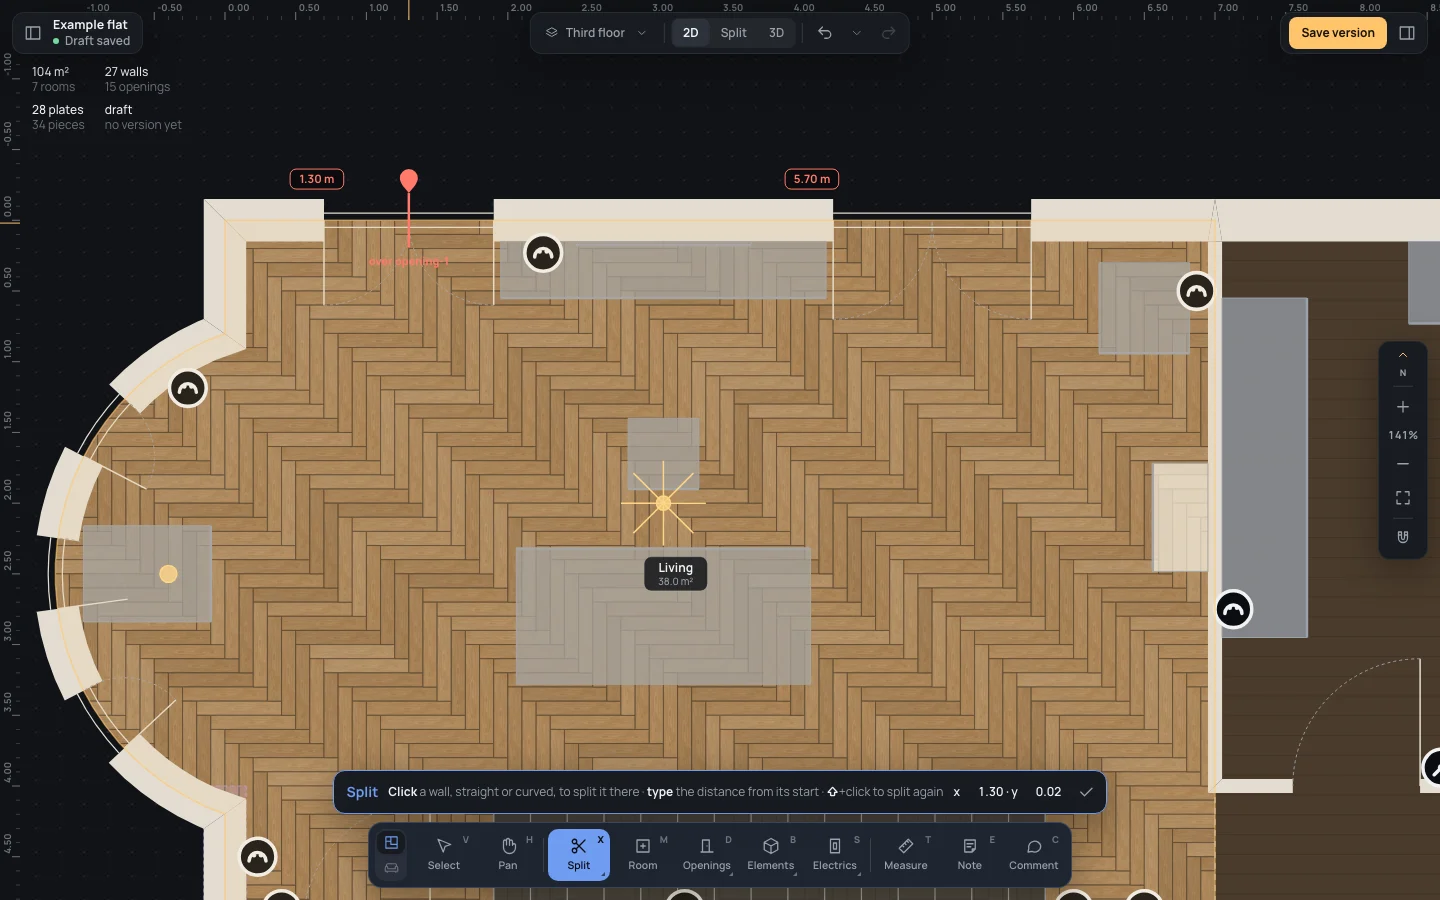
Section titled “What it snaps to”Within the snapping reach (10 pixels), the cut catches the wall’s middle and the edges of the openings in it, and says so under the pin: middle, edge of opening-1. Anywhere else it follows the pointer freely. A curved wall is cut on its own curve.
What it refuses
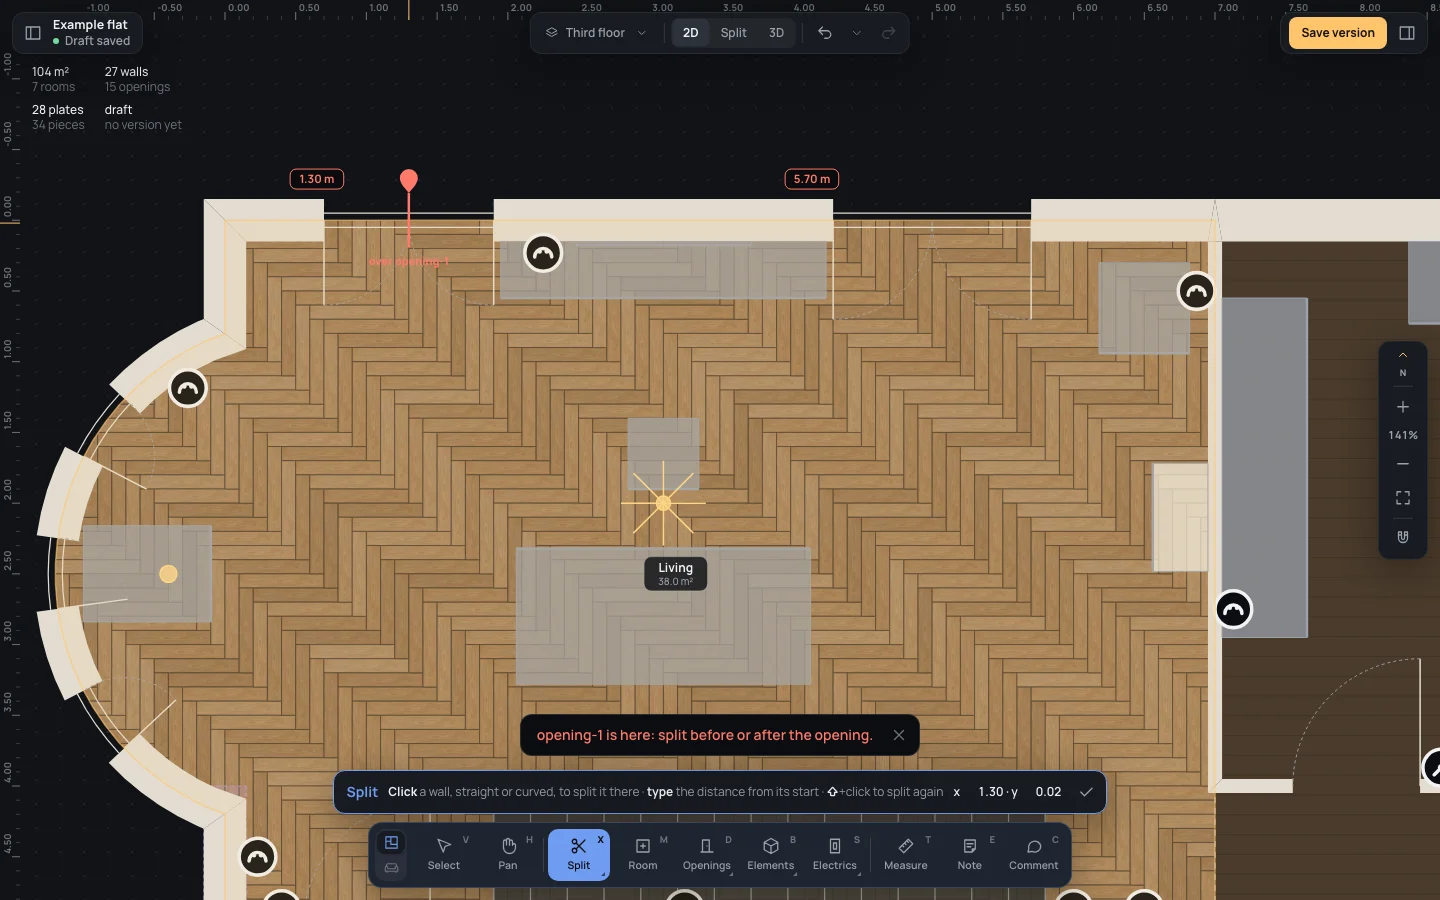
Section titled “What it refuses”Where a cut can’t go, it turns red and says why under the pin; a click there changes nothing and a message says why:
- over an opening (over opening-1): opening-1 is here: split before or after the opening.
- within 1 cm of either end of the wall (end): Too close to an end of the wall.
A typed distance that falls there is refused the same way, and the box stays open for another.
The wall is two walls, one step in the history (Wall split). The first piece keeps the wall’s name and what refers to it (an awning, a dimension); the second gets a new one. Each opening, light switch and socket goes with the piece it stands on. A message says Split here: each piece has its own ◆ to bend it, and the editor is back on Select (unless you held ⇧Shift).
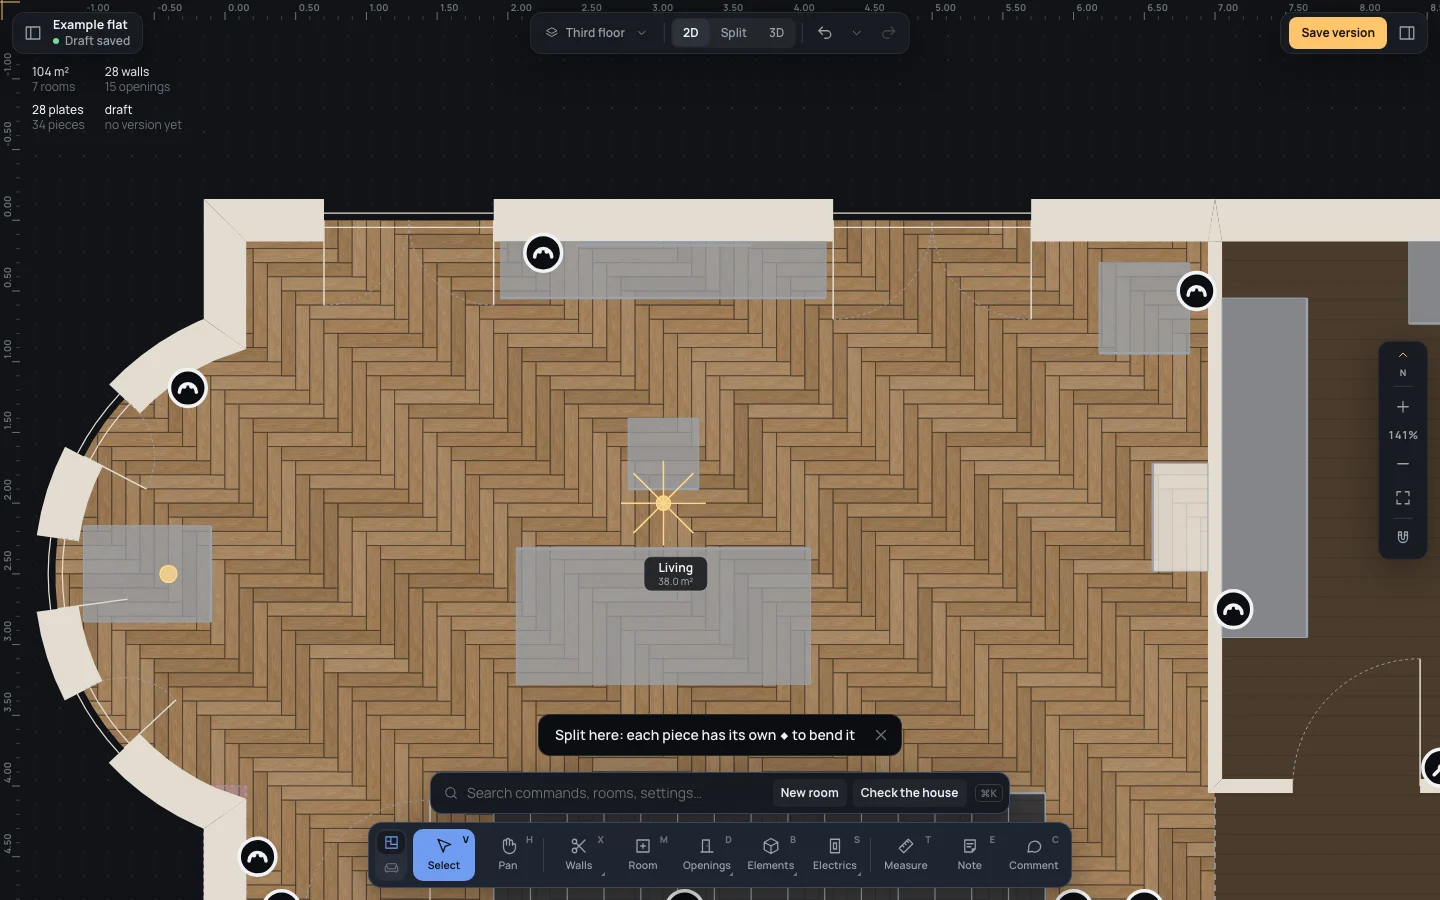
Example: the living room’s north wall
Section titled “Example: the living room’s north wall”On the finished example flat, split the living room’s north wall (wall-1, 7.00 m) between its two windows, 3.50 m from its west end.
- Press XX.
- Move over the living room’s north wall, between the two windows.
- Type From its start
3.50and press ↵↵.
The outline now lists wall-1 at 3.50 m and a new wall of 3.50 m beside it, each with its window.
If something goes wrong
Section titled “If something goes wrong”- Split in the wrong place: ⌘ZCtrl+Z joins it back. Two walls left in line can also be joined from their right-click menu, Join with the wall continuing it (Editing walls).
- The cut stays red: move off the opening, or away from the wall’s end.
- Nothing follows the pointer: it isn’t over a wall; zoom in, or come closer to the wall’s body.
See also
Section titled “See also”- Editing walls: joining, bending, reversing, squaring walls.
- Wall and Rectangle: drawing walls.
- Numbers: how lengths are typed.