

What fits
What fits answers “what can I put here?”: you trace the free space on the plan, and the catalogue keeps only the products that fit in it, turned either way. It changes nothing in the home.
Picking it
Section titled “Picking it”It starts from the catalogue, in Furnish:
- In the catalogue beside the plan, click Filters.
- At the bottom of the filters, click Trace the space to furnish on the plan.
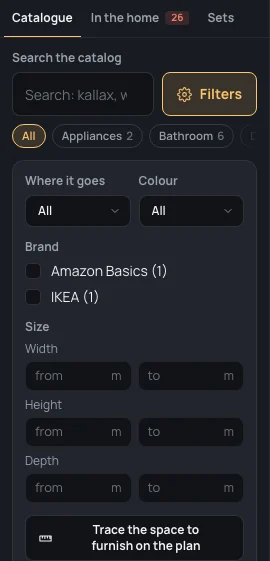
It has no key and no place in the dock: it is the filter’s own tool. Only who can edit the project traces a space.
Using it
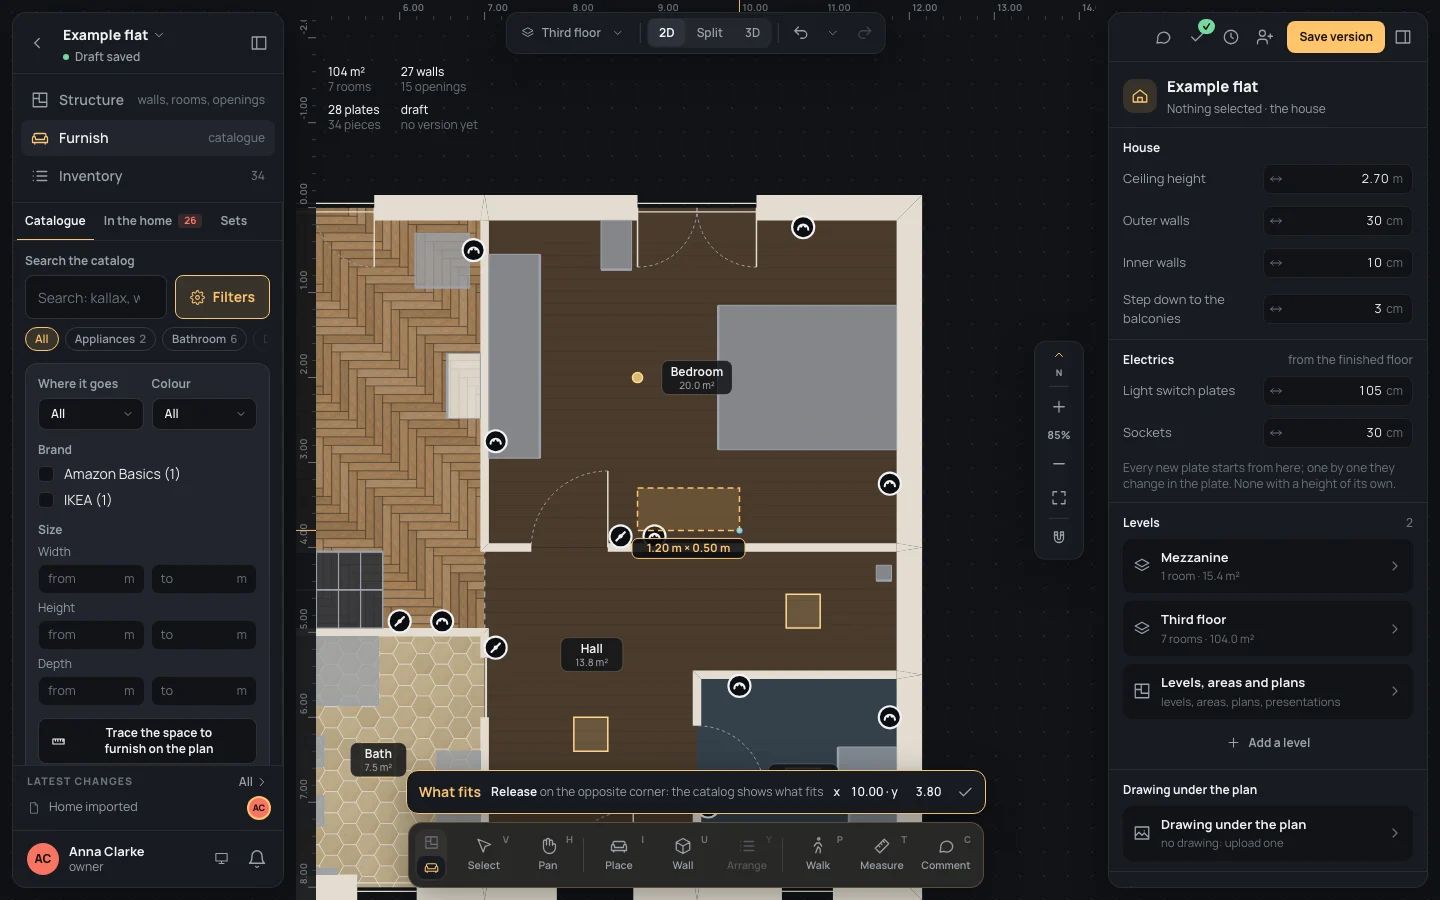
Section titled “Using it”- The bar says Drag the space to furnish on the plan, against a wall or free: the catalog shows what fits · EscEsc to leave.
- Press on one corner of the space and drag to the opposite one; or click one corner, then (the bar says Release on the opposite corner) click the other. While you drag, a dashed rectangle follows the pointer with its width × depth under it.
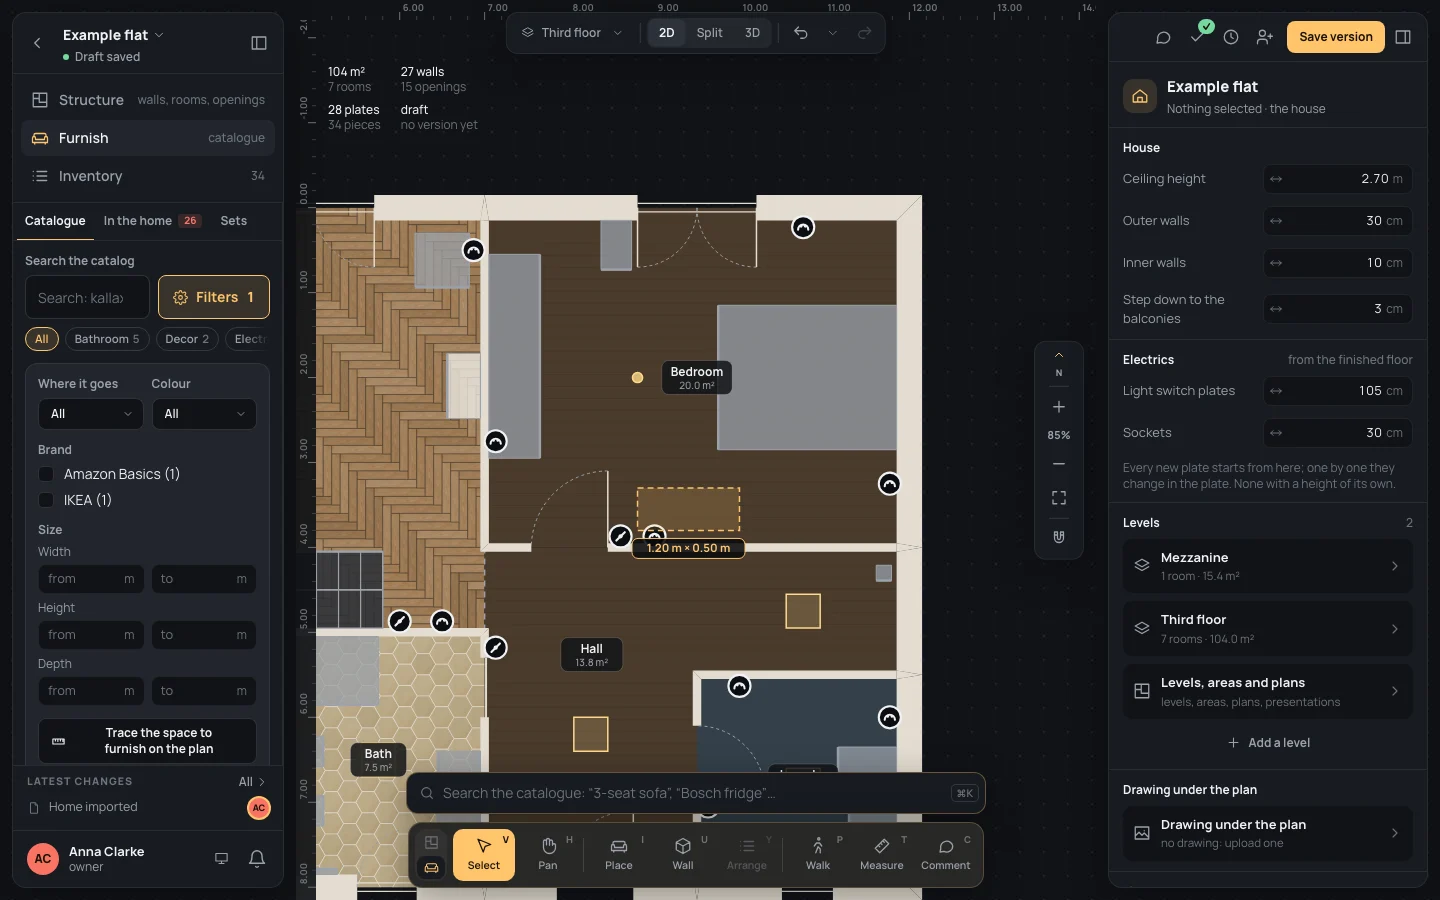
- Release. The catalogue shows only what fits, in its Catalog tab, with a chip such as Fits 120 × 50 × 270 cm under the search; Filters counts it. The tool goes back to Select.
What fits means
Section titled “What fits means”The space is the rectangle’s width and depth, and the height of the plan’s ceiling (2.70 m on the example’s third floor). A product fits when one of its sizes (any of the sizes its options give) is no taller than the ceiling and fits the rectangle’s width and depth, turned either way on the floor. The rectangle stays on the plan, dashed, for as long as the filter holds.
Keys inside it
Section titled “Keys inside it”- EscEsc: drops the first corner if one is placed; otherwise leaves the tool for Select, with no space traced.
- ⌘Ctrl held: no snapping.
- ␣␣ held: move the view; ⌘Ctrl with the wheel: zoom.
What it snaps to
Section titled “What it snaps to”Both corners snap as the plan’s snapping is set (Snapping): the walls’ ends, middles and axes, the alignment with ends already there, the grid when it is on. So a corner caught on a wall is on its axis: the space then includes half the wall’s thickness.
What it refuses
Section titled “What it refuses”A side shorter than 10 cm is not a space: the drag leaves its first corner waiting for a second click further away.
- The chip’s ✕ takes the filter away, and the rectangle with it; Clear does it with the other filters.
- Trace again for another space: the new one replaces it.
- A product found is placed as any other: drag it onto the space (Place).
Example: at the foot of the bed
Section titled “Example: at the foot of the bed”On the finished example flat, in Furnish:
- Filters, then Trace the space to furnish on the plan.
- In the bedroom, press at x 8.80 · y 3.30 and drag to x 10.00 · y 3.80: the rectangle reads 1.20 m × 0.50 m.
- Release. The chip says Fits 120 × 50 × 270 cm, and 72 of the 88 products are left.
If something goes wrong
Section titled “If something goes wrong”- The space came out a few centimetres off: a corner caught something. Trace it again holding ⌘Ctrl, or zoom in.
- Nothing fits: no product of the catalogue is that small. Trace a larger space, or take the chip away.
- The rectangle is gone from the plan: the What fits filter was taken away, or changed by hand.
See also
Section titled “See also”- The catalogue: searching, categories and the other filters.
- Place: putting a product on the plan.
- Measure: checking a space before tracing it.