

Calibrate the drawing
Calibrate the drawing puts the floor plan you imported to scale: you click the two ends of a length you know on it, type how long it really is, and the drawing grows or shrinks so that every length traced over it is right.
Picking it
Section titled “Picking it”It is there only when the plan you are on has a drawing under it (The drawing). Then any of these starts it:
- The key KK.
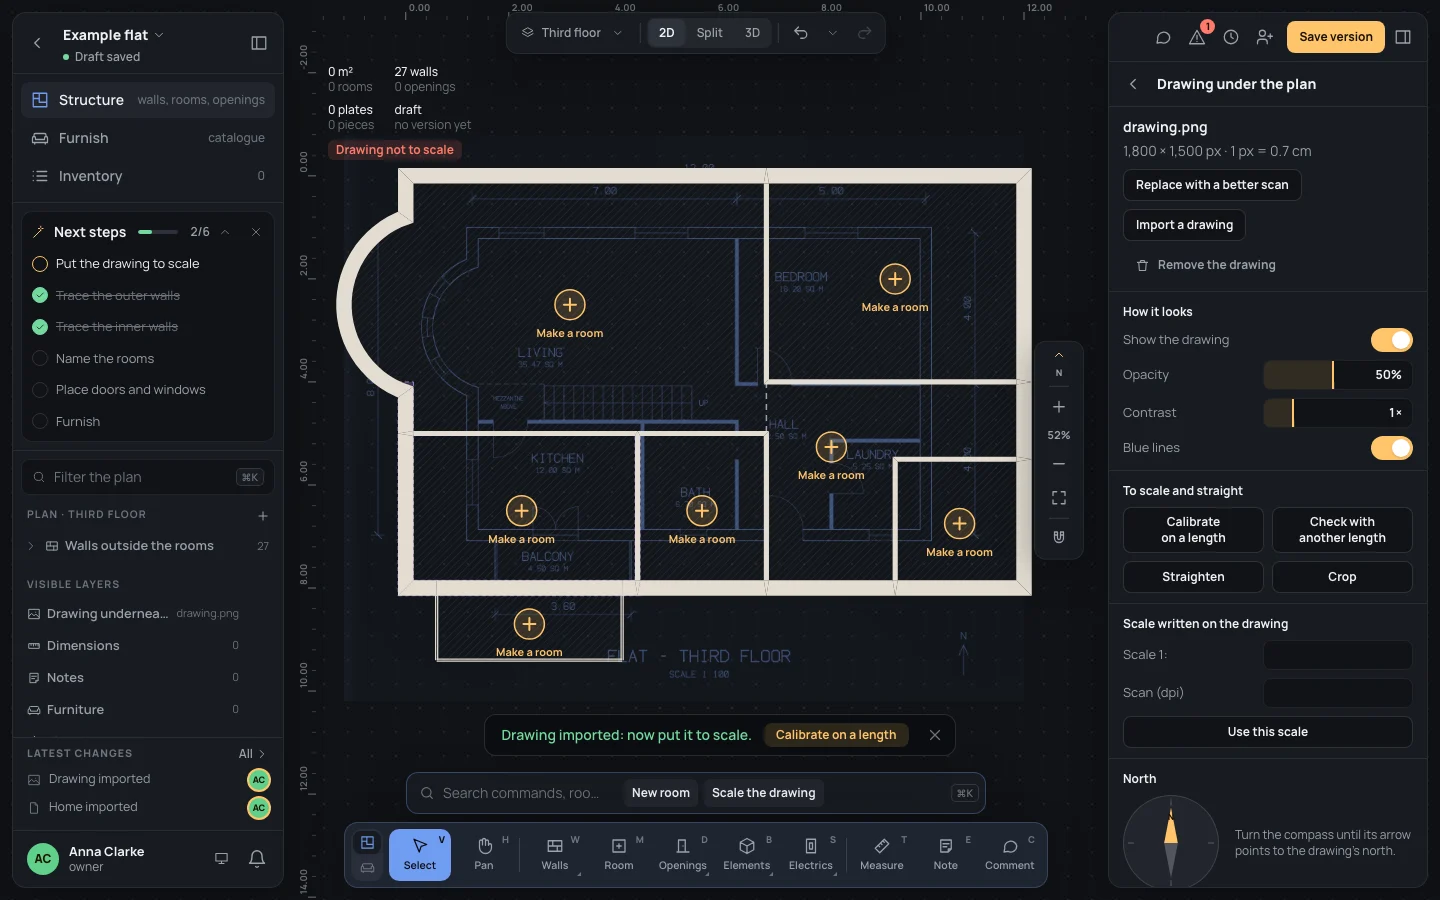
- Calibrate on a length, in the Drawing under the plan page of the house’s inspector (nothing selected), under To scale and straight; or on the toast that follows an import, Drawing imported: now put it to scale.
- Scale the drawing, among the suggestions beside the search in the bar, with nothing selected.
- The red Drawing not to scale under the house’s numbers, top left of the plan.
- Put the drawing to scale in Next steps, and Put it to scale on the problem The drawing isn’t to scale: lengths traced on it are wrong. Calibrate it on a known length. in the Checks.
- The search (⌘KCtrl+K): calibrate.
The bar
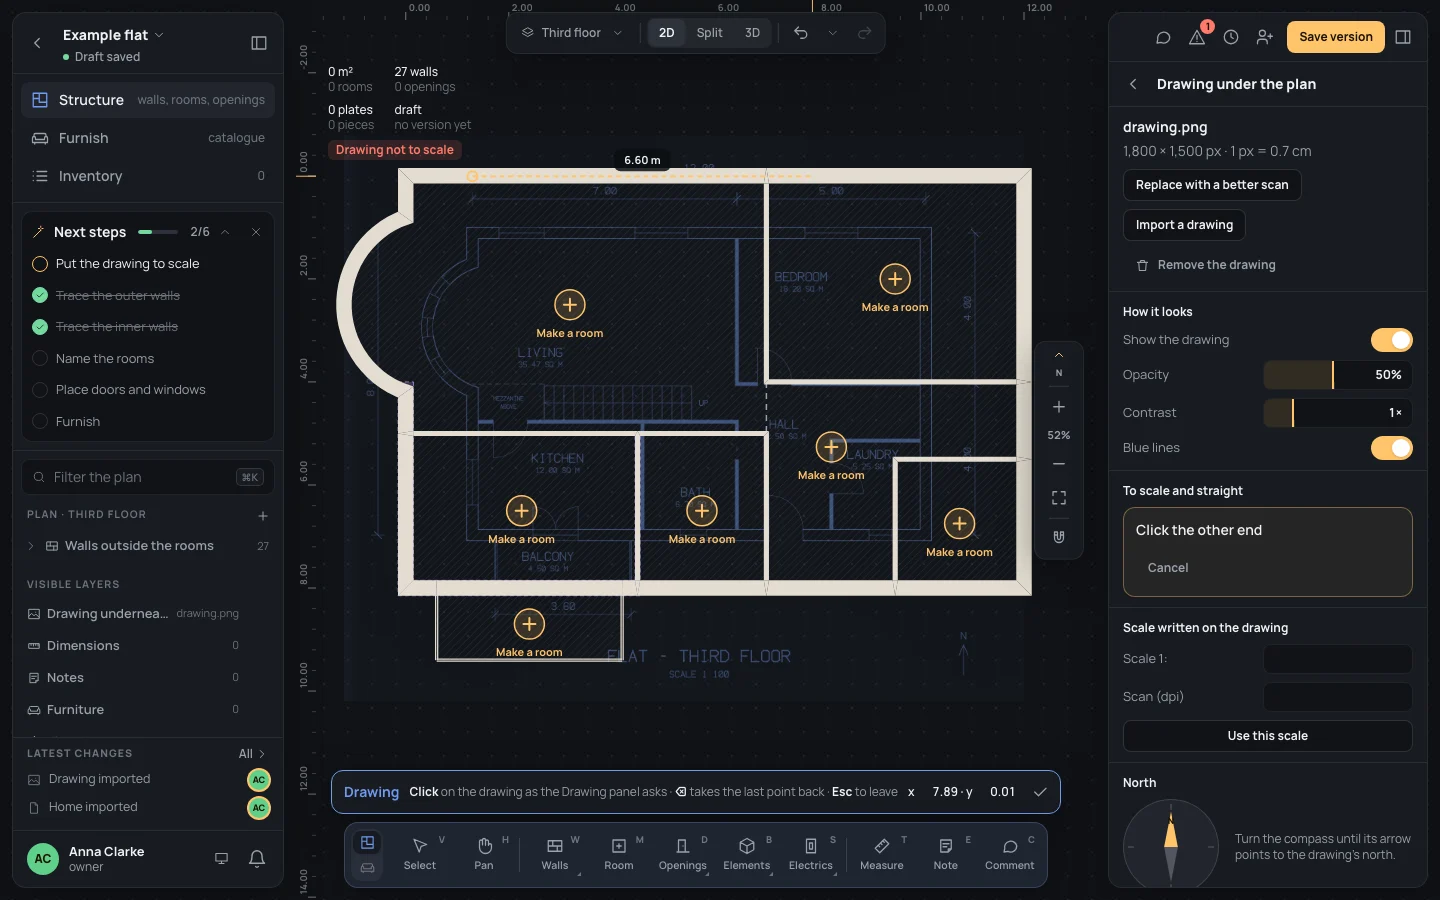
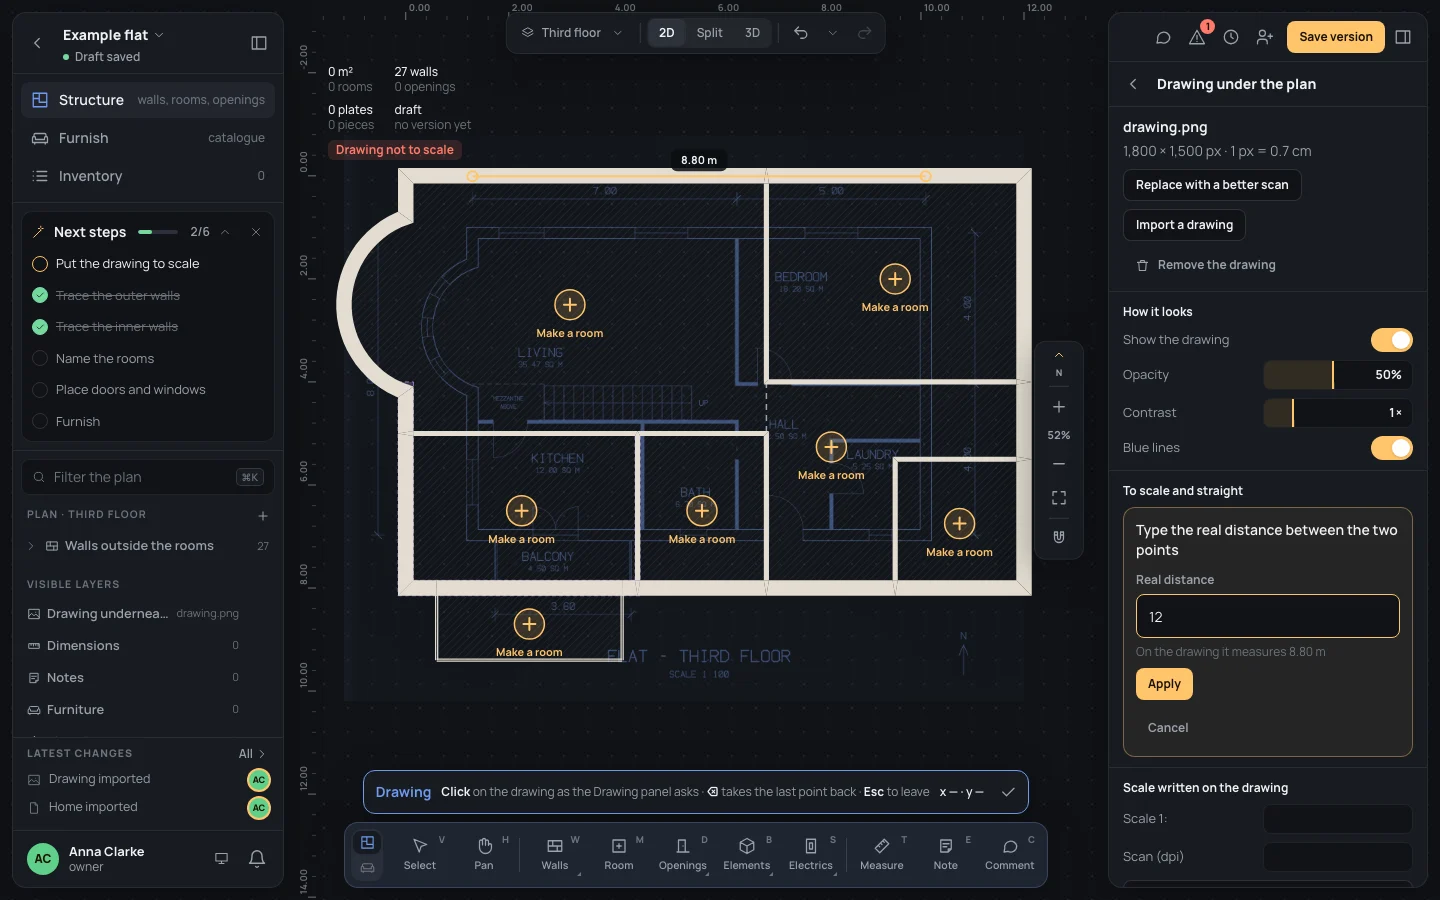
Section titled “The bar”The bar above the dock reads Drawing, with what to do: Click on the drawing as the Drawing panel asks. It has no options: the steps and the length are in the Drawing under the plan page, which says each step in turn:
- Click one end of a known length (a dimension, a long wall)
- Click the other end
- Type the real distance between the two points: the Real distance field, with what it measures now under it (On the drawing it measures 8.80 m), then Apply.
Cancel leaves without changing anything.
Using it
Section titled “Using it”- Start it (KK).
- Click one end of the length. Zoom in first if you can (++): the point goes exactly where you click.
- Click the other end. A line joins them, with the length it has on the drawing as it is now.
- Type the real length in Real distance, in metres or with its unit (12, 1200 cm), and press ↵↵ or click Apply.
Keys inside it
Section titled “Keys inside it”- ⌫⌫: takes the last point back.
- EscEsc: leaves the calibration, back to Select, nothing changed.
- ↵↵ in Real distance: applies it.
What it snaps to
Section titled “What it snaps to”Nothing: the points are on the drawing, not on the plan, so they go exactly where the pointer is, with no snapping. The best length to calibrate on is a long one, end to end: a small slip weighs less on it.
What it refuses
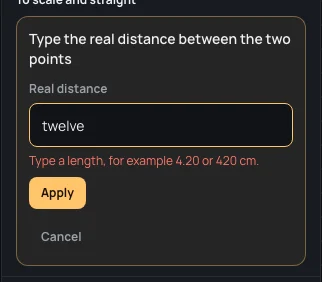
Section titled “What it refuses”- A Real distance that isn’t a length, or zero: Type a length, for example 4.20 or 420 cm. Nothing changes until you type one.
- KK with no drawing under the plan does nothing.
- A person who can only look at the project can’t calibrate: the panel offers them Check with another length alone.
The drawing is put to scale in one step (Drawing calibrated in the history) and the editor goes back to Select. A toast says how long a pixel of the drawing is now, Drawing calibrated: 1 px = 1 cm, and so does the panel. The first point you clicked stays where it was: the drawing grows or shrinks around it. Drawing not to scale goes away and Put the drawing to scale is ticked in Next steps.
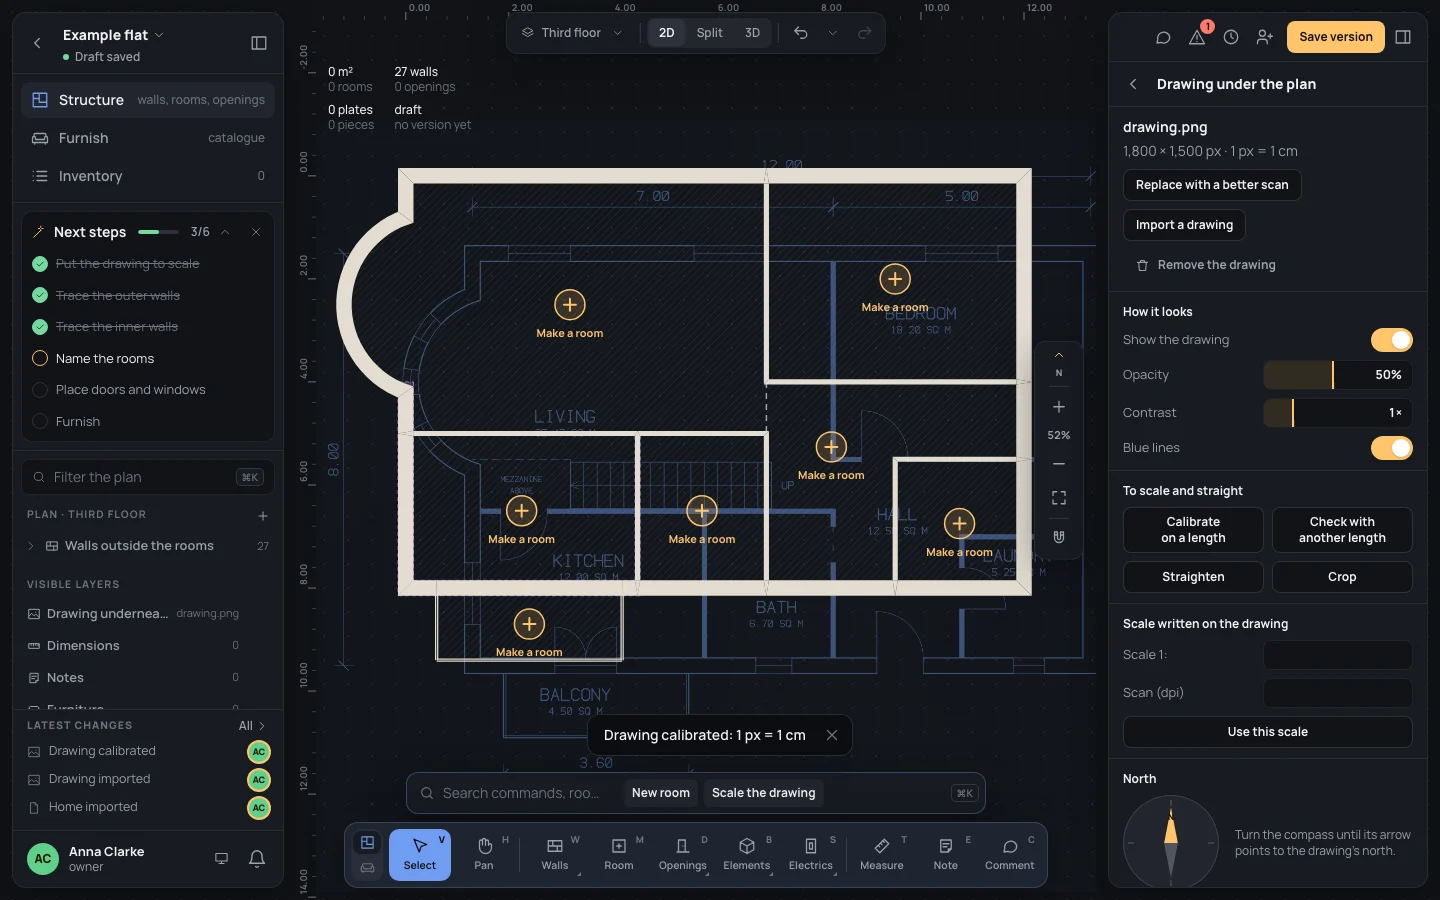
To be sure, Check with another length measures a second known length the same way and says how far off it is, without changing anything (The drawing).
Example: the example’s drawing
Section titled “Example: the example’s drawing”The example’s drawing (drawing.png, the one the tutorial uses) is a plan at 1:100 with
its dimensions written on it. Its longest is the north one, 12.00, over the whole flat.
- Open Drawing under the plan from the house’s inspector and import
drawing.png. It comes in at its own size: 1 px = 0.7 cm on the bare example home. - Press KK.
- Click the left tick of the 12.00 dimension, at the top of the drawing, then its right tick.
- Type Real distance
12and press ↵↵.
The toast says Drawing calibrated: 1 px = 1 cm: the drawing is at 1:100, as written on it. Check it on the 8.00
dimension down the west side with Check with another length: Real distance8.
If something goes wrong
Section titled “If something goes wrong”- A point in the wrong place: ⌫⌫, then click it again.
- A calibration on the wrong length: ⌘ZCtrl+Z puts the drawing back as it was, or calibrate again on a better one: each calibration replaces the last.
- Calibrating doesn’t move the drawing onto walls you have already drawn: calibrate first, then trace.
See also
Section titled “See also”- The drawing: importing, checking, straightening, cropping, how it looks, north.
- From a drawing: a scan put to scale and traced, step by step.
- Every key